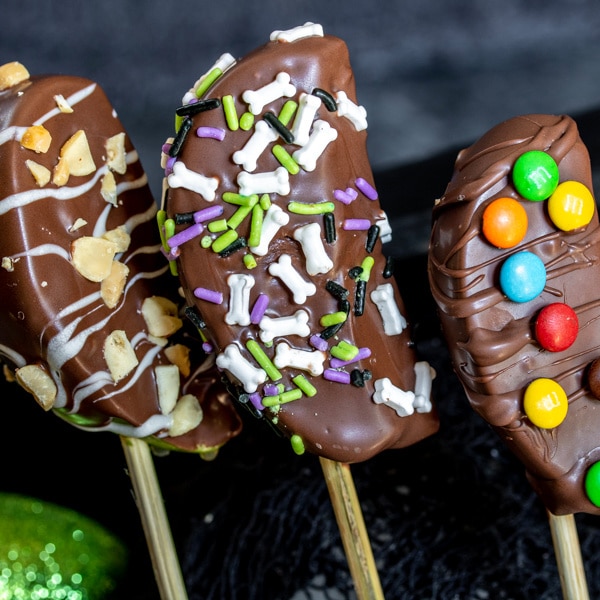
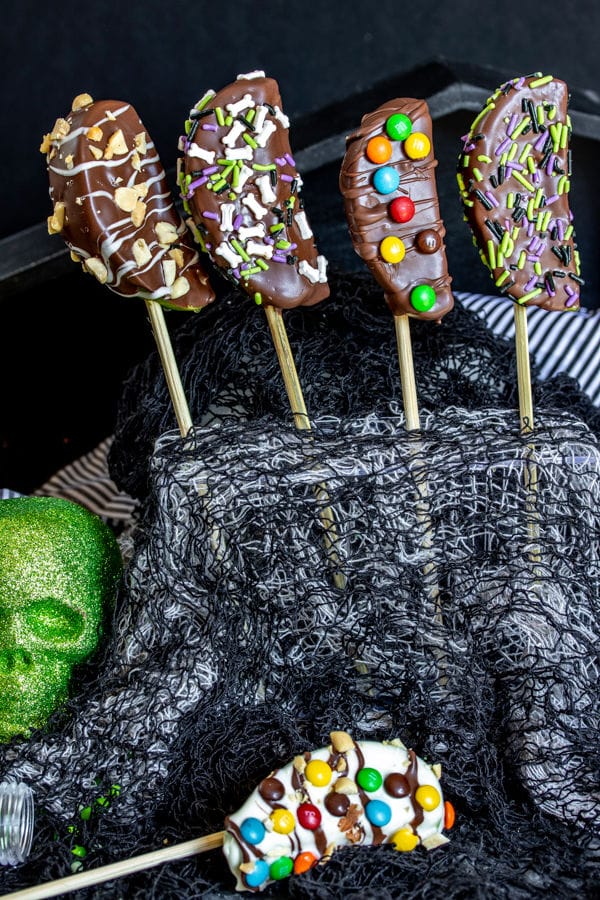
Chocolate Covered Apple Kabobs
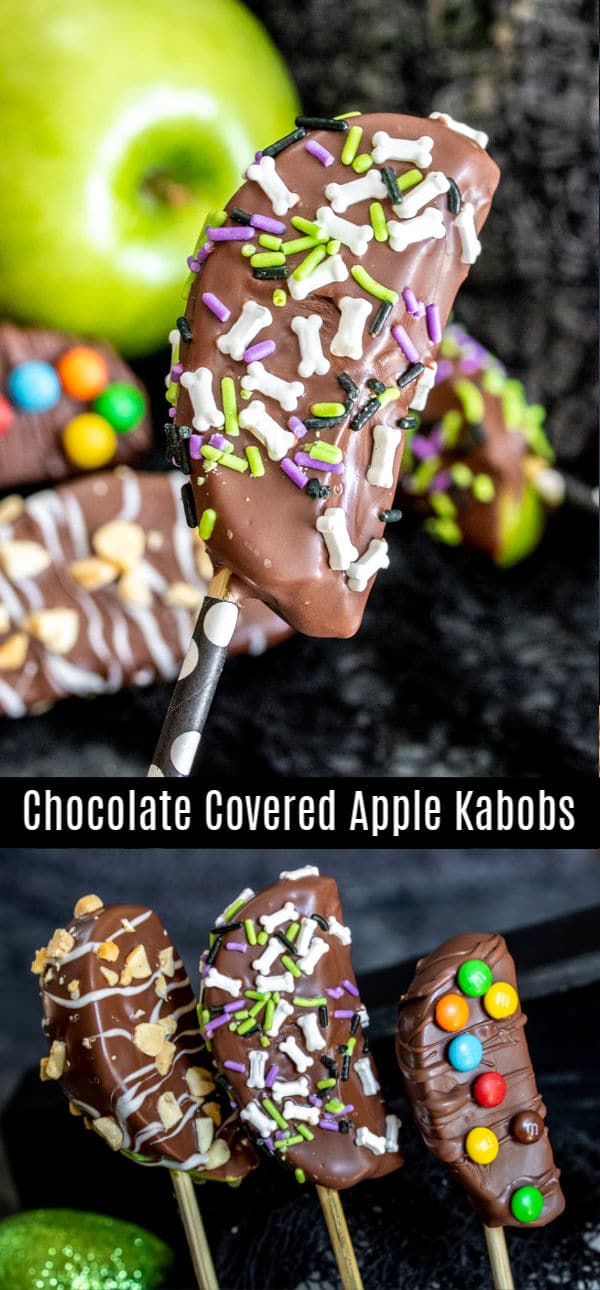
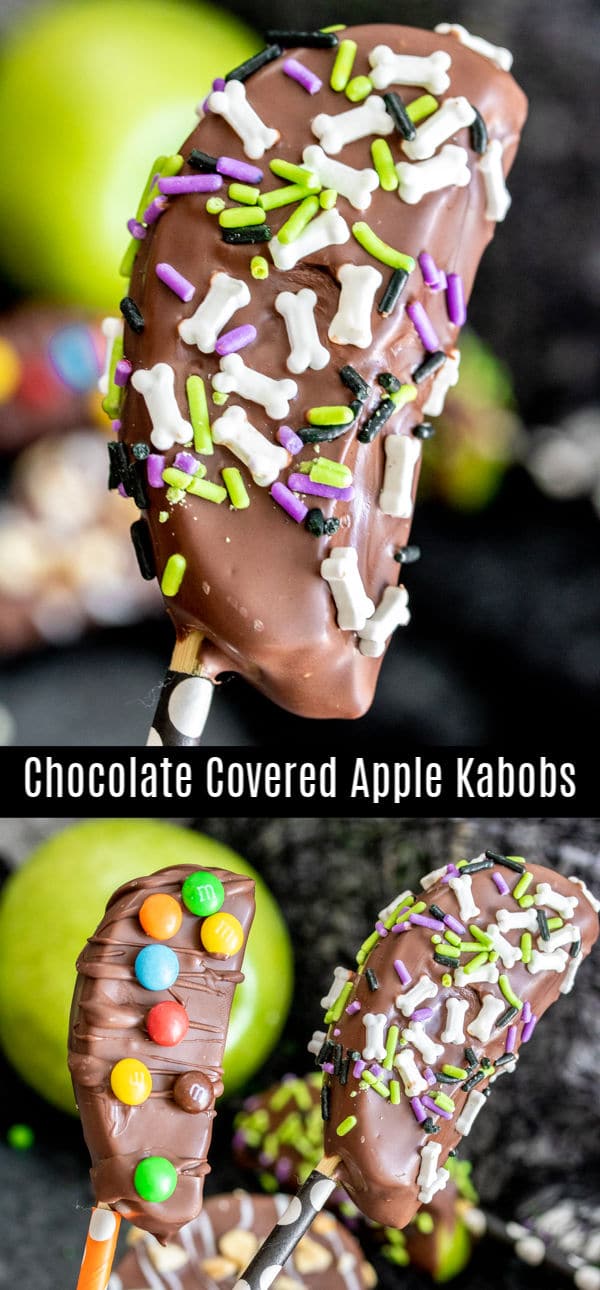
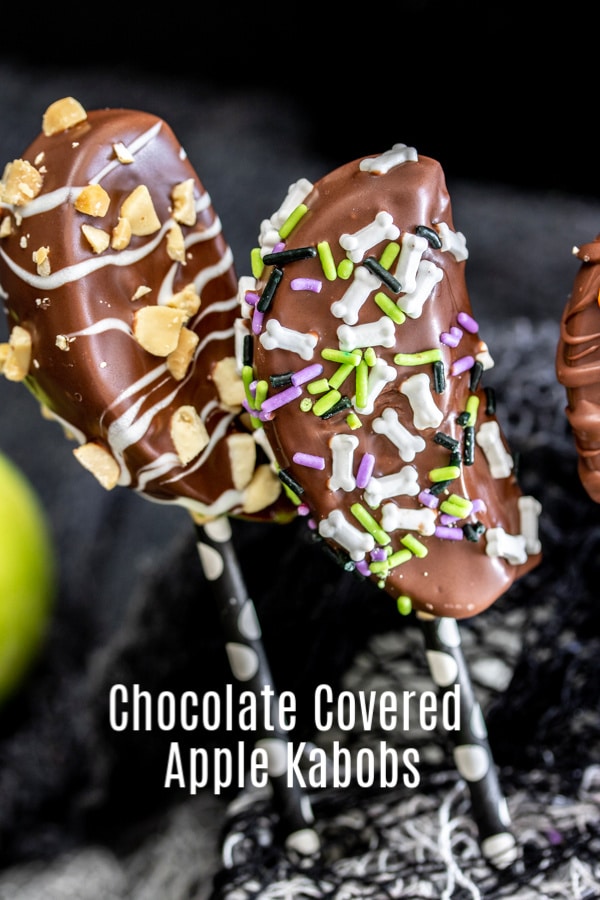
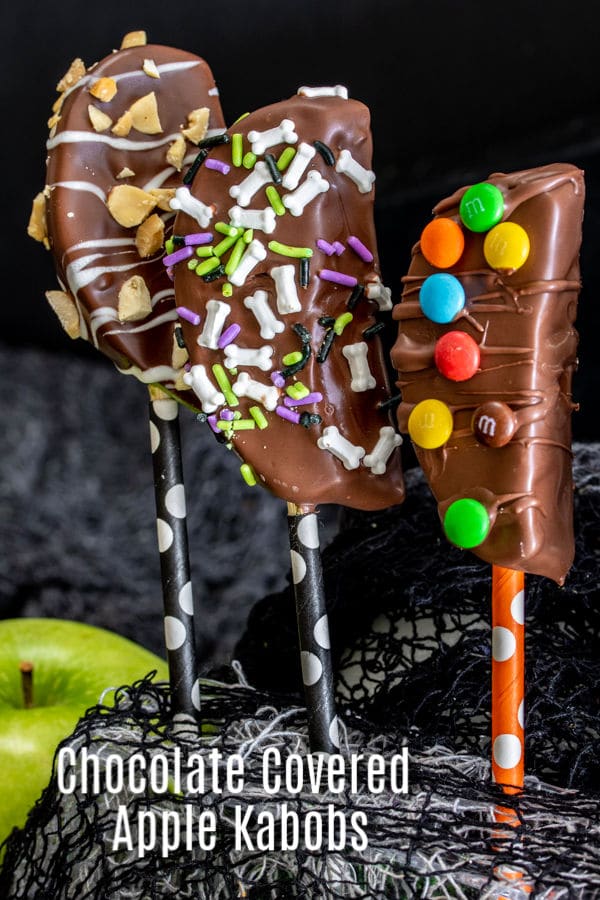

These Chocolate Covered Apple Kabobs are chocolate dipped apples coated in nuts and candy to make a fun fall treat for your next Halloween party!
Chocolate Covered Apple Kabobs
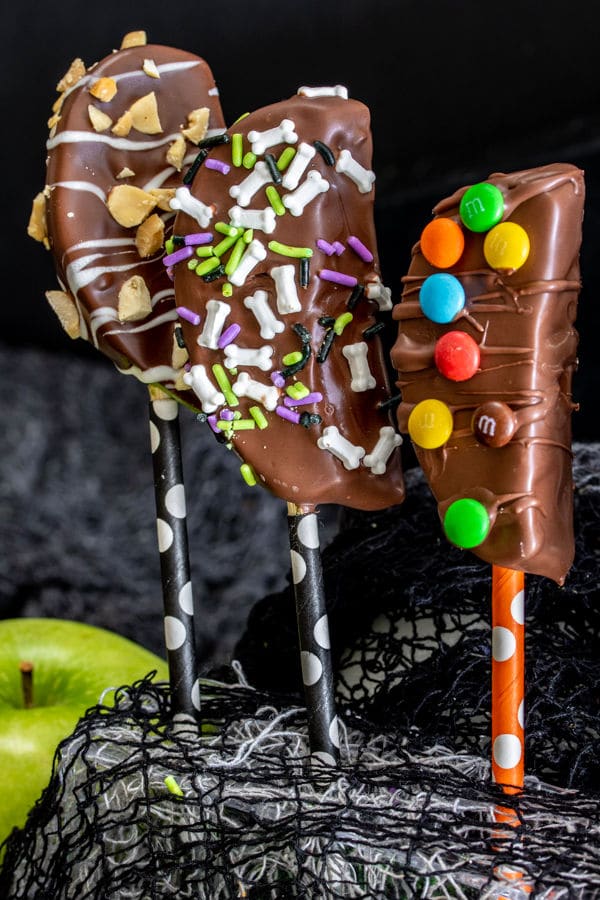
These easy Chocolate Covered Apple Kabobs are a simple way to serve candied apples at a Halloween party. I LOVE caramel apples, they’re delicious AND pretty, but who wants to stand around eating a whole apple when you’re at a party?
This simple recipe uses apple slices, skewers them on a stick, and then you dip them into melted chocolate and sprinkle them with your favorite candies. It’s the perfect way to serve candied apples at this year’s Halloween party.
Note: This post may contain affiliate links. That means if you click on a link and make a purchase we may receive a small commission. Thank you!
What You Need to Make Chocolate Covered Apples:
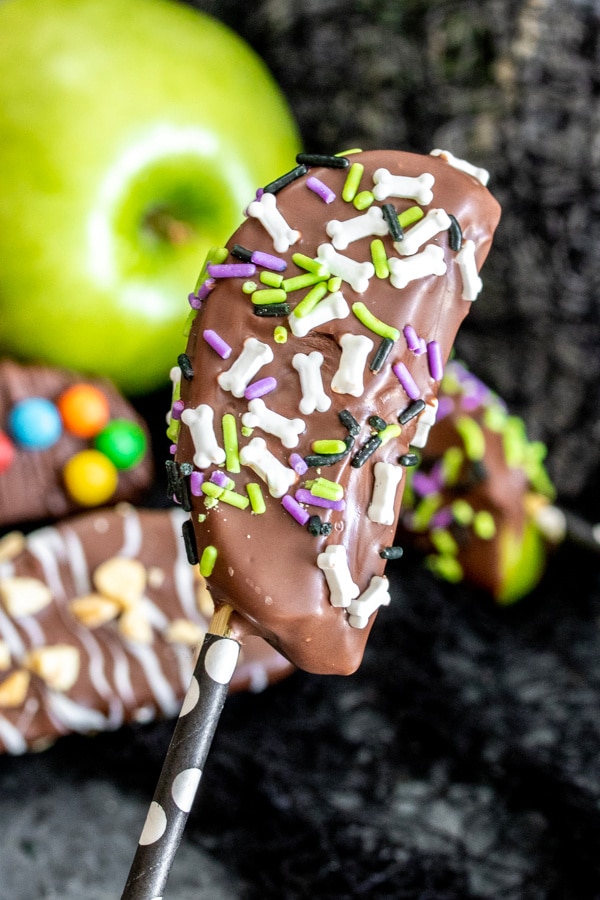
- 3 large Granny Smith Apples (you can use red apples if you prefer!)
- Wooden Skewers – we used these skewers and trimmed them using scissors.
- Chocolate – We used Ghiradelli Melting Wafers because they melt smoothly and firm up quickly after dipping. If you cannot find these in your grocery store you can use chocolate chips and/or almond bark.
- Toppings – Chopped peanuts, almonds, or walnuts, mini M&Ms, mini Reese’s pieces, mini marshmallows, Halloween sprinkles, etc.
How to Make Chocolate Covered Apple Slices:
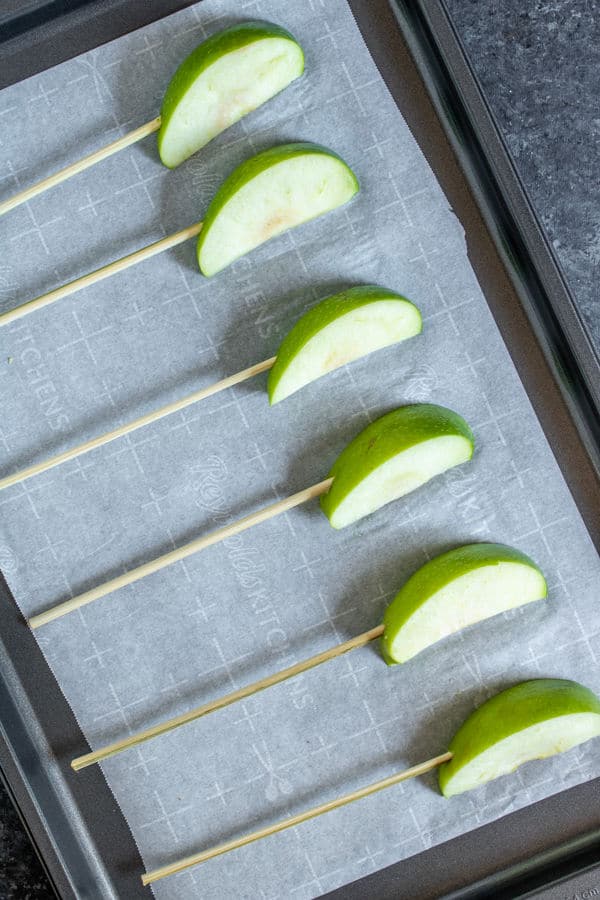
- Cut each apple into 6-8 slices. This depends on the size of the apple. You want the apple slices to be about 1 – 1/5 inches thick.
- Push a skewer into each apple slice.
- Melt your chocolate according to package instructions. I place my melting chocolate in a large coffee mug and use my microwave to melt the chocolate by heating it for 30 seconds at a time and stirring in between until it is melted and smooth.
- Dip the apple slice into the melted chocolate making sure to cover them completely. Lightly tap the skewer against the edge of your mug 3 or 4 times to remove excess chocolate.
- Sprinkles, and chopped nuts can be added right after dipping but heavier toppings like mini M&Ms will need to be added once the chocolate begins to firm up otherwise they will slide off. Let the chocolate harden for about 30 seconds, to the point that it is still wet but it is starting to firm up, and then sprinkle with your toppings.
- If you want you can use another flavor of melted chocolate to drizzle over the apple to add another layer of color. This is optional.
- Place the apple slice, skewer down, into a mug that is tall enough that it doesn’t tip over but not so tall that it touches the apple slice.
- Once the chocolate is firm these are ready to serve.
Can You Make Chocolate Covered Apples Ahead of Time?
Yes. You can dip the apples the day before and store in an airtight container in the refrigerator. Remove from the fridge at least 1 hour before serving to let the chocolate come to room temperature.
How to Serve Chocolate Covered Apple Kabobs:
You can lay your dipped apple slices on a platter to keep things simple. If you’d like to get a little more creative you can place a piece of styrofoam in a Halloween box, pumpkin, cauldron, etc. and push the skewers into the styrofoam. Just make sure your container is tall enough and heavy enough that it won’t tip over when the apple kabobs are added.
Looking for More Easy Halloween Recipes?
- Halloween S’mores Dip
- Werewolf Chow
- Frankenstein Marshmallow Pops
- Mummy Dogs
- Nutter Butter Boos
- Mummy Mallows
- Witch’s Brew Brownies
- Ghost Goo Cupcakes
- More Halloween Recipes…
Like this recipe?
Make sure to follow us on Instagram and Pinterest for more recipes like this.
Chocolate Covered Apple Kabobs

Ingredients
- 3 large Granny Smith Apples
- 10 ounces Ghiradelli Chocolate Melting Wafers
- 10 ounces Ghiradelli White Chocolate Melting Wafers
- Toppings – Chopped peanuts, almonds, or walnuts, mini M&Ms, mini Reese’s pieces, mini marshmallows, Halloween sprinkles, etc.
Instructions
- Remove core and cut each apple into 6-8 slices. This depends on the size of the apple. You want the apple slices to be about 1 – 1/5 inches thick.
- Push a skewer into each apple slice.
- Melt your chocolate according to package instructions. I place my melting chocolate in a large coffee mug and use my microwave to melt the chocolate by heating it for 30 seconds at a time and stirring in between until it is melted and smooth.
- Dip the apple slice into the melted chocolate making sure to cover them completely. Lightly tap the skewer against the edge of your mug 3 or 4 times to remove excess chocolate.
- Sprinkles, and chopped nuts can be added right after dipping but heavier toppings like mini M&Ms will need to be added once the chocolate begins to firm up otherwise they will slide off. Let the chocolate harden for about 30 seconds, to the point that it is still wet but it is starting to firm up, and then sprinkle with your toppings.
- If you want you can use another flavor of melted chocolate to drizzle over the apple to add another layer of color. This is optional.
- Place the apple slice, skewer down, into a mug that is tall enough that it doesn’t tip over but not so tall that it touches the apple slice.
- Once the chocolate is firm these are ready to serve.

This recipe was first published on 10/28/14. It was republished with updated instructions and photos on 9/25/19.


How long ahead of time can you make the apples? Will they keep for a Week?
No, because they are peeled they really need to be made and eaten on the same day. If you dip them in water with a little lemon juice that will keep them from turning brown for awhile but I wouldn’t make them more than a few hours ahead of time.
Hi! These are so cute and yummy looking! Does the chocolate actually stick to the apple? Since they are presliced, it looks like it would slip off.
Yes! We actually had a problem with the caramel sticking to sliced apples but the chocolate was fine. This was a post from back in our first days of blogging so we really need to update it. If you want to make these ahead of time I suggest dipping the whole slice to help keep it from turning brown.