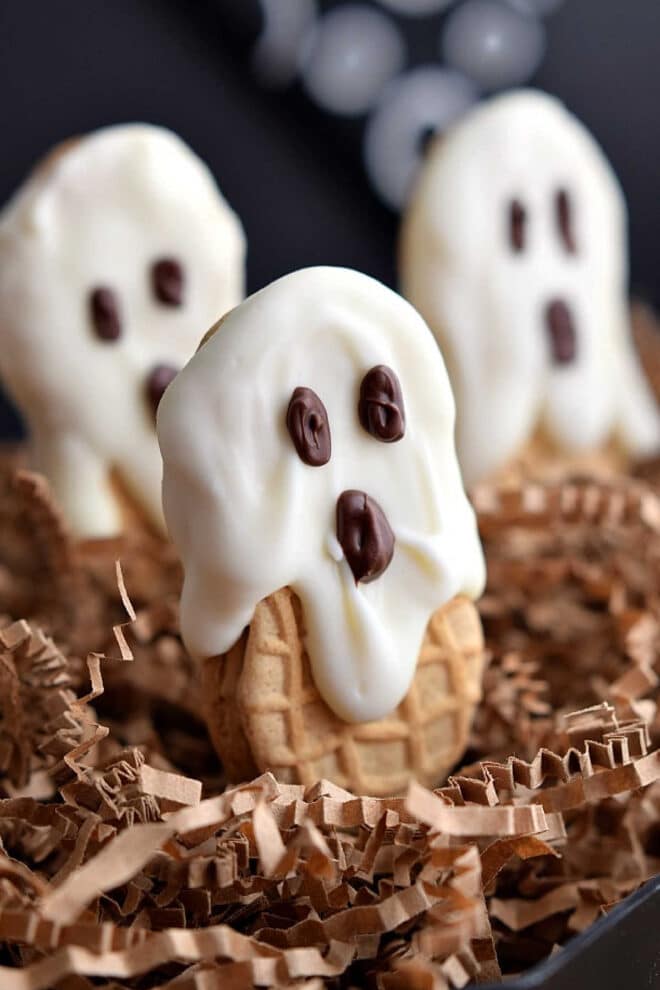
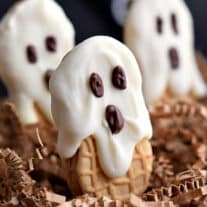
Easy Nutter Butter Ghost Cookies


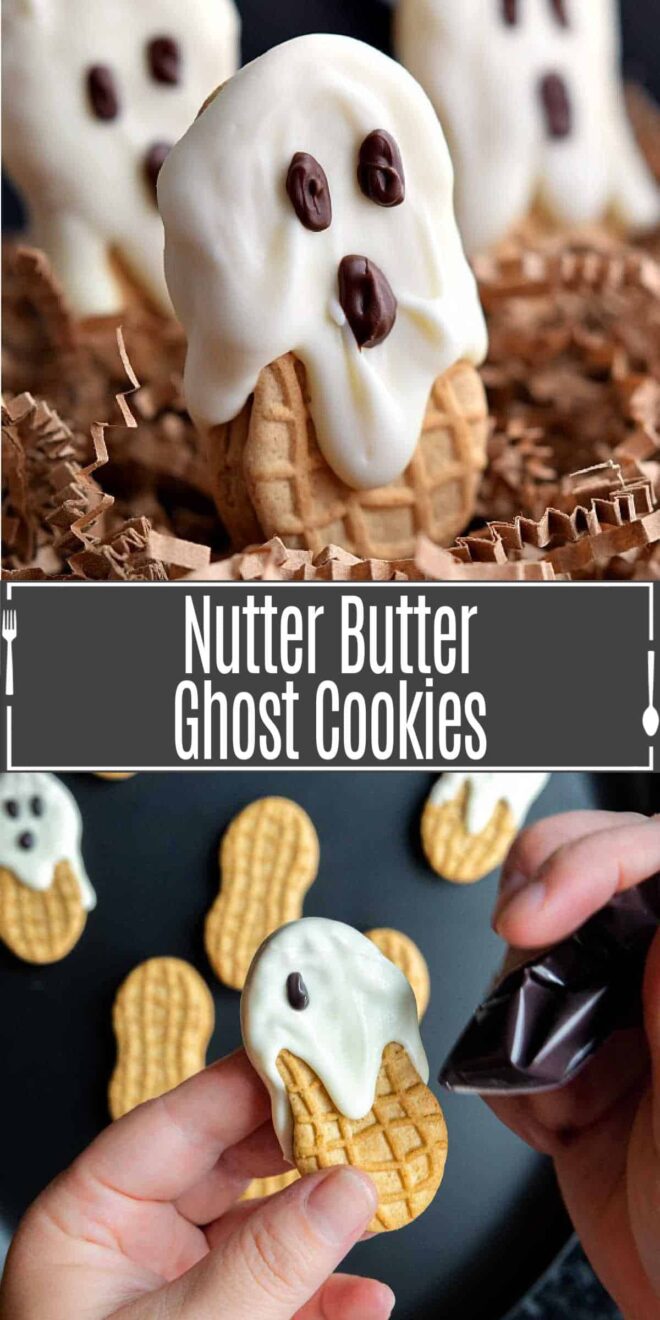
These cute Halloween cookies are called Nutter Butter ghosts. They are one of the easiest Halloween cookies requiring just 3 ingredients and no baking! They make the perfect Halloween party food.

These cute little ghost cookies are the perfect easy Halloween cookie! Super simple to make, no cookie dough required, these Halloween treats are made with Nutter Butter cookies, white chocolate, and regular chocolate.
This is a classic ghost cookie that everyone loves. Back when I was a kid we would dip the whole cookie in white chocolate but I like the drip technique that makes them look like the cookies are wearing a white sheet to dress up like ghosts for Halloween.
Serve them along with our Halloween s’mores dip or caramel apple dip and mummy dogs and you have the perfect Halloween party food!
Note: This post may contain affiliate links. That means if you click on a link and make a purchase we may receive a small commission. Thank you!
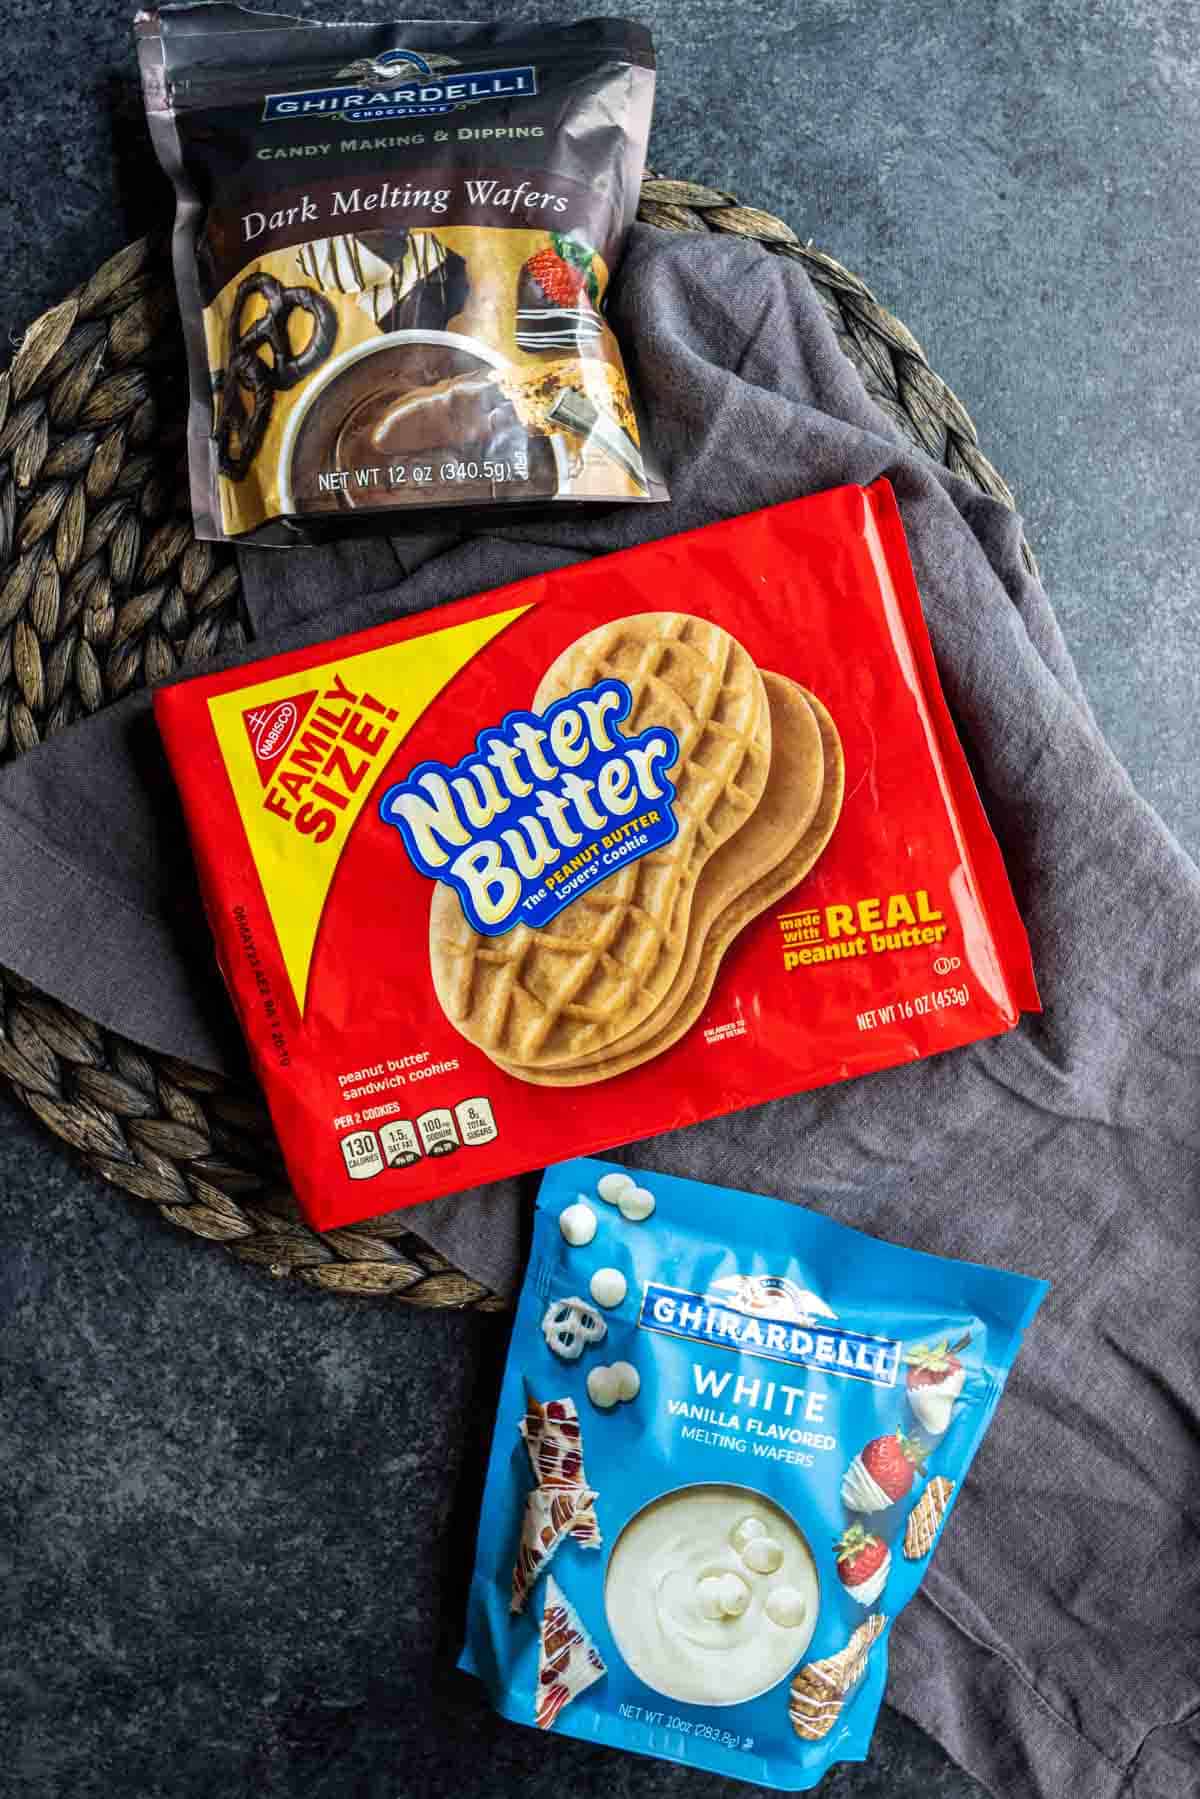
Ingredients for Nutter Butter Ghosts
- Nutter Butter Cookies – delicious peanut butter cookies shaped like peanuts.
- White melting chocolate – you can use regular white chocolate chips but I prefer white melting chocolate because it melts smoother and is a brighter white color. We usually use Ghirardelli white chocolate melting wafers.
- Chocolate chips – You just need a dark or milk chocolate for this. You could even use black melting chocolates if you prefer.
How to Make Ghost Cookies
Step 1 – Prepare workspace. Line a baking sheet with parchment paper or wax paper. Lay your cookies side-by-side on the baking sheet.
Step 2 – Melt chocolate. Put the white chocolate melts in a microwavable bowl or mug and microwave for 30 seconds. Stir well and then microwave for 10 seconds at a time, stirring in between each, until the chocolate is fully melted.
Use a spoon to put the melted chocolate into a sandwich baggie. Snip a little bit off of one corner to make a hole. You can use a piping bag with a small tip on it if you prefer.
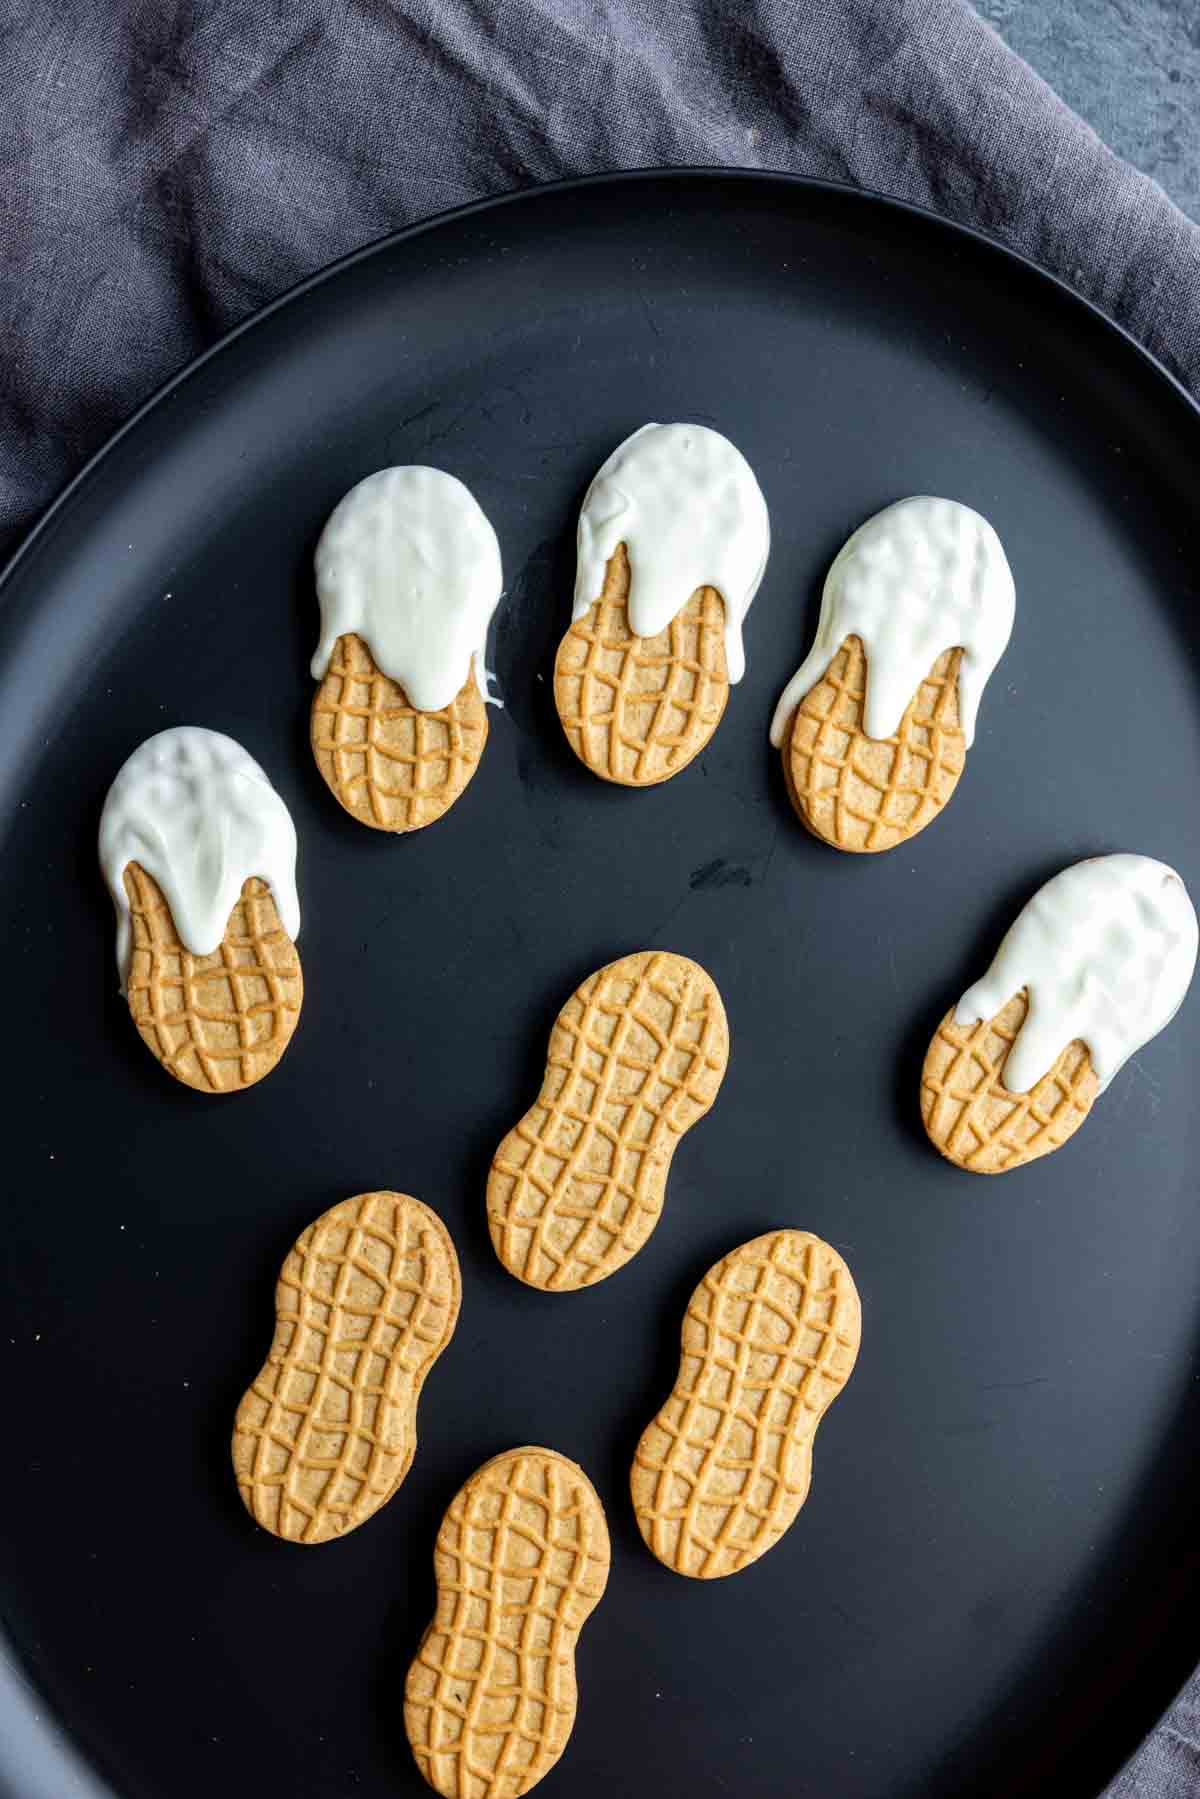
Step 3 – White chocolate layer. Pick up one of the cookies and squeeze the chocolate over the top arc of the cookie. Do your best to keep the chocolate on the front of the cookie and keep the back side clean. Gently tape the bottom of the cookie against a flat surface to make the melted candy begin to ooze down the cookie. Shift it from side-to-side to create uneven edges on the bottom of the ghost.
Place the cookie back on the parchment paper with the back side against the paper and the decorated front facing up. Continue until all of your cookies have been decorated with the white chocolate.
Let the white chocolate fully harden, approximately 10 minutes.

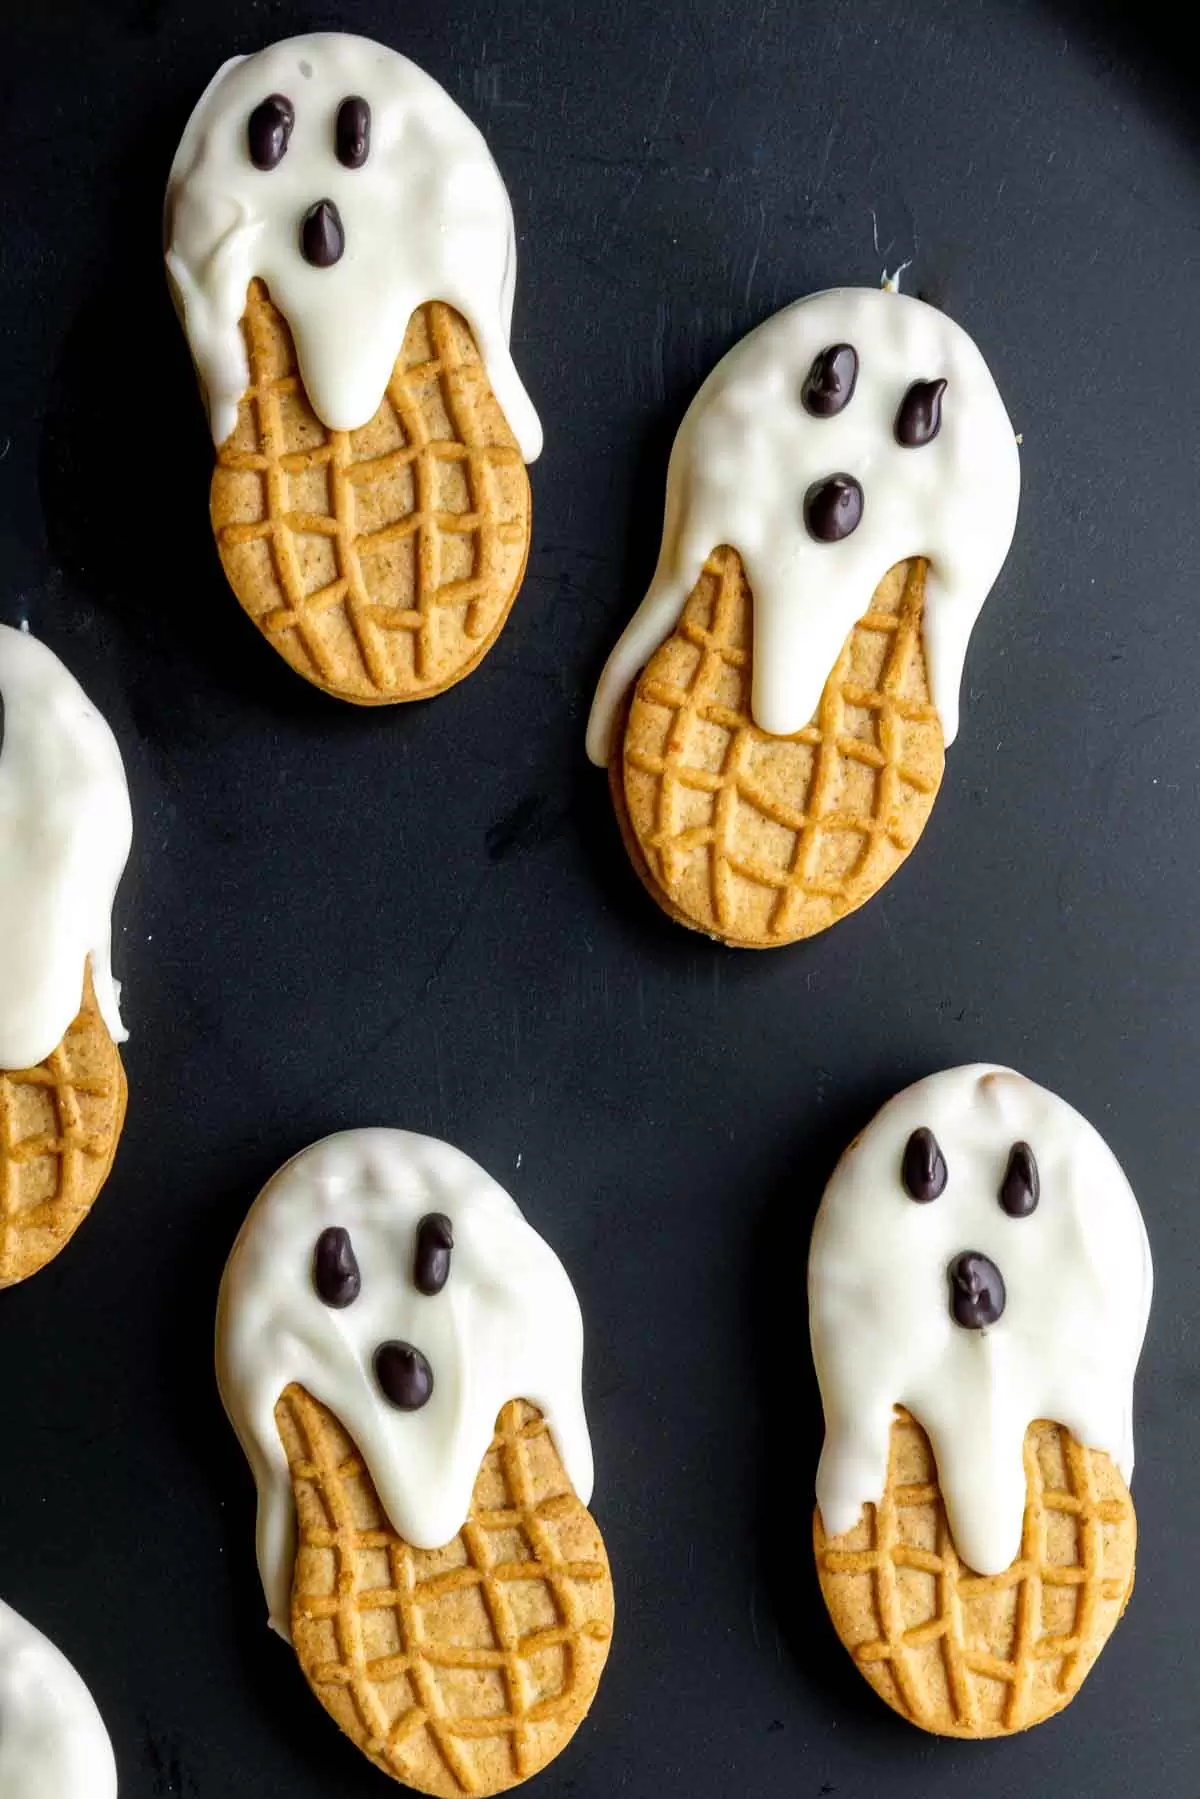
Step 4 – Milk chocolate layer. Next place the chocolate chips in a microwave mug or bowl and melt it just like you did with the white chocolate.
Use a spoon to put the melted chocolate into a sandwich baggie. Snip a little bit off of one corner to make a hole. You can use a piping bag with a small tip on it if you prefer.
Pipe three circles on each ghost cookie, 2 eyes and a mouth.
Step 5 – Store and serve. Let the chocolate harden completely. Store in airtight container with a layer of wax paper between each layer. Store at room temperature until reach to serve or, if you are making them ahead of time, store in the freezer for up to 2 months.
How to Melt Chocolate in the Microwave
Melting chocolate in the microwave is simple. Place your chocolate in a microwave safe dish, we often use a mug or small Pyrex dish.
If you are using large pieces of chocolate we suggest chopping it up so it is in small pieces. This will help it melt faster and more evenly.
Microwave the chocolate for 30 seconds then remove from the microwave and stir well. The residual heat will continue melting the chocolate so stir for at least 30 seconds. Then, if it isn’t fully melted, place it back in the microwave and cook for 10 seconds more. Remove and stir again. Repeat until the melted chocolate is smooth.
Other Halloween Cookie Ideas & Easy Treats
We’re all about easy Halloween cookies, brownies, and bars. They are a fun way to celebrate with the kids and they are a great addition to Halloween parties! Some of our favorites are:
- No Bake Monster Cookies
- Witch’s Brew Brownies
- Candy Bar Cookie Bars
- Halloween Magic Cookie Bars
- Halloween Dessert Pizza
Freezing Halloween Cookies
If you want to save time and make these cookies ahead of time you can! Just decorate them as instructed and let the chocolate harden fully.
Place a single layer of cookies in gallon freezer bag or in a freezer-safe storage container. Place a sheet of wax paper over the layer of cookies and then top with the next layer. This will keep the cookies from sticking together and messing up your decorations.
Store in the freezer for up to 2 months.
When you’re ready to serve them let them sit out at room temperature for 1 hour. This will thaw them and allow any condensation to form and evaporate before serving.
Looking for More Easy Halloween Recipes?
- Ghost Goo Halloween Cupcakes
- Mummy Hot Dogs
- Keto Halloween Deviled Eggs
- Frankenstein Mini Cheesecakes
- Halloween Baked Cheese
- Halloween S’mores Dip
- More Halloween Recipes…
Like this recipe?
Make sure to follow us on Instagram and Pinterest for more recipes like this.
Nutter Butter Ghost Cookies
Ingredients
- 12 Nutter Butter Cookies
- 5 ounces White melting chocolate
- 2 ounces Chocolate chips, finely chopped
Instructions
- Line a baking sheet with parchment paper or wax paper. Lay your cookies side-by-side on the baking sheet.
- Put the white chocolate melts in a microwavable bowl or mug and microwave for 30 seconds. Stir well and then microwave for 10 seconds at a time, stirring in between each, until the chocolate is fully melted.
- Use a spoon to put the melted chocolate into a sandwich baggie. Snip a little bit off of one corner to make a hole. You can use a piping bag with a small tip on it if you prefer.
- Pick up one of the cookies and squeeze the chocolate over the top arc of the cookie. Do your best to keep the chocolate on the front of the cookie and keep the back side clean. Gently tape the bottom of the cookie against a flat surface to make the melted candy begin to ooze down the cookie. Shift it from side-to-side to create uneven edges on the bottom of the ghost.
- Place the cookie back on the parchment paper with the back side against the paper and the decorated front facing up. Continue until all of your cookies have been decorated with the white chocolate.
- Let the white chocolate fully harden, approximately 10 minutes.
- Next place the chocolate chips in a microwave mug or bowl and melt it just like you did with the white chocolate.
- Use a spoon to put the melted chocolate into a sandwich baggie. Snip a little bit off of one corner to make a hole. You can use a piping bag with a small tip on it if you prefer.
- Pipe three circles on each ghost cookie, 2 eyes and a mouth.
- Let the chocolate harden completely then store in an airtight container until ready to serve.
Nutrition


Nutter butters are my favorite! Love these!
Mine too!
these Nutter Butter ghosts are the cutest things ever!!
Thanks Lexi, I loved how they turned out 🙂
So cute! Perfect for Halloween parties– I bet they’re a hit!
The kids loved them! 🙂
I want to make these along with my 9 year-old granddaughter this October. How cute!
I bet she’d really enjoy that!