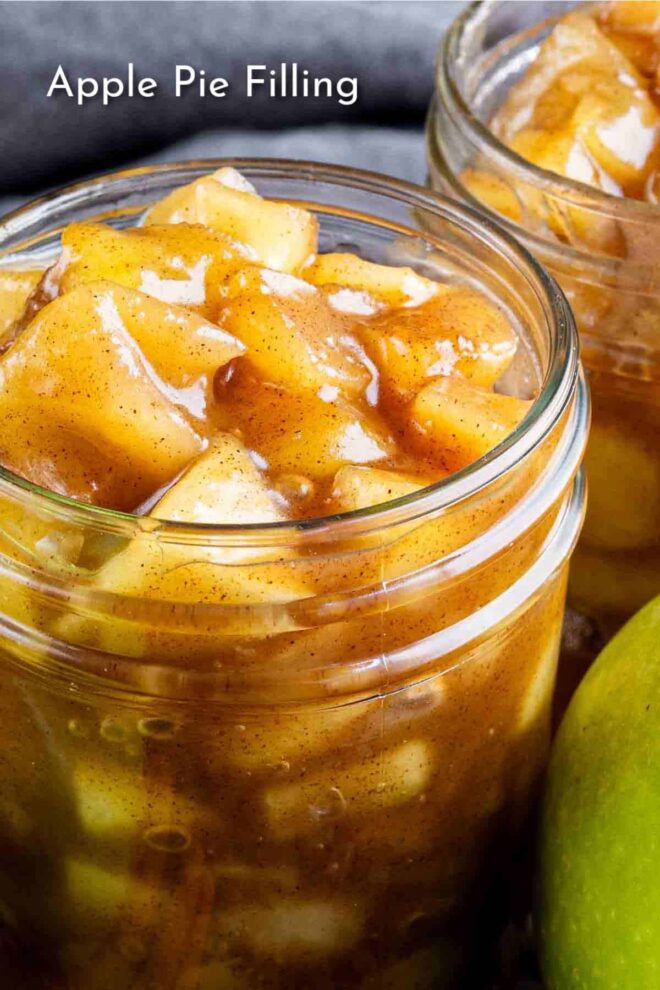
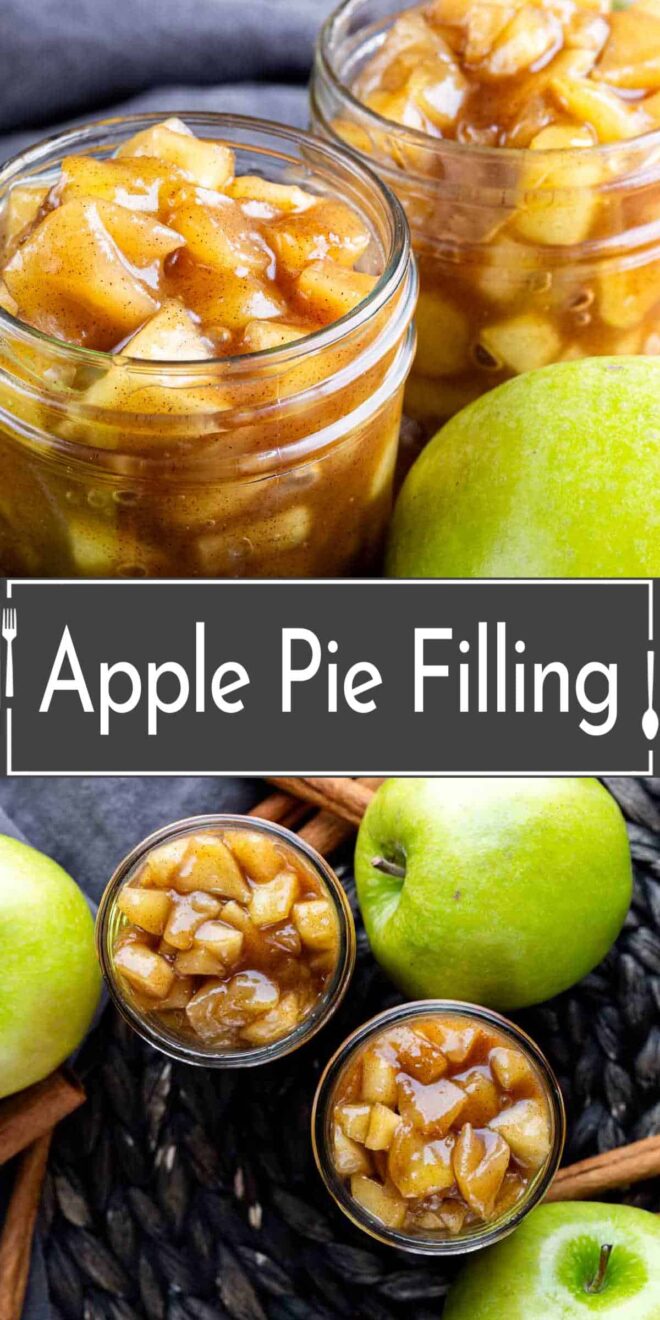
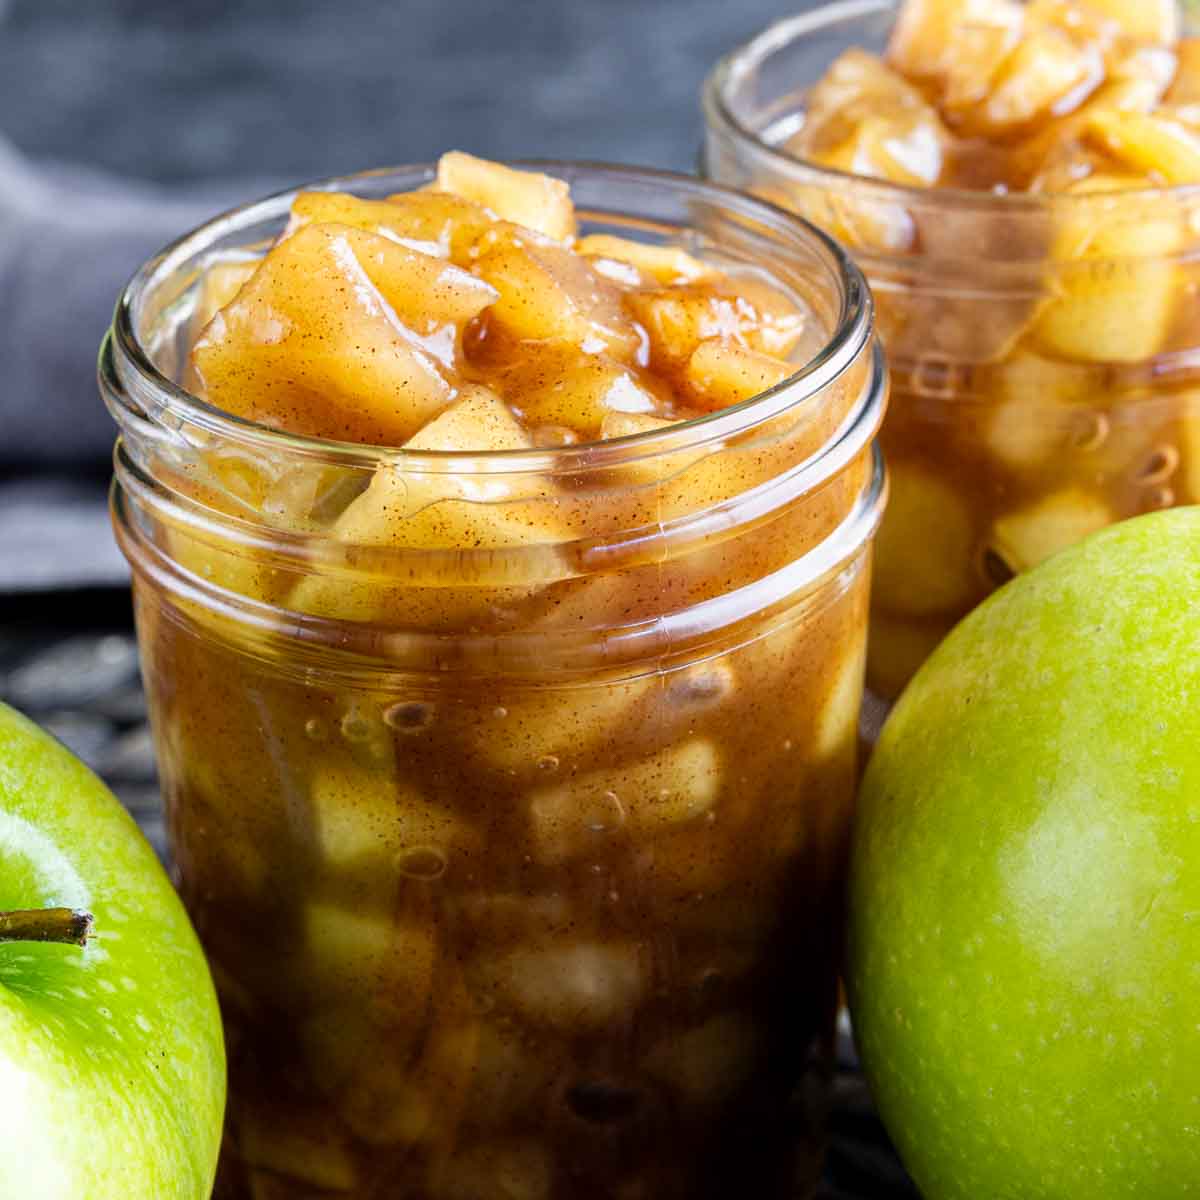
Homemade Apple Pie Filling (Stovetop)
Create your own delicious homemade apple pie filling with this simple stovetop recipe. With just a few ingredients and easy steps, you’ll have a flavorful filling that beats anything from a can!
It’s fall and I know that means pumpkin everything for lots of people, but for me it’s all about the apples! Apple pie, apple bread, apple cake. I love all things apple, and warm spices like cinnamon, cloves, and nutmeg.
This simple apple pie filling is everything you love about apple pie without the crust. It’s sweet and tart and perfect for spooning over ice cream or pancakes, or adding to a pie crust or puff pastry for a simple hand pie.
All it takes are a few basic ingredients and a little time on the stovetop and you’ll have an amazing pie filling that beats anything you can get from the store!
Note: This post may contain affiliate links. That means if you click on a link and make a purchase we may receive a small commission. Thank you!
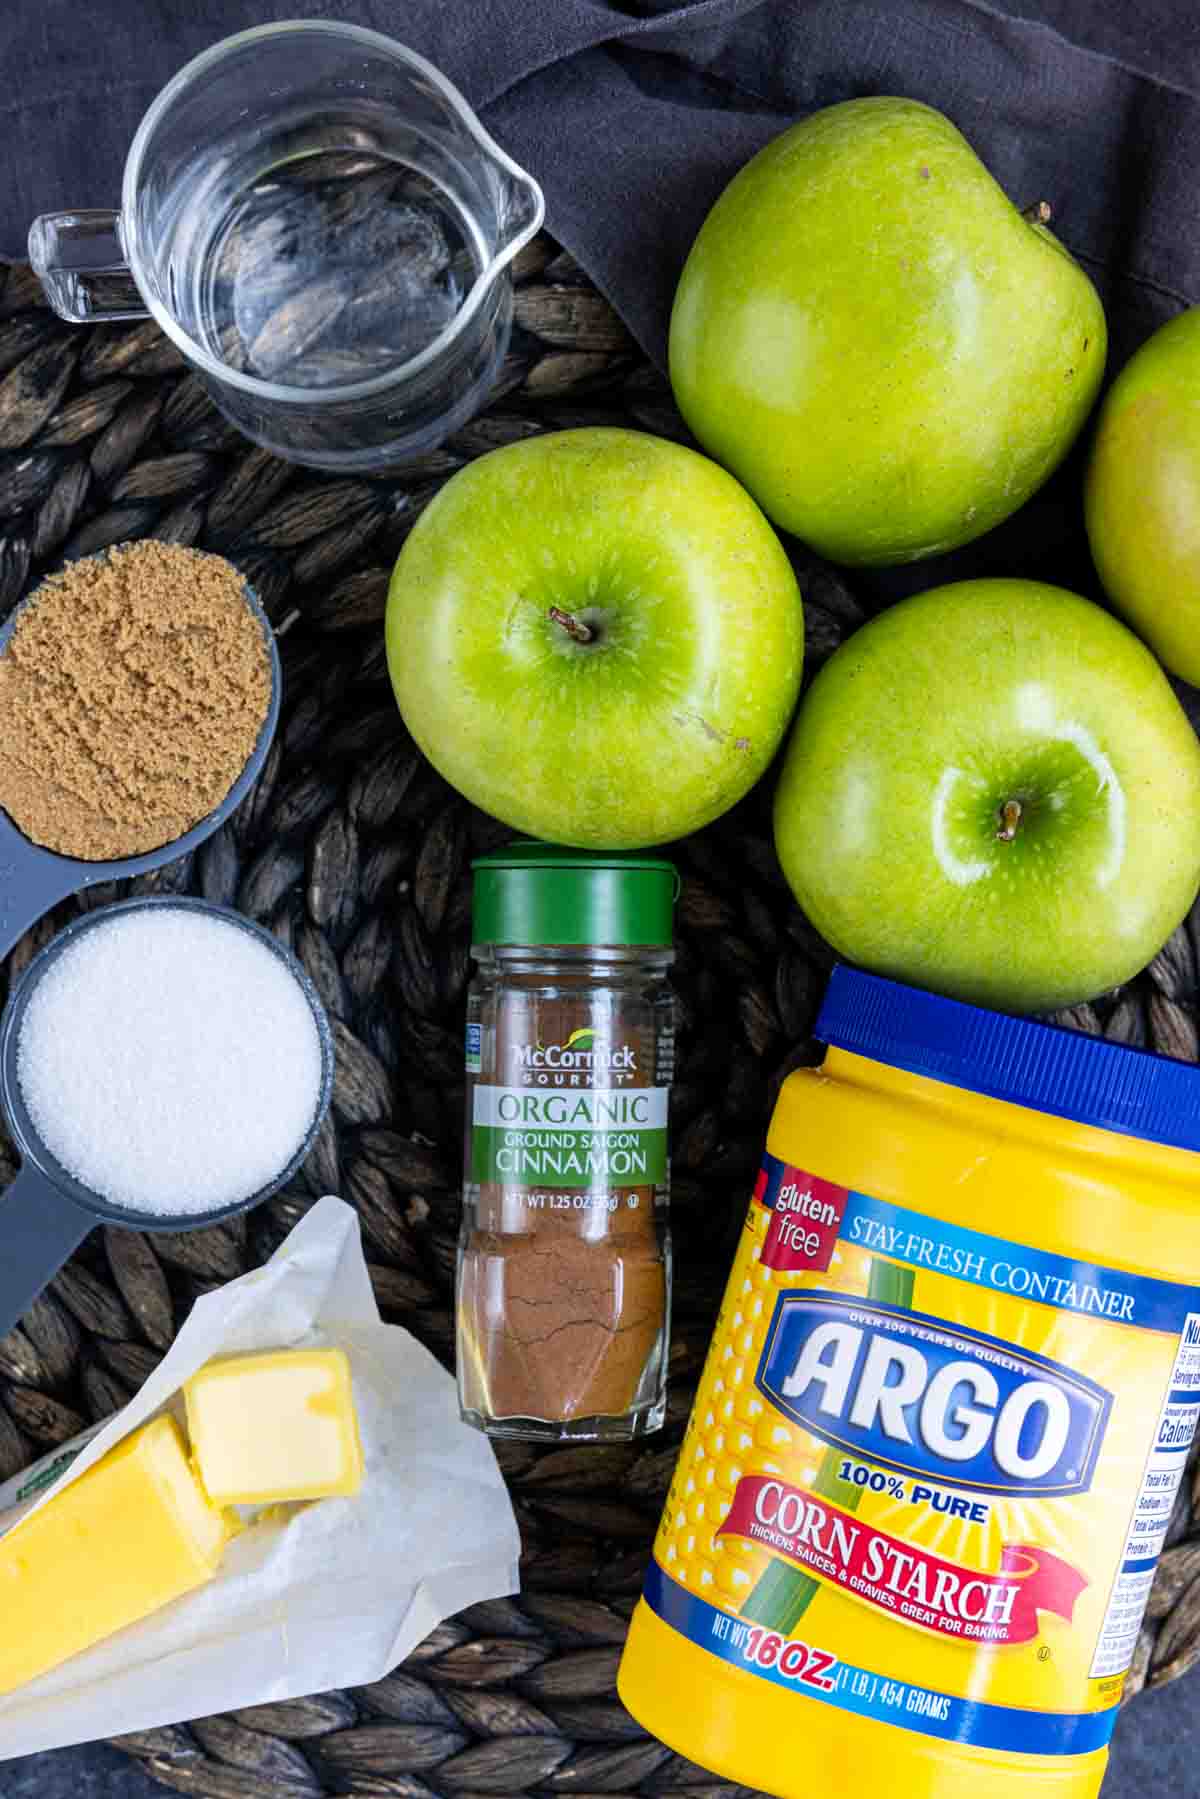
Ingredients You’ll Need
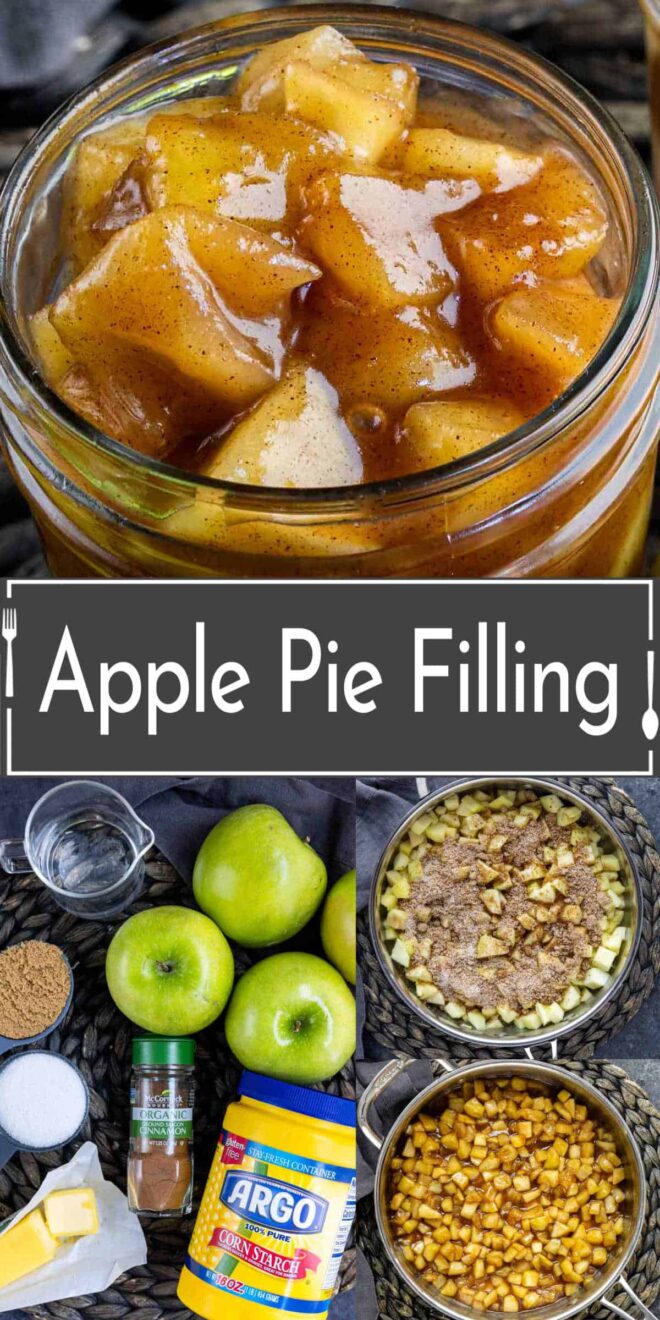
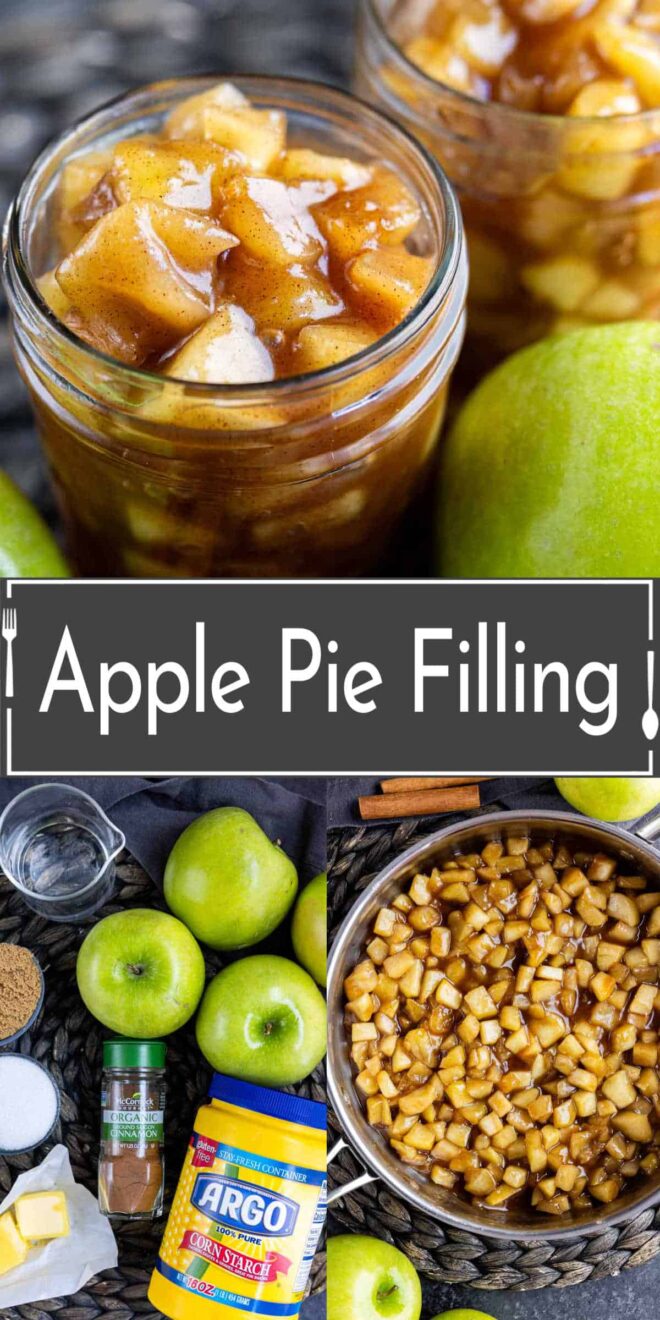
- Granny Smith apples – Have a tart, crisp flavor. A vibrant green color and firm texture make them instantly recognizable. The sturdy nature of Granny Smith apples allows them to maintain their integrity when cooked, making them an ideal choice for pie fillings or any recipe that requires cooking the apples.
- Salted butter – The reason we choose salted butter over unsalted is that it brings out more depth in our dish. The salt incorporates well into the apples as they soften, making each bite perfectly sweet with just enough salty undertone to round off one delicious mouthful.
- Granulated sugar – This not only sweetens the filling, but also enhances the overall flavor, creating a delightful balance between tart and sweet. How much granulated sugar you include can be adjusted to taste and depends on how tart your apples are.
- It’s worth noting that using other kinds of sugars may affect both texture and taste – stick with granulated sugar for best results!
- Dark brown sugar – This adds a rich and caramel-like flavor that enhances the overall taste profile of the filling. Not only does it bring depth to the flavor, but it also contributes to the deep, rich color of the filling.
- Ground cinnamon – Ground cinnamon enhances the overall flavor and aroma of the filling, adding warmth and depth to each bite. The recipe calls for a specific amount of ground cinnamon to be sprinkled over the apples, ensuring that the taste is just right.
- Water – Additionally, incorporating water into the recipe helps create a moist and tender texture for the apples as they cook down.
- Cornstarch – Cornstarch is an essential ingredient when making homemade apple pie filling. It acts as a thickening agent, creating a smooth and thick texture in the filling. This versatile ingredient is natural and gluten-free, making it a great option for those with dietary restrictions.
Our cinnamon sugar baked apple slices are similar to apple pie filling but you bake them in the oven or the air fryer. They make a delicious dessert all on their own. Add a big scoop of vanilla ice cream and you’ll be in heaven!
Instructions
Making your apple pie filling is simple. Just a few ingredients and a little time and you’ll have filling so delicious you’ll never buy canned pie filling again!
Step 1 – Prepare apples. To begin making homemade apple pie filling, start by preparing the apples. First, core and peel the apples to remove any unwanted parts. Next, cut the apples into bite-sized pieces for easier incorporation into the filling.
It’s important to cut them uniformly so that they cook evenly and provide a consistent texture in the final product. Removing the cores and peels not only improves taste but also contributes to a smoother overall filling.

Step 2 – Sugar and spice. In a small bowl combine the sugar, brown sugar, and ground cinnamon, stirring together until well mixed.
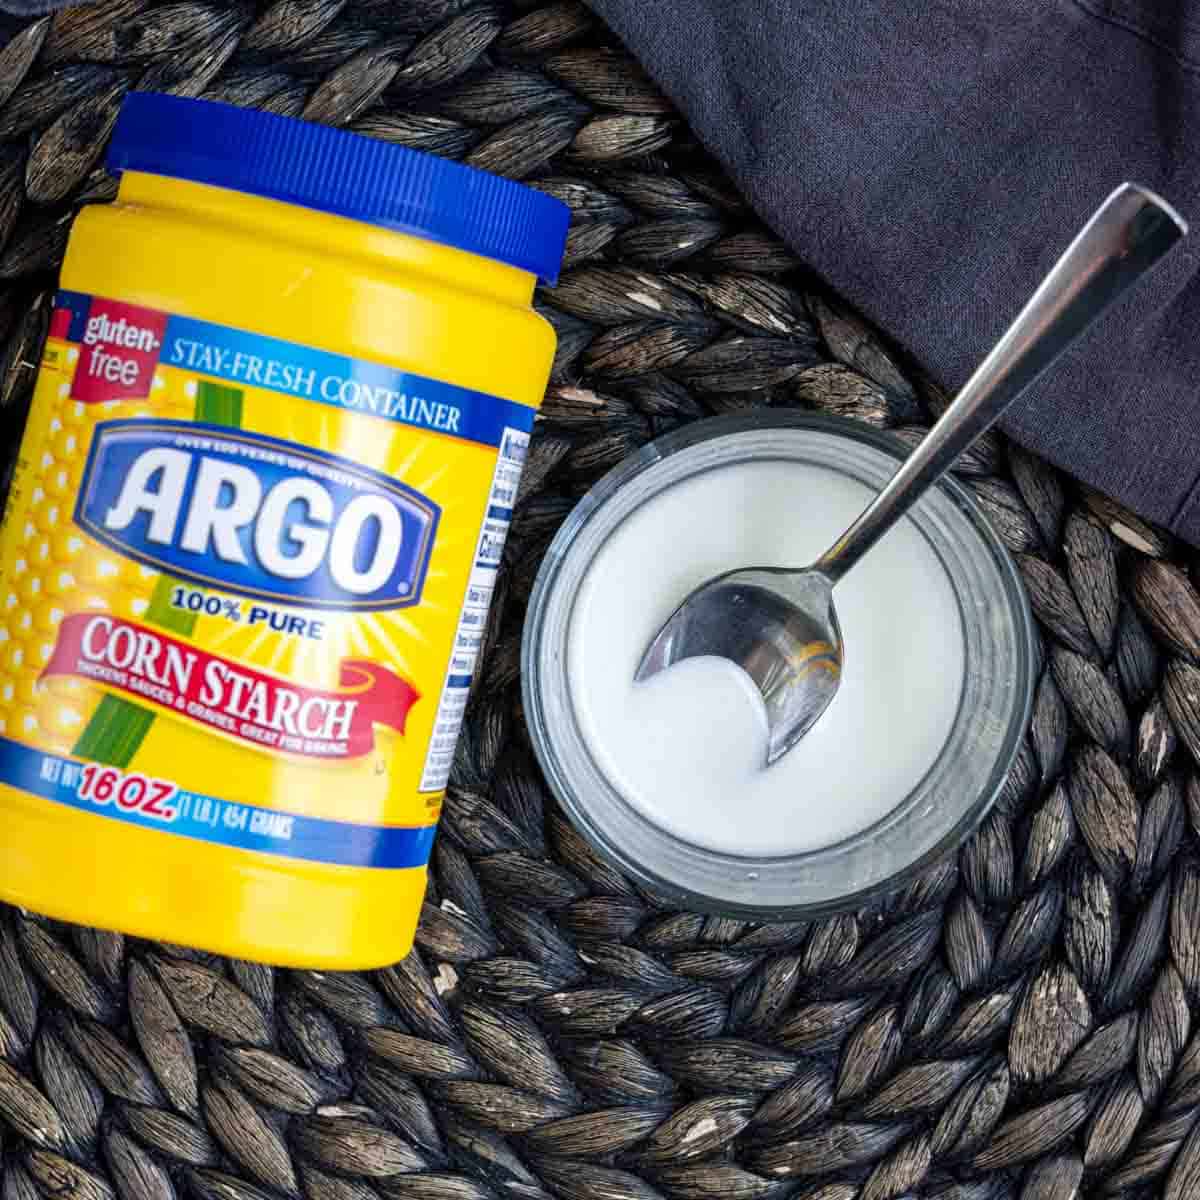
Step 3 – Make a slurry. To create a slurry for your homemade apple pie filling, simply whisk together 2 tablespoons of cornstarch and 2 tablespoons of water in a small bowl. This mixture will help thicken the filling as it cooks on the stovetop.
It’s important to gradually add the slurry while stirring continuously to prevent any clumps from forming. As you cook the filling, the slurry will work its magic and give you that perfect consistency you’re looking for.
Step 4 – Melt butter. Melt the butter in a large skillet over medium-high heat. This step is crucial in creating a rich and buttery flavor in the apple pie filling. The melted butter serves as the base for the filling, adding depth and richness to the flavors.
Make sure to keep an eye on the skillet while melting the butter to prevent it from overheating or browning too much.
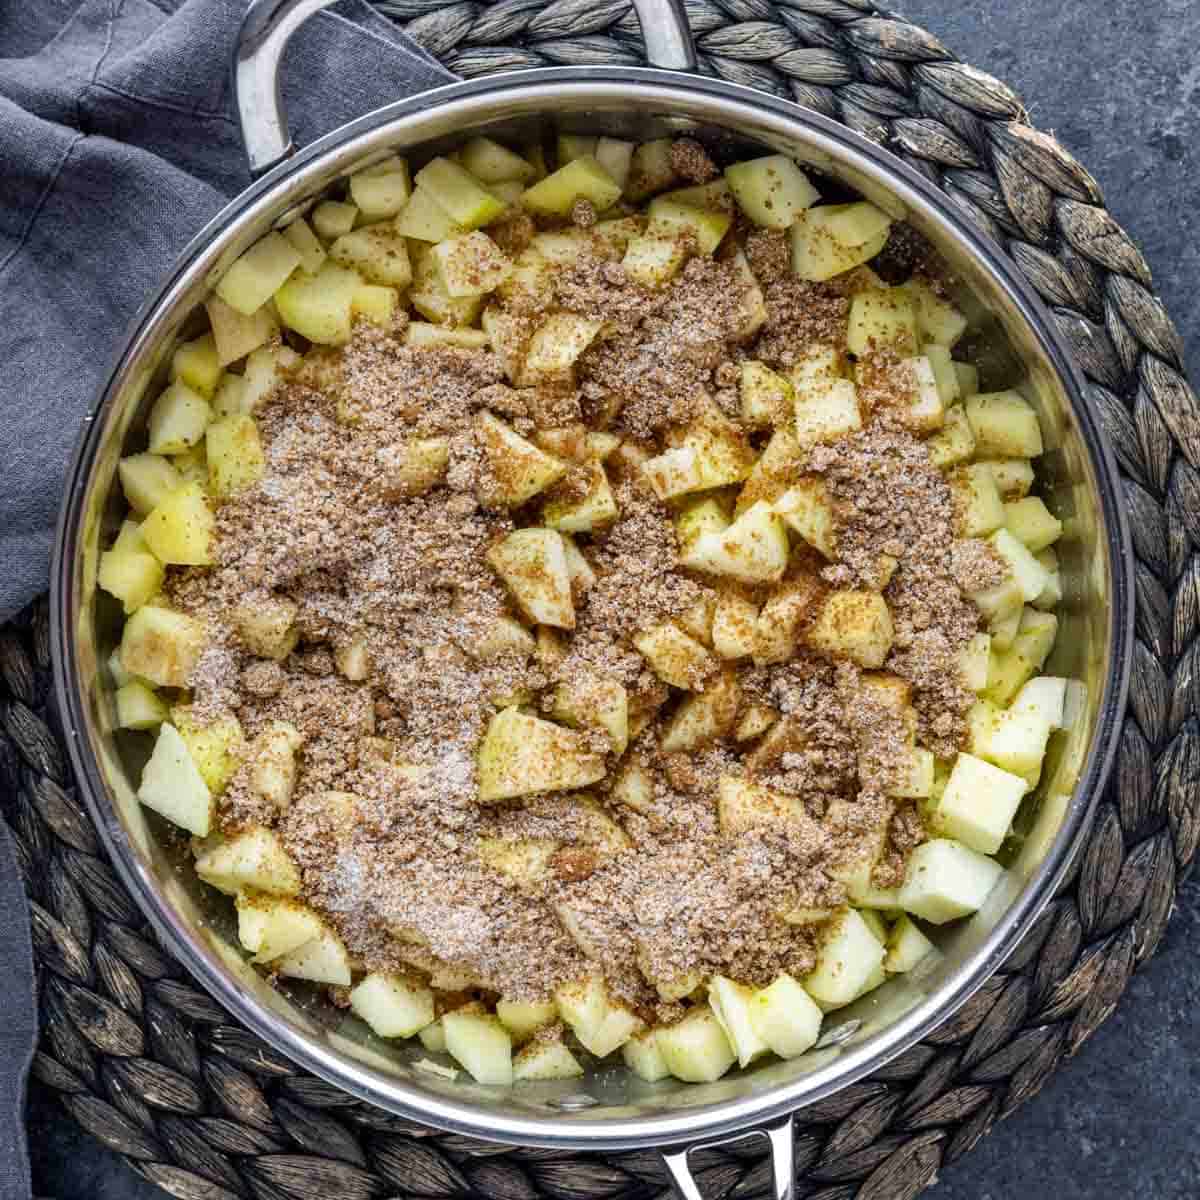
Step 5 – Cook apples. Add the apple pieces and 5 tablespoons of water then sprinkle the cinnamon sugar mixture over the apples. Stir together and let cook them for 5-6 minutes over medium-high heat, stirring occasionally.
Step 6 – Bring to boil. Increase the heat until the liquid reaches a boiling point. Keep cooking for an additional 3 minutes, or until the apples become soft and tender. This ensures that the homemade apple pie filling has perfectly cooked apples with a delightful texture.
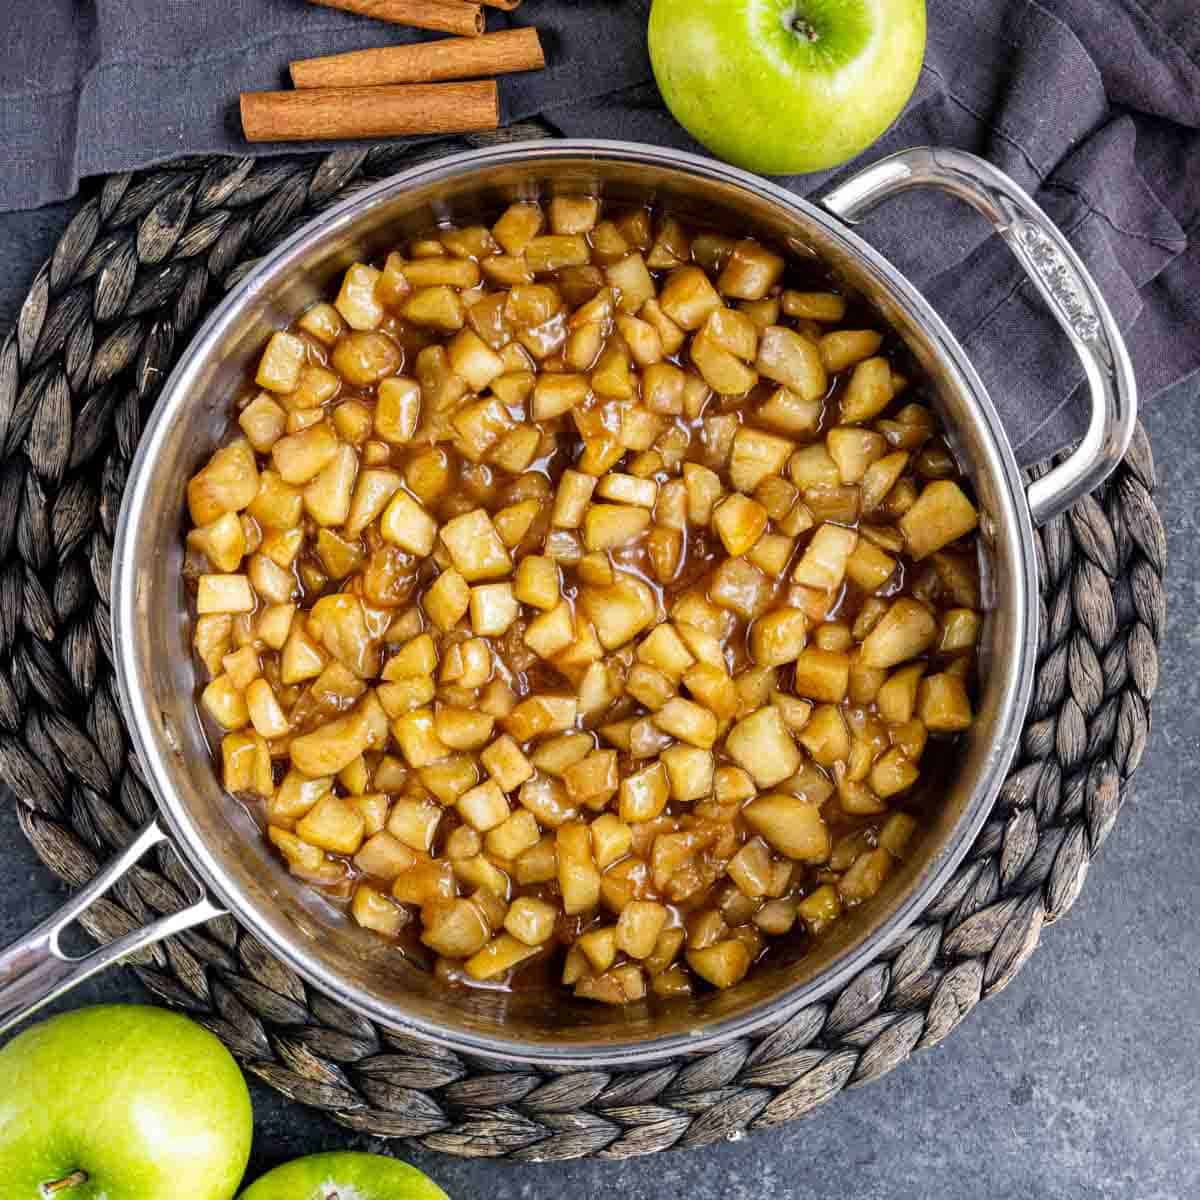
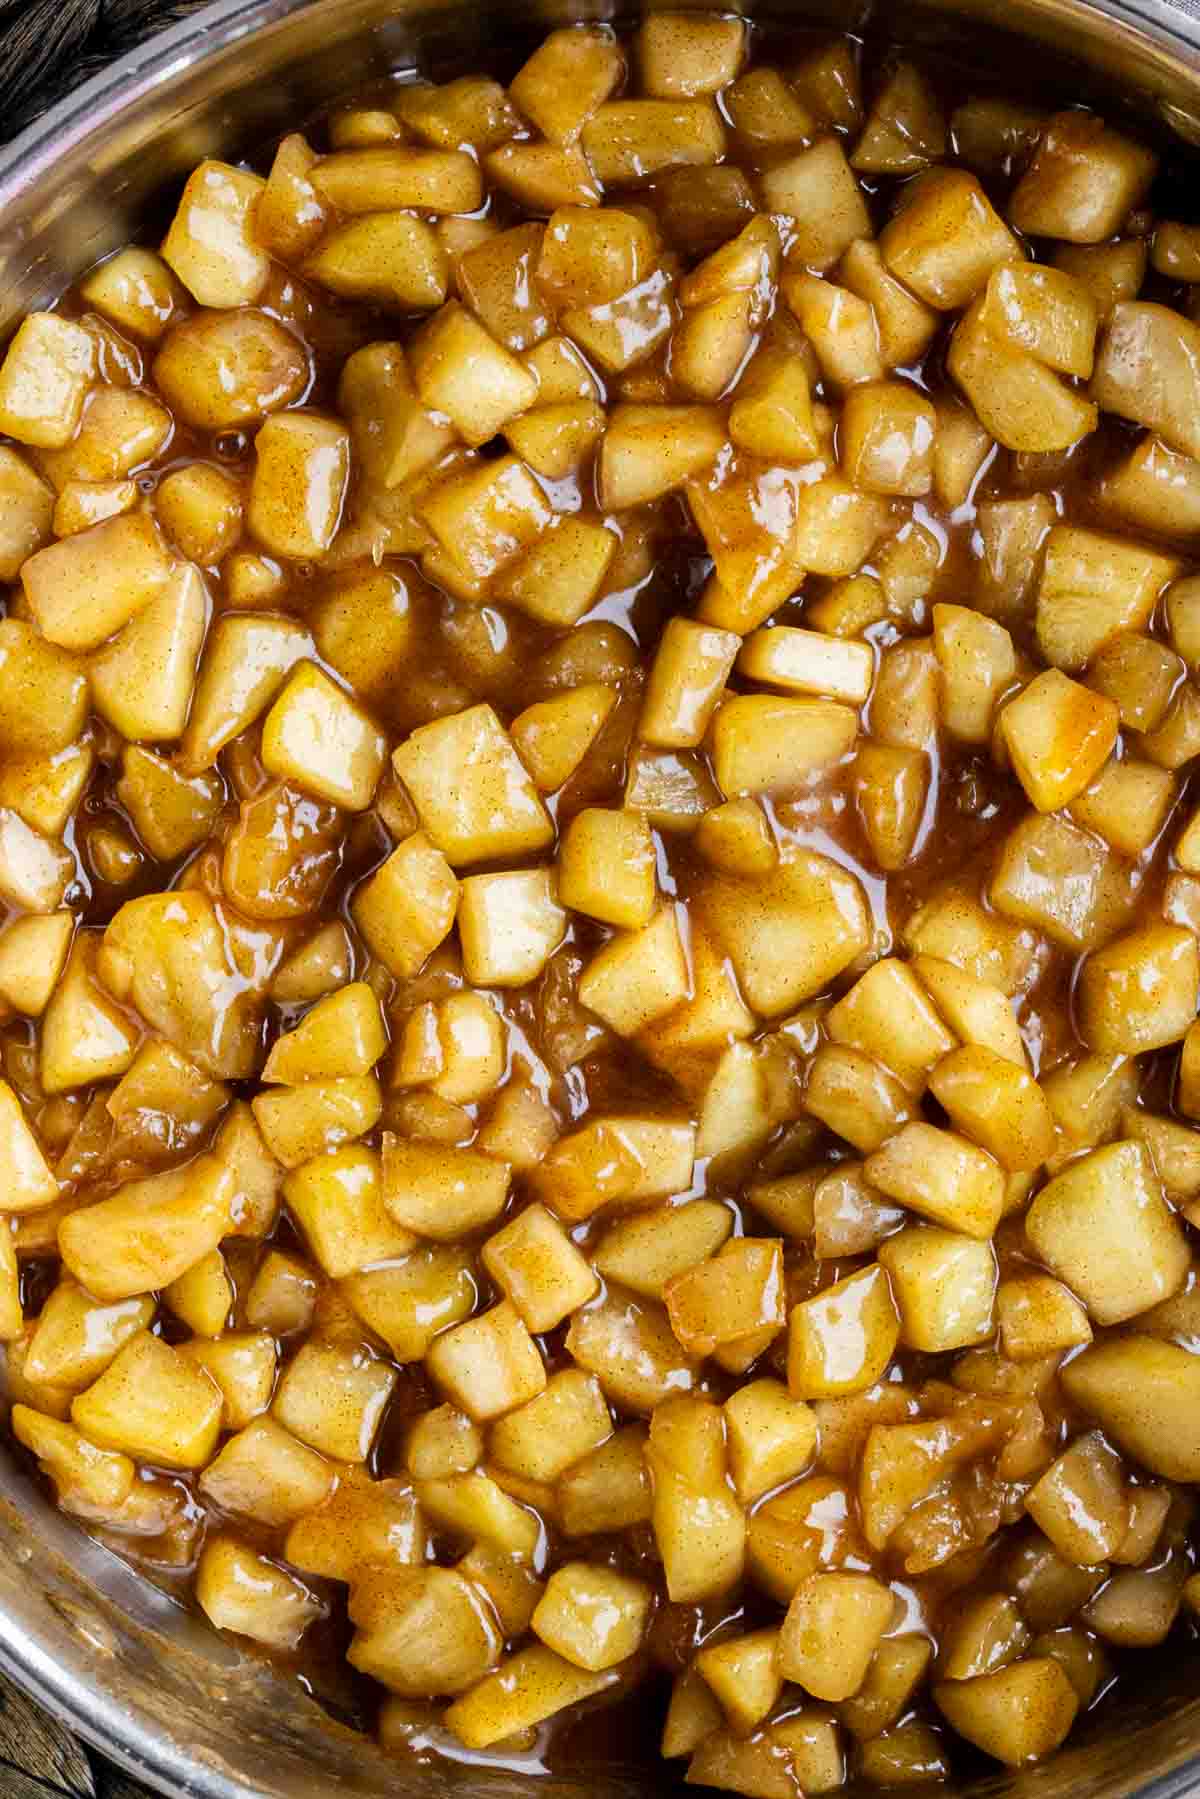
Step 7 – Thicken sauce. Pour the cornstarch mixture (slurry) over the apples and stir together. Continue to cook until the mixture thickens, 2-3 minutes.
Step 8 – Cool and store. After simmering the homemade apple pie filling, it’s important to let it cool before storing. This step allows the filling to set and thicken, ensuring a perfect consistency when it’s time to use it in your favorite apple pie recipe.
More Delicious Apple Recipes
- Apple Spice Cake
- Air Fryer Baked Apple Slices
- Caramel Apple Bread
- Caramel Apple Cupcakes
- Apple Walnut Salad
- Pecan Apple Stuffing
- Apple Coleslaw
Variations & Substitutions
Different types of apples
Granny Smith apples are known for their tartness and firm texture, making them a popular choice in apple pie filling. They add a tangy flavor that balances well with the sweetness of the pie.
On the other hand, Honeycrisp apples are sweet and juicy, bringing a natural sweetness to the filling. Their crispness provides a satisfying bite. McIntosh apples, on the other hand, have a soft and tender texture which results in a smoother consistency in the pie filling.
Mixing different types of apples allows you to create a well-balanced and flavorful combination for your homemade apple pie filling. So whether you prefer tart or sweet, there’s an apple variety that can cater to your taste buds.
Spices
Cinnamon is the star spice in homemade apple pie filling, adding warm and sweet notes to the flavor profile. Nutmeg, on the other hand, brings a touch of sweetness and nuttiness to the mix.
Allspice is a versatile choice, combining flavors like cinnamon, nutmeg, and cloves for added complexity. For those who enjoy a bold taste, cloves can provide a strong and pungent flavor to the apple pie filling.
Remember that you can adjust the amount of spices used according to your personal preference and taste. Get ready to elevate your apple pie filling with these aromatic spices!
Other flavorings
You can get creative with the flavorings in your homemade apple pie filling to add a unique twist to the classic recipe. Consider adding a dash of nutmeg or allspice for a warm and aromatic flavor.
If you prefer a tangy taste, try squeezing in some lemon juice or adding a splash of apple cider vinegar. For those who like a hint of warmth, sprinkle in some ground cloves or ginger.
Experiment with different combinations and amounts to find the perfect balance of flavors that suits your taste buds.
Don’t be afraid to think outside the box when it comes to flavoring your apple pie filling. You can also incorporate extracts like vanilla or almond for an extra layer of richness.
How to Use Apple Pie Filling
Use your homemade apple pie filling to create delicious desserts and treats. One popular option is to make a classic apple pie by simply pouring the filling into a prepared pie crust and baking it until golden brown.
You can also use the filling as a topping for pancakes, waffles, crepes, or French toast for a sweet and fruity twist. Another idea is to spoon it over vanilla ice cream or yogurt for a tasty dessert.
Get creative and use the apple pie filling as a filling for no bake apple pie in a jar, turnovers, hand pies, or even stuffed pastries. The possibilities are endless with this versatile ingredient!

How to Store & Reheat
To store homemade apple pie filling, transfer it to an airtight container and refrigerate for up to 5 days. To reheat, simply warm it in a saucepan over low heat or microwave in short intervals, stirring occasionally until heated through.
Refrigerating
After making your homemade apple pie filling, it’s important to refrigerate it for optimal freshness. To store the apple pie filling, transfer it into an airtight container or sealable bag and place it in the refrigerator.
This will help maintain its taste and texture. Remember to consume the refrigerated apple pie filling within a specific timeframe to ensure its quality. When you’re ready to enjoy it again, simply reheat the filling on the stovetop and serve it in your favorite baked goods or desserts.
Freezing
Frozen apple pie filling can be stored for up to 3 months.
To freeze homemade apple pie filling, let it cool completely before transferring it to an airtight container or freezer bags. Make sure to leave some space at the top for expansion.
Label the containers with the date and contents, then place them in the freezer. When you’re ready to use it, simply thaw it in the refrigerator overnight and reheat on the stovetop or in the microwave until warm.
Freezing allows you to enjoy your homemade apple pie filling anytime without any extra effort!
Another option is freezing individual portions of apple pie filling in ice cube trays. Once frozen, transfer them into labeled freezer bags for easy portioning later on. This way, you can take out just what you need when making smaller desserts like turnovers or mini pies.
Reheating
To reheat your homemade apple pie filling, simply place it in a saucepan over low heat. Stir occasionally until the filling is warm throughout. Avoid overheating to prevent the apples from becoming mushy.
Once heated, you can use the reheated apple pie filling for various purposes, such as topping ice cream or pancakes, or for making pies and turnovers.
Like this recipe?
Make sure to follow us on Instagram and Pinterest for more recipes like this.
Apple Pie Filling

Ingredients
- 4 Granny Smith apples
- 2 tablespoons Salted butter
- 1/2 cup Sugar
- 1/2 cup Dark brown sugar
- 2 teaspoons Ground cinnamon
- 7 tablespoons Water, divided
- 2 tablespoons Cornstarch
Instructions
- Core and peel the apples then cut them into bite-sized pieces.
- In a small bowl combine the sugar, brown sugar, and ground cinnamon, stirring together until well mixed.
- In a small bowl whisk together the 2 tablespoons of cornstarch and 2 tablespoons of water to create a slurry.
- In a large skillet melt the butter over medium-high heat.
- Add the apple pieces and 5 tablespoons of water then sprinkle the cinnamon sugar mixture over the apples. Stir together and let cook them for 5-6 minutes over medium-high heat, stirring occasionally.
- Turn up the heat enough to bring the liquid to a boil. Continue to cook for 3 minutes or until apples soften.
- Pour the cornstarch mixture (slurry) over the apples and stir together. Continue to cook until the mixture thickens, 2-3 minutes.
- Remove from heat and let cool before storing.
Nutrition
