Easter Deviled Brownies Made with Brownie Mix

Note: This post may contain affiliate links. That means if you click on a link and make a purchase we may receive a small commission. Thank you!
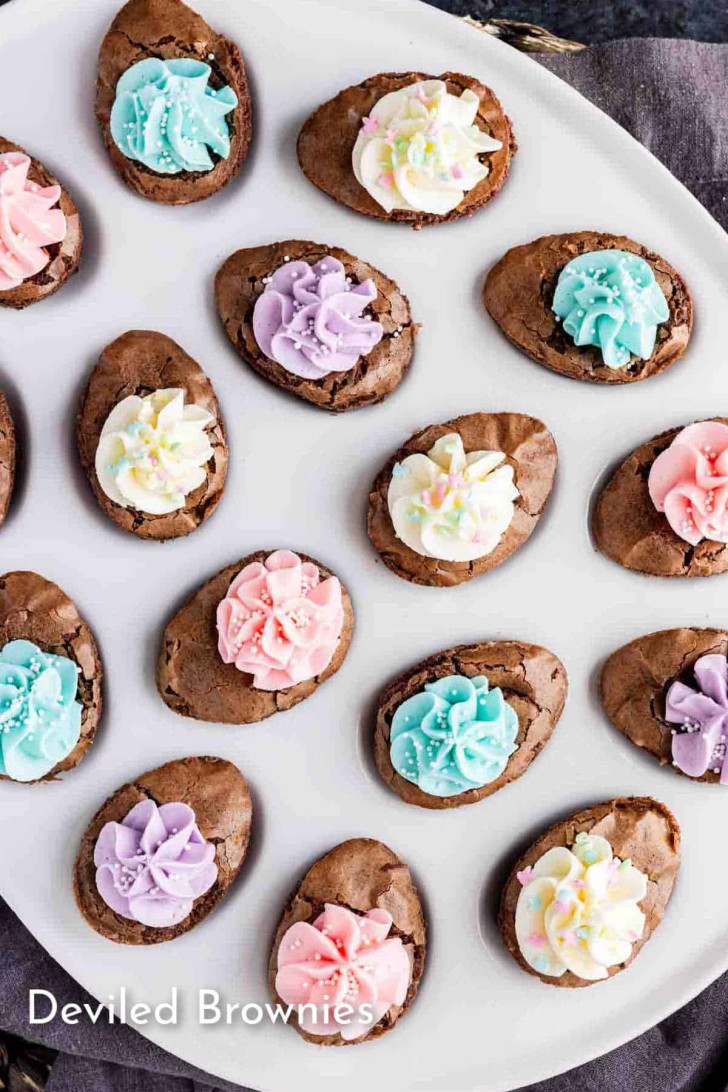
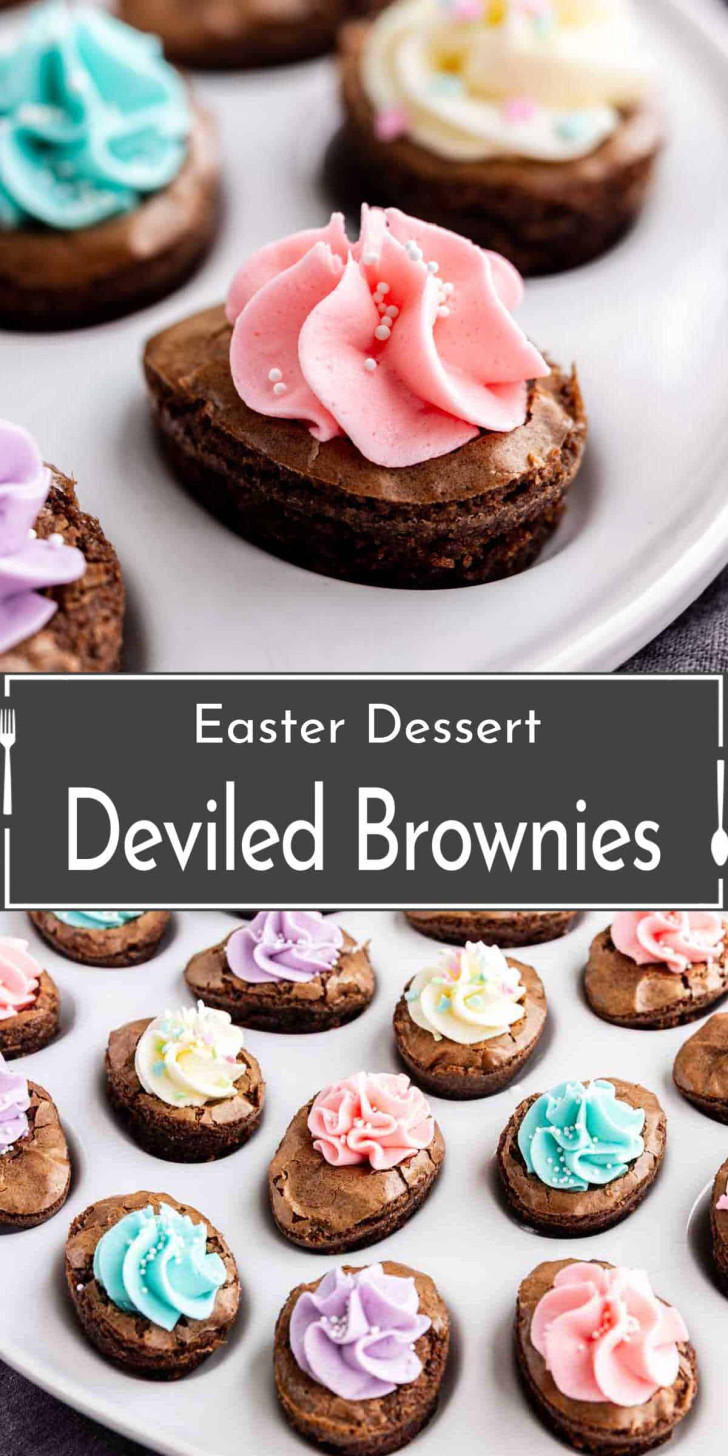
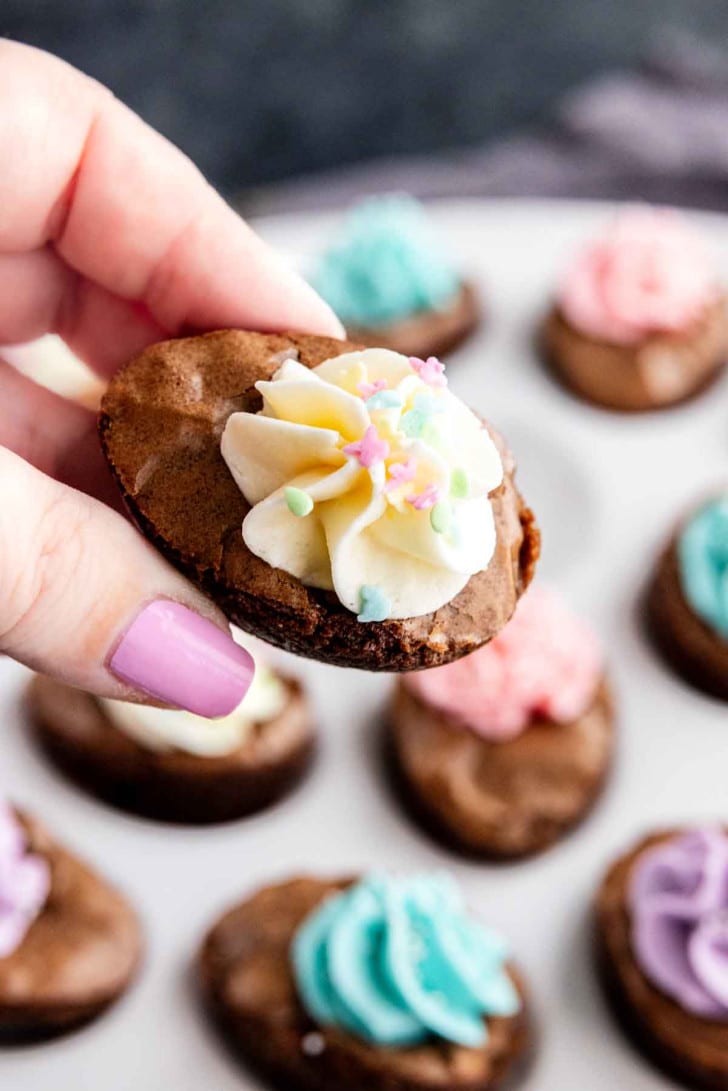
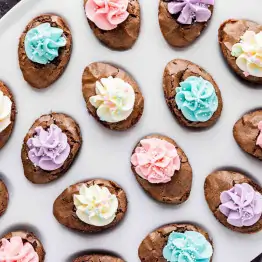
These Deviled Brownies are the cutest easy Easter dessert! Made with brownie mix, colorful frosting, and a silicone egg mold, these frosted brownie bites are festive, simple, and perfect for parties.
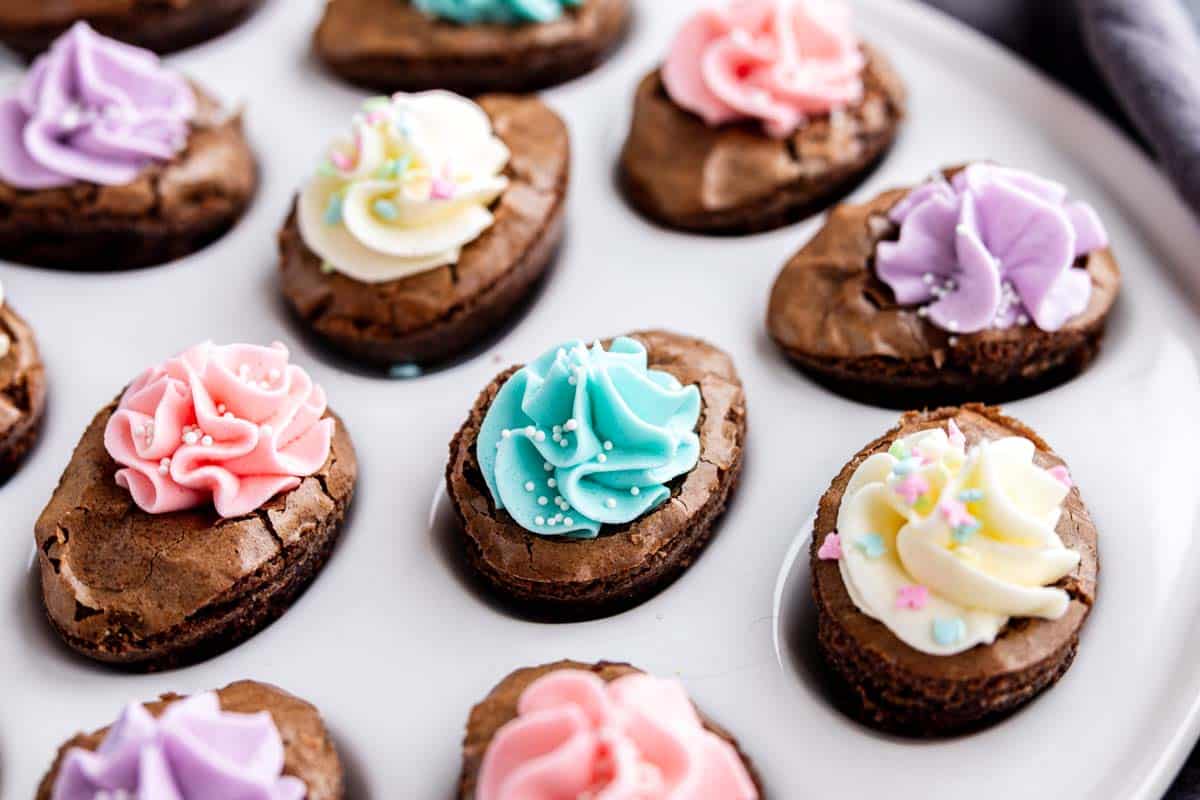
These Deviled Brownies are a fun, fudgy easy Easter dessert that looks fancy but is incredibly simple to make. Made with a box brownie mix in a silicone egg mold, these cute Easter brownies are shaped like little deviled eggs and finished with colorful frosting for a playful holiday treat. They’re perfect for Easter brunch, spring parties, school events, and baby showers, and they make a great brownie bites recipe when you want something festive, chocolatey, and easy to serve.
What makes this brownie mix dessert even better is that you can keep it super simple with either homemade frosting or a can of frosting from the store. Just tint the frosting with food coloring and pipe it into the center for an easy shortcut that still looks adorable. If you’re looking for a boxed brownie mix recipe that’s cute, kid-friendly, and party-ready, these Deviled Brownies are an easy win.
Looking for More Easy Easter Desserts? Try These!
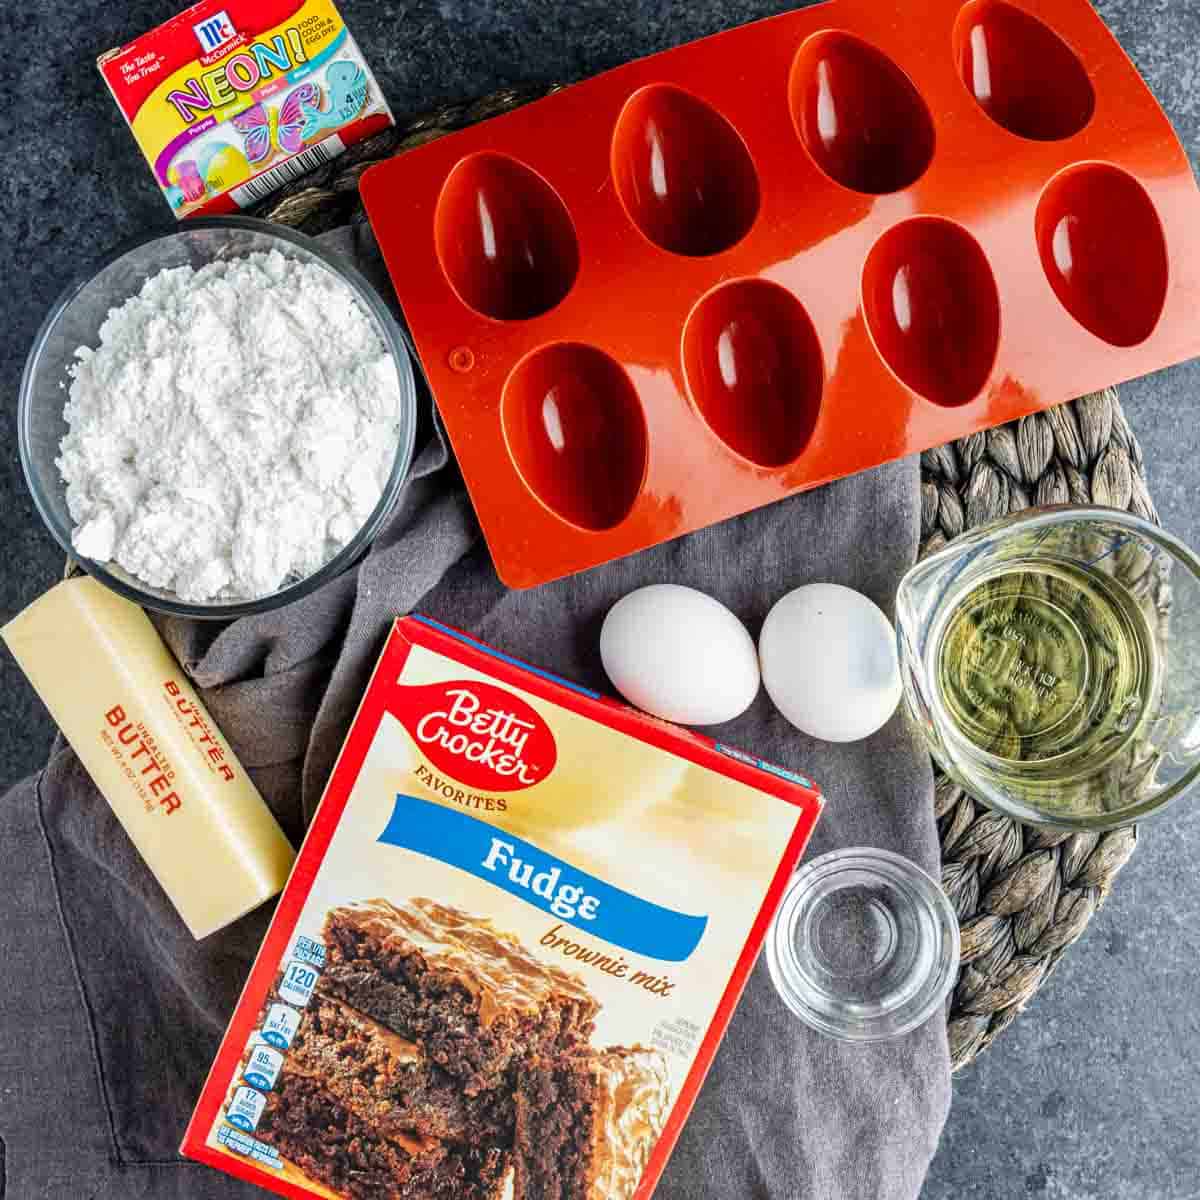
Ingredients You’ll Need
- Box brownie mix – This is the easy base for the whole recipe. Use your favorite brand and prepare it with the ingredients listed on the back of the box. Fudgy-style mixes work especially well for rich, soft brownie bites.
- Ingredients called for on the brownie box – These are usually things like eggs, oil, and water, though that depends on the brand. Follow the package directions exactly so your batter has the right texture.
- Unsalted butter – Softened butter creates a smooth, fluffy frosting with great flavor. If you only have salted butter, you can use it, but the frosting may have a slightly saltier finish.
- Powdered sugar – This sweetens and thickens the frosting while keeping it smooth enough to pipe. Sift it first if it looks lumpy.
- Water or milk – Just a little bit helps loosen the frosting so it becomes light and pipeable. Milk gives a slightly richer texture, while water works perfectly if that’s what you have on hand.
- Vanilla extract – Vanilla adds warmth and rounds out the sweetness in the frosting. Clear vanilla can be a nice choice if you want very bright frosting colors.
- Food coloring of choice – This is what turns the frosting into fun, festive centers. Gel food coloring usually gives bolder shades without thinning the frosting too much, but liquid coloring can work too. The FDA notes that food color additives used in foods are regulated for safety and labeling.
- Egg-shaped mold – You’ll need this silicone mold to give the brownies the perfect egg shape.
Optional shortcut – Canned Frosting – This is not required, but it’s a fantastic time-saver. Eliminate the need for the butter, powdered sugar, water/milk, and vanilla extract. Instead of making homemade frosting, use one can of vanilla or cream cheese frosting, divide it into bowls, tint it with food coloring, and pipe it into the brownie centers. This simple swap makes an already easy Easter dessert even easier.
Step-by-Step Instructions
Step 1 – Prepare the brownie batter. Make the brownie mix according to the package directions using the ingredients listed on the back of the box. Stir until everything is well combined, but don’t overmix.
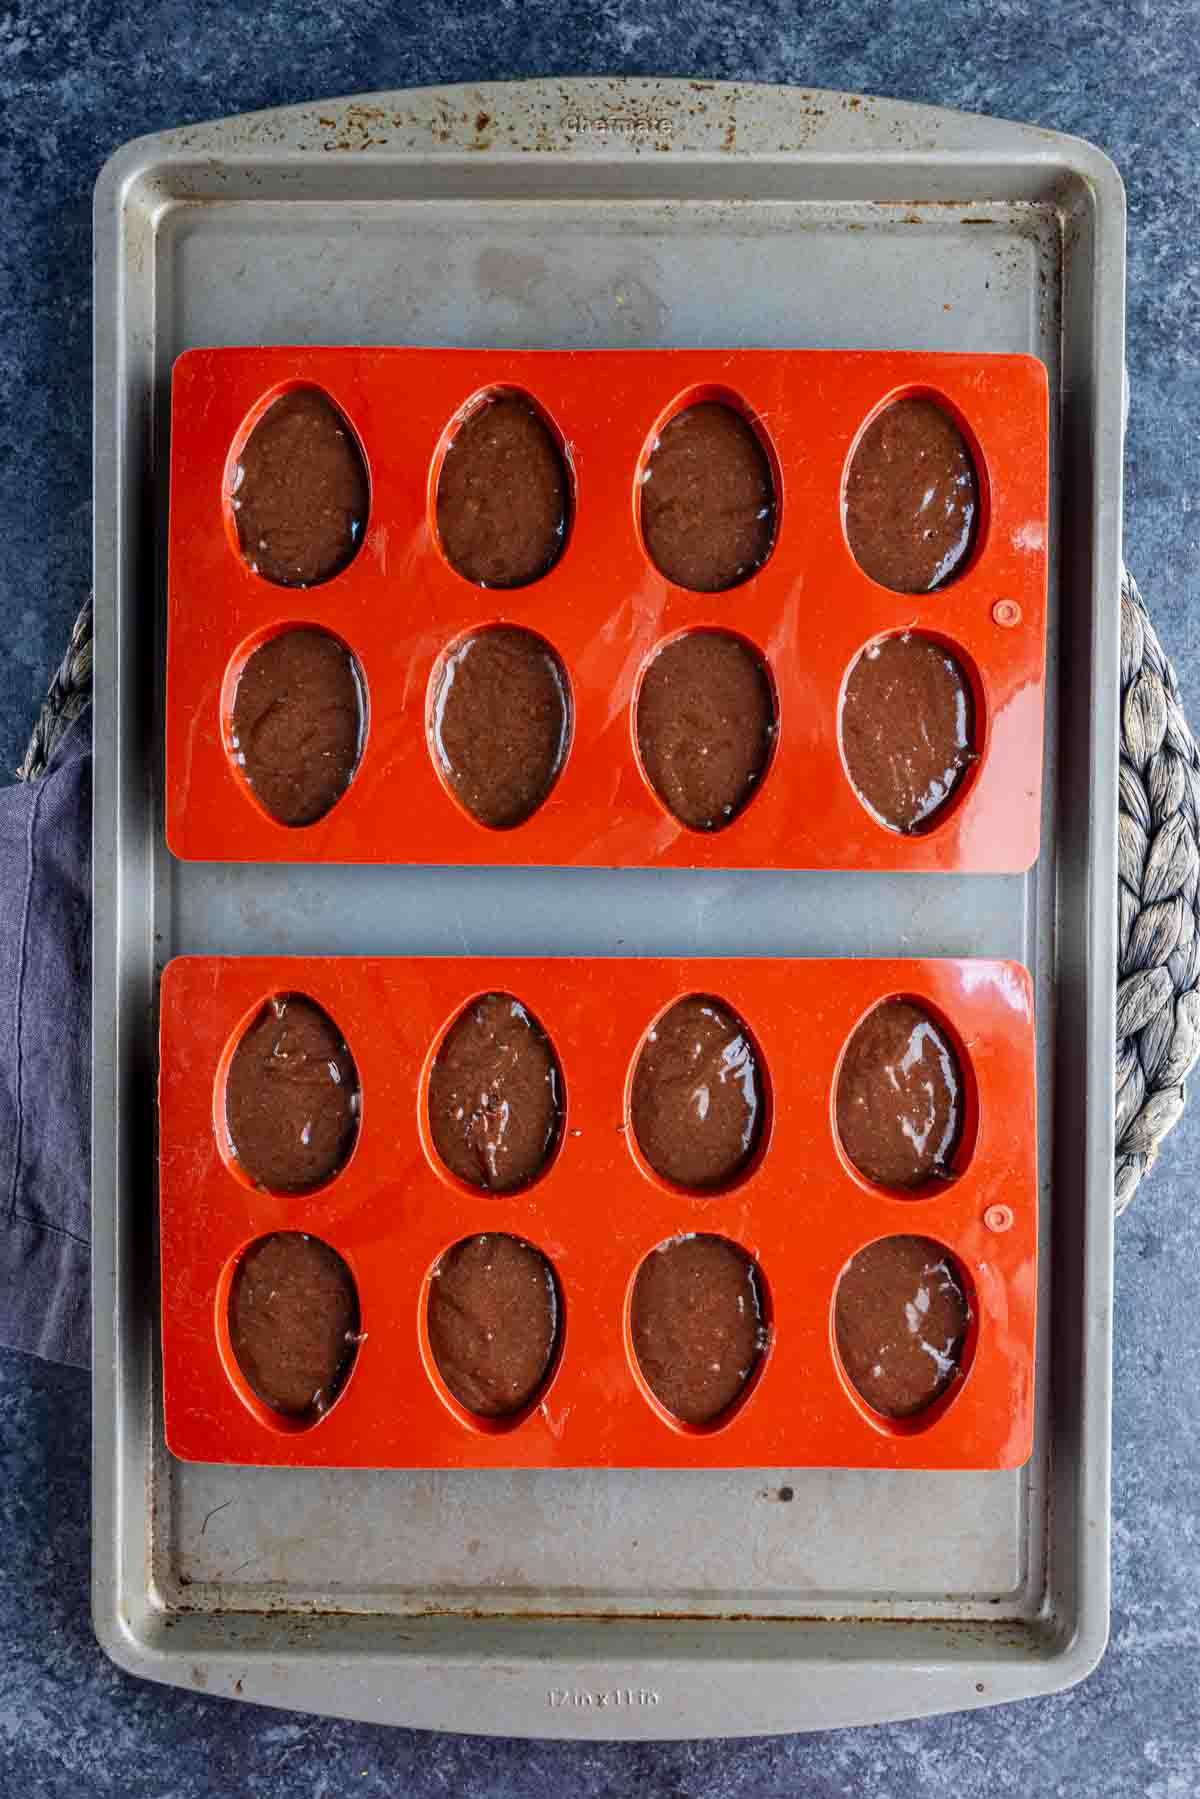
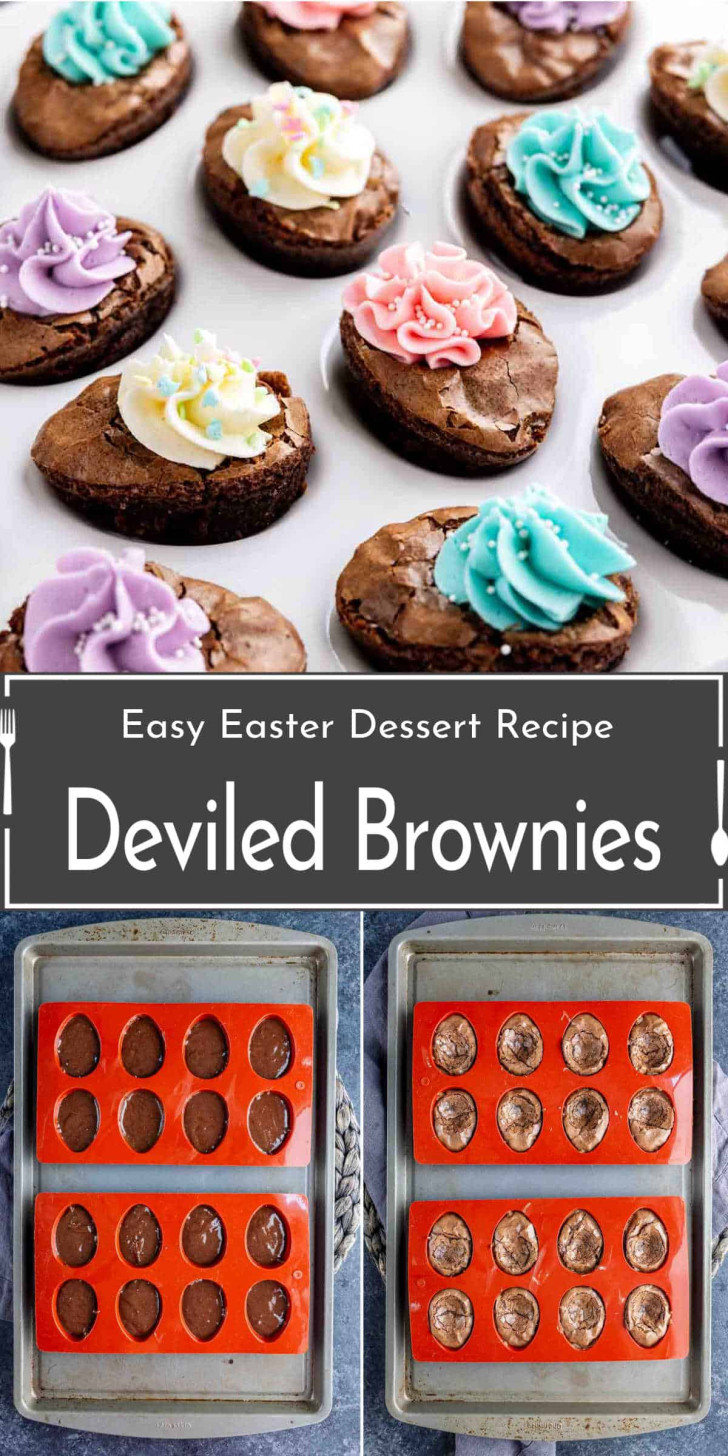
Step 2 – Fill the egg mold. Place a silicone egg mold on a baking sheet so it stays stable while you fill it. Spoon the brownie batter into each cavity, filling each one about 3/4 full. This gives the brownies room to rise without overflowing.
Step 3 – Bake until set. Bake at 350 degrees F for 20 to 25 minutes, or until a toothpick inserted in the center comes out clean or with a few moist crumbs. Keep an eye on them near the end, since brownie mixes can vary a little by brand.
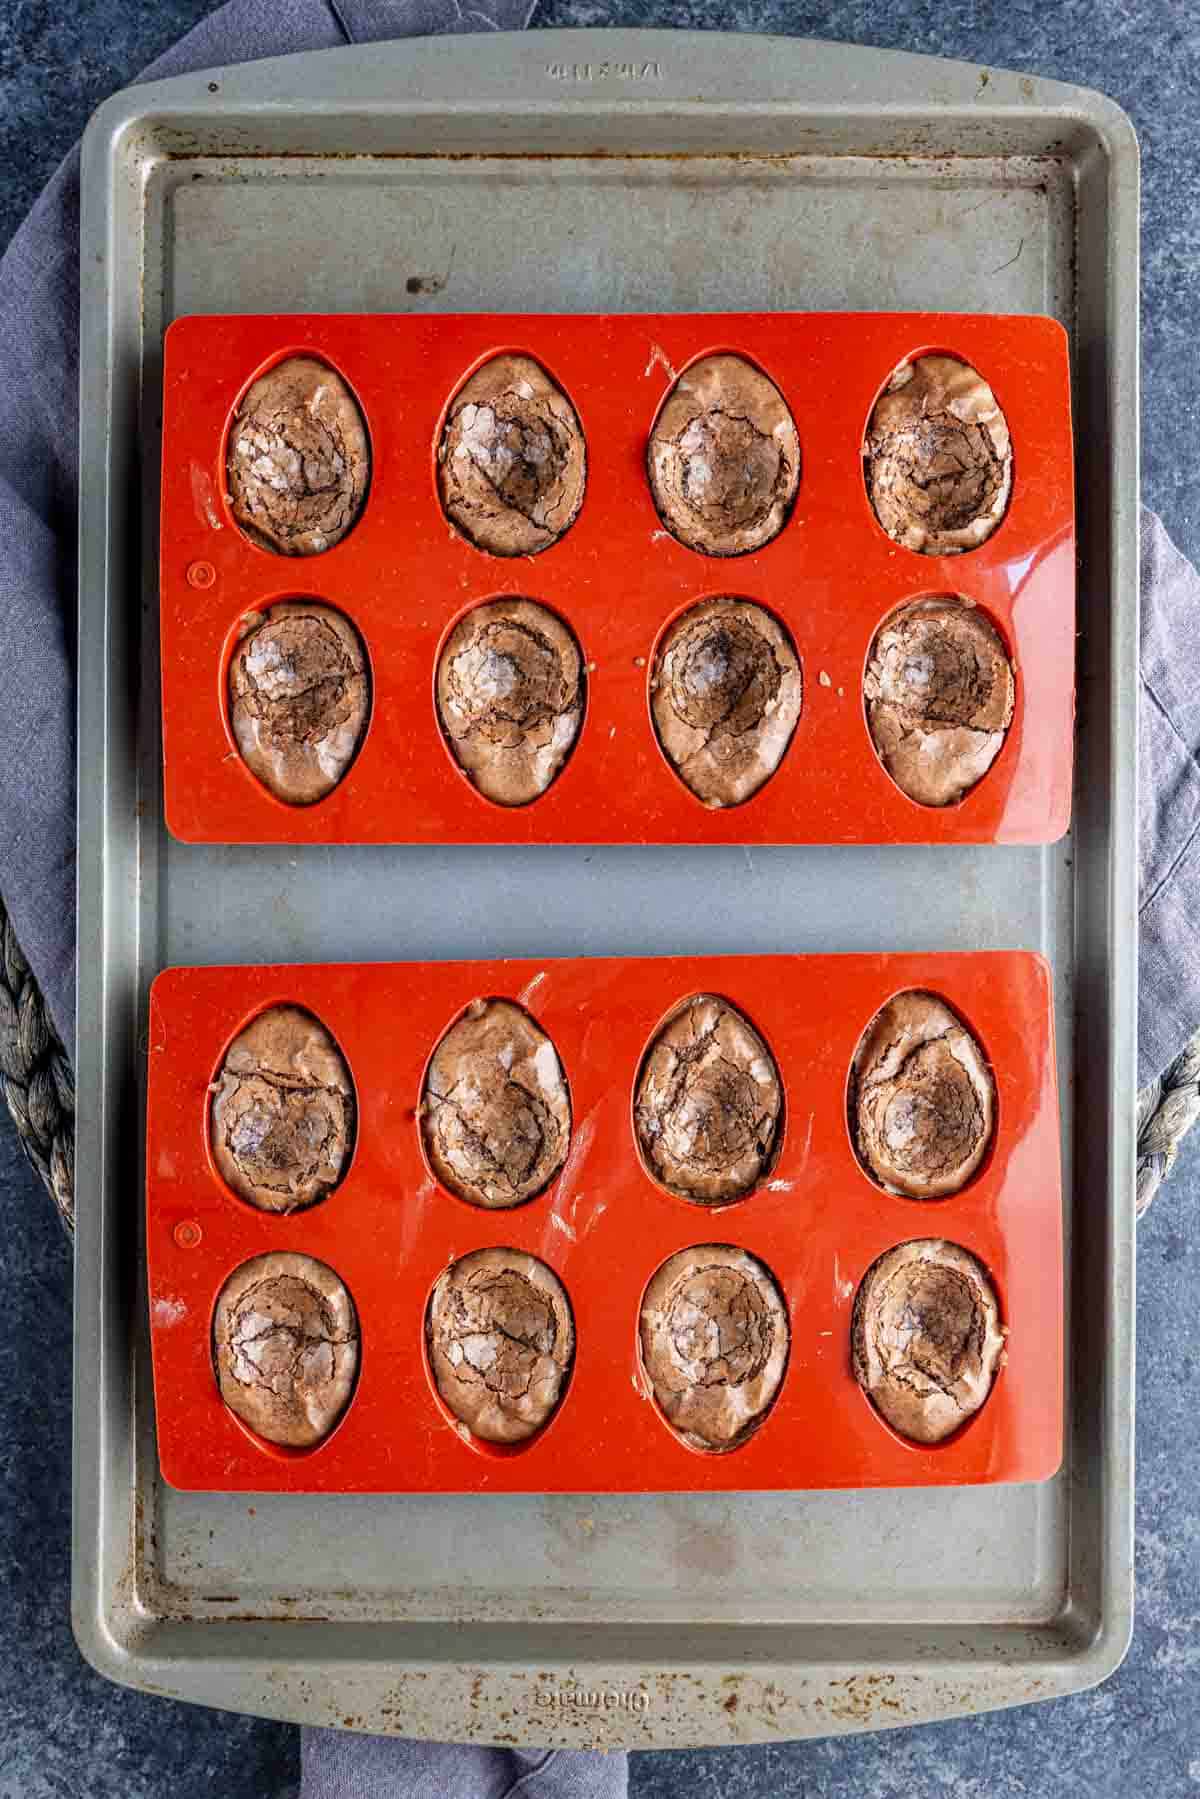
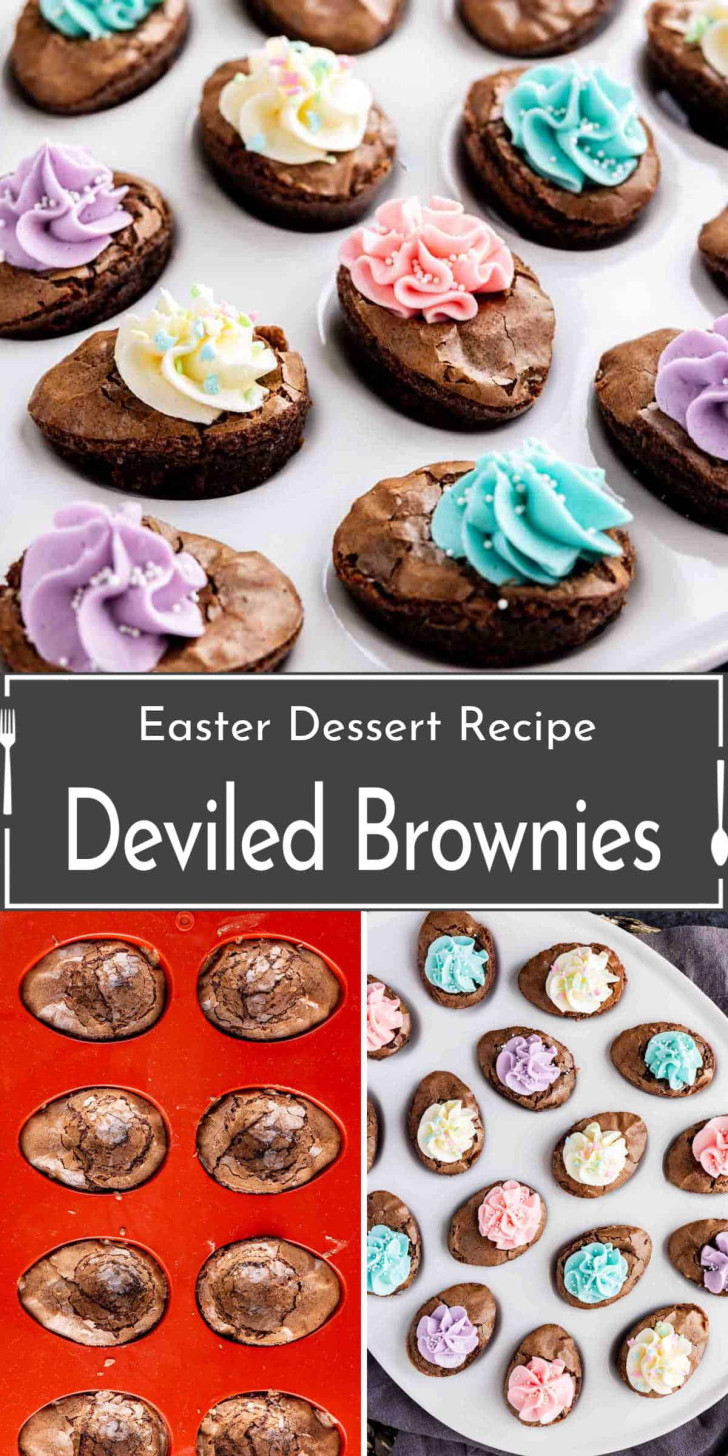
Step 4 – Make the “deviled egg” indent. As soon as the brownies come out of the oven, use the back of a teaspoon to gently press a shallow indent into the center of each brownie. This creates the little well where the frosting will go later.
Step 5 – Cool completely. Let the brownies cool completely in the mold before removing them. This is important because warm brownies are more delicate and can break if you try to pop them out too early.
Step 6 – Make the frosting. While the brownies cool, combine the softened butter, powdered sugar, and 1 tablespoon of water or milk in the bowl of a mixer. Beat on medium-high speed for about 3 minutes.
Step 7 – Add vanilla and whip until fluffy. Add the vanilla extract and keep mixing until the frosting looks light, creamy, and fluffy. If it seems too thick, add a tiny splash more milk or water. If it seems too soft, mix in a little more powdered sugar.
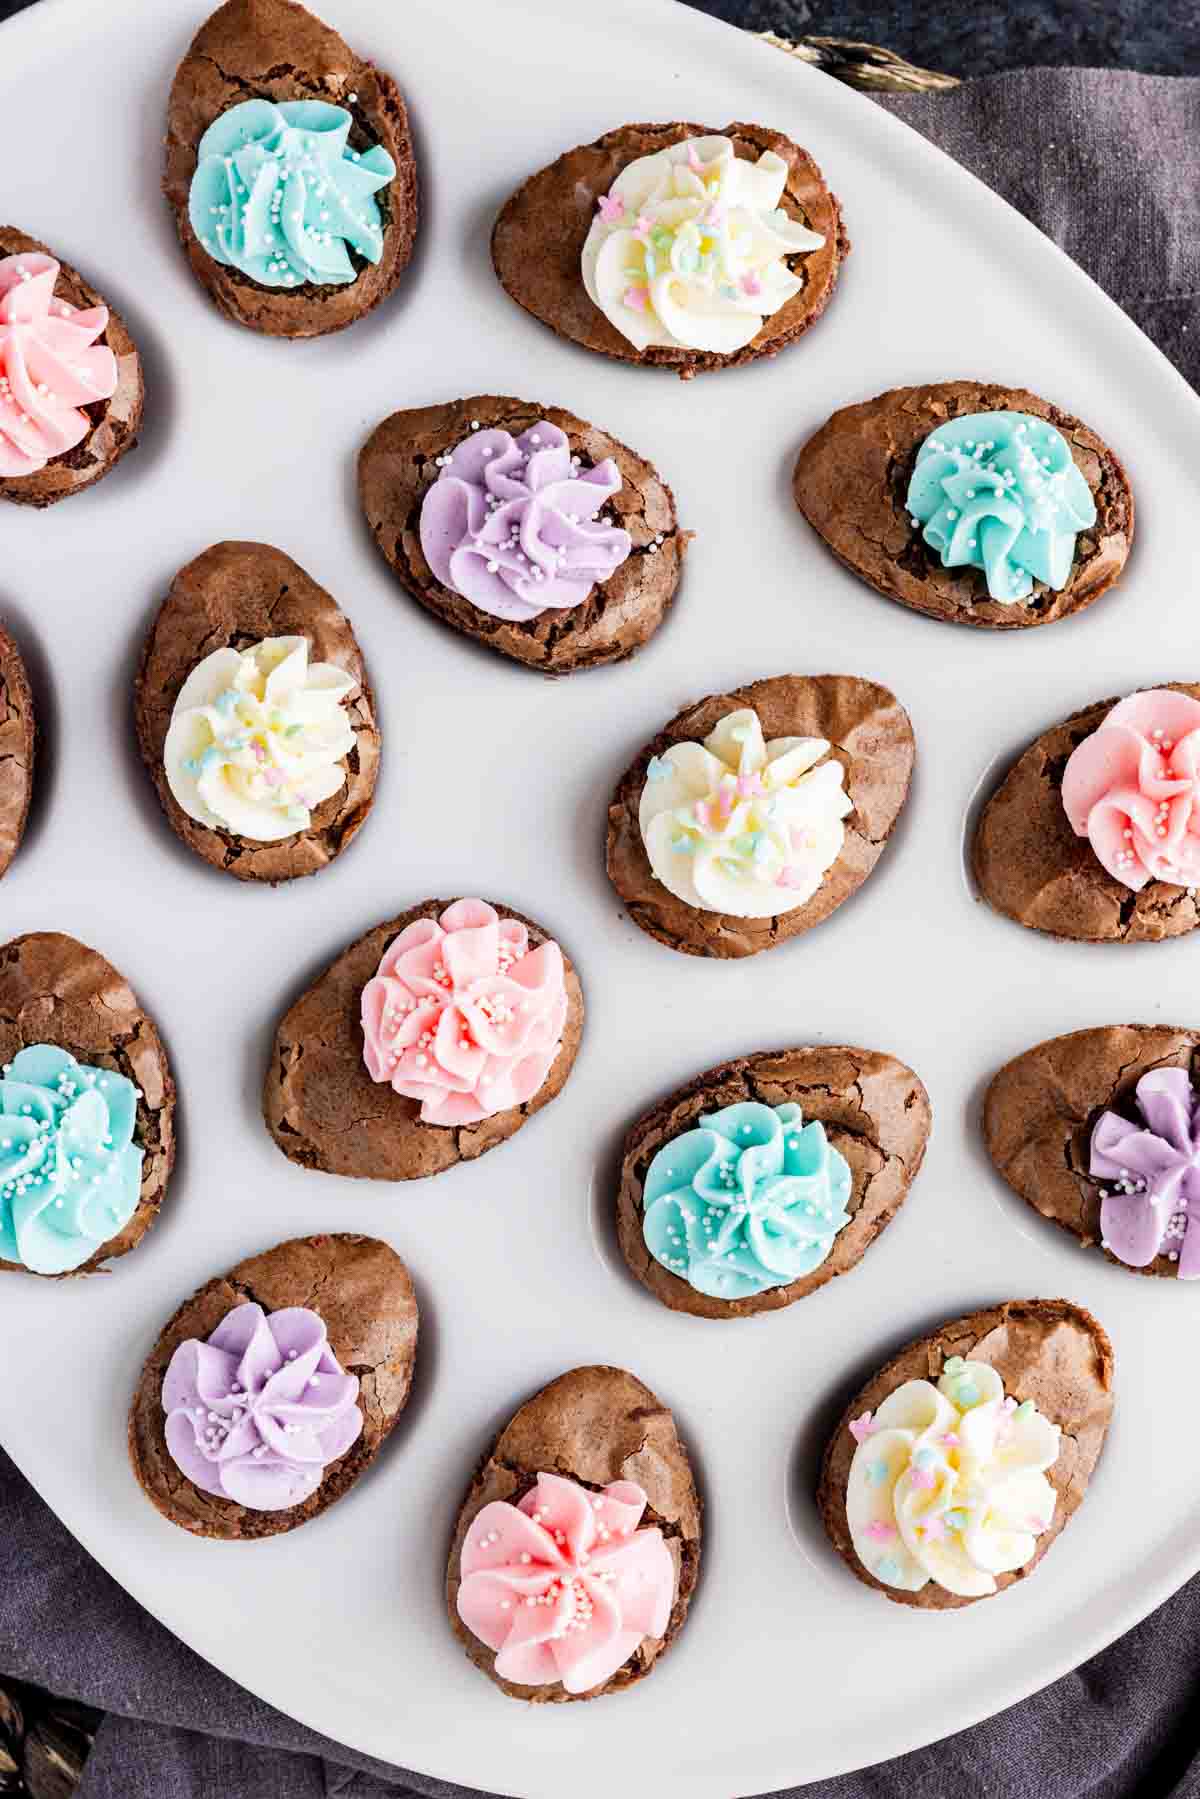
Step 8 – Color the frosting. Decide how many frosting colors you want to make, then divide the frosting evenly into separate bowls. Add a drop or two of food coloring to each bowl and stir until the color is evenly mixed.

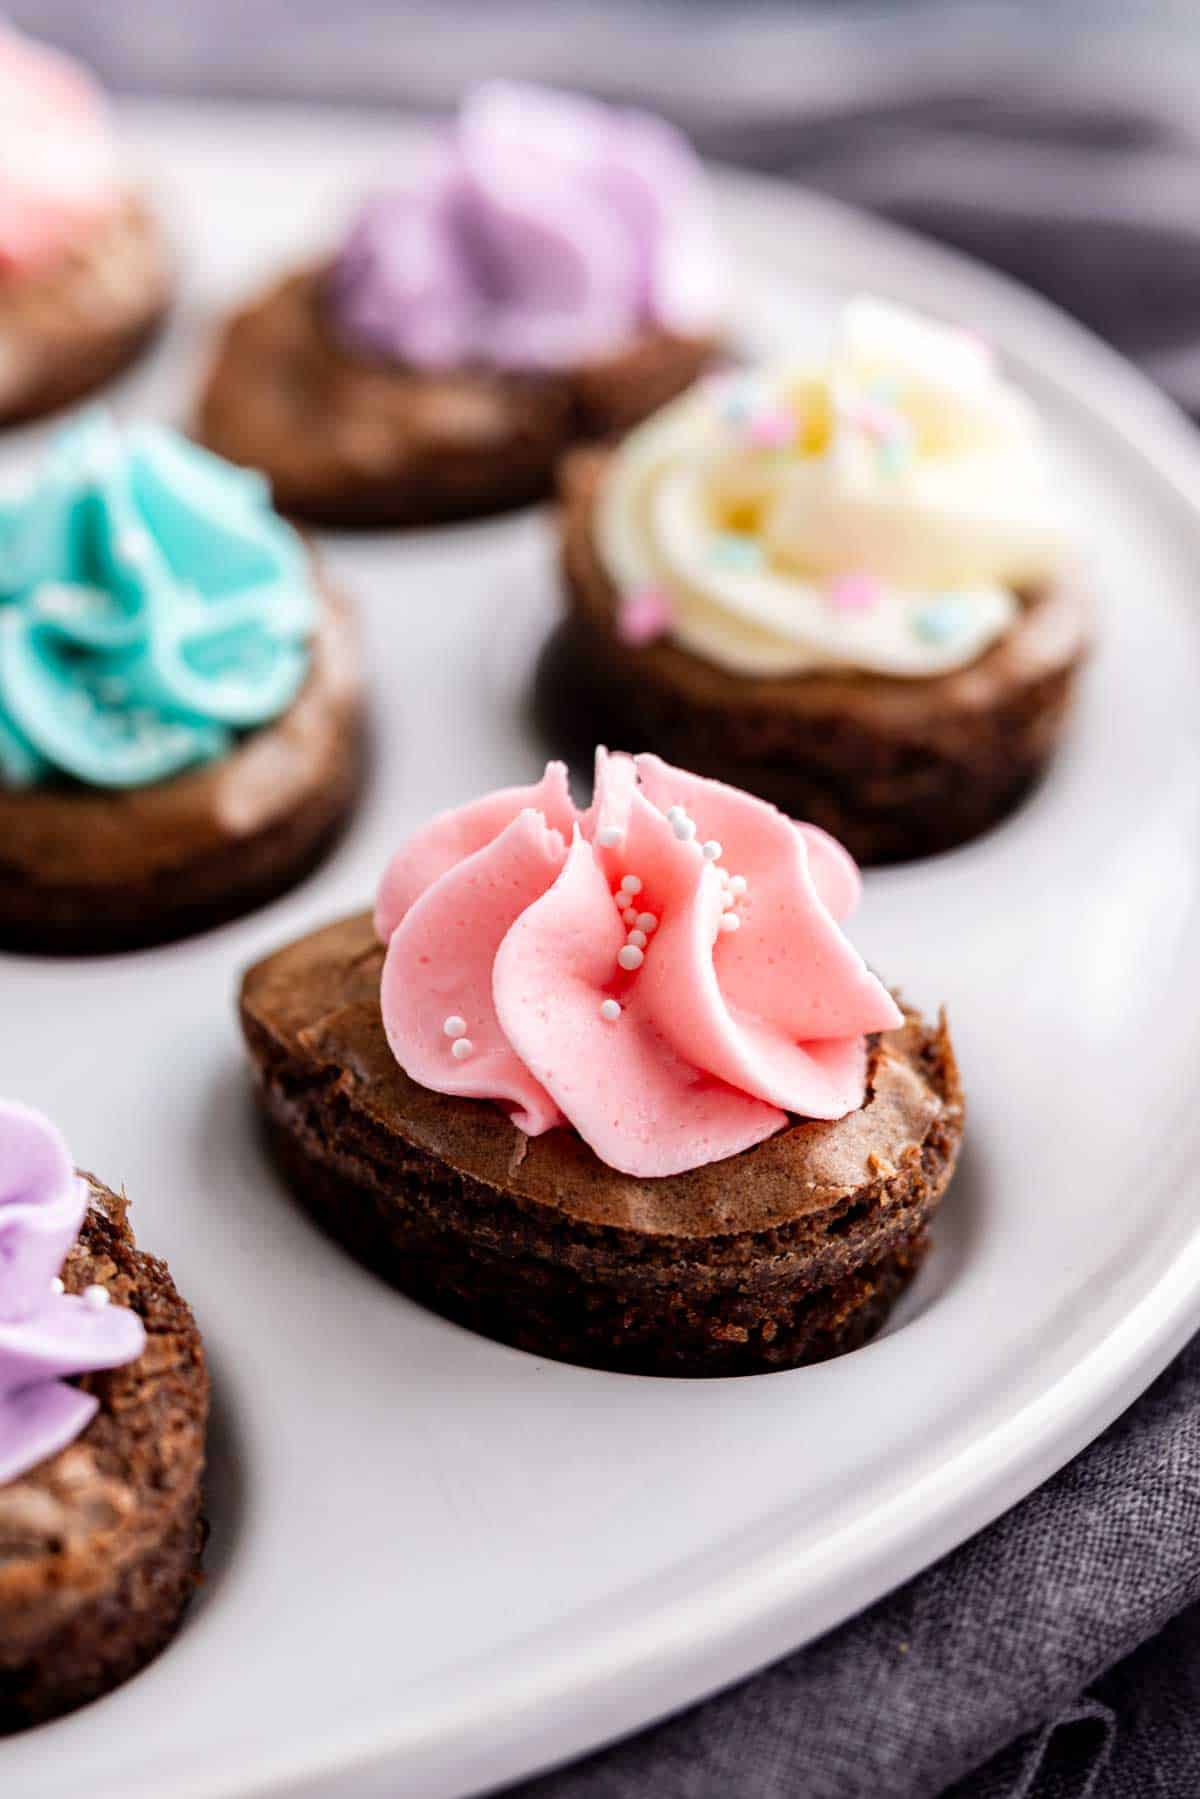
Step 9 – Pipe the frosting into the centers. Spoon each frosting color into a piping bag fitted with a tip, then pipe the frosting into the indents in the cooled brownies. Make the frosting look like a rounded yolk or add swirls for a more playful look.
Step 10 – Serve and enjoy. Arrange the finished Deviled Brownies on a platter and serve. They’re cute, festive, and almost too fun to eat. Almost.
Frequently Asked Questions (FAQs)
Yes, absolutely. In fact, this is one of the easiest ways to simplify the recipe. Just use a can of frosting, divide it into bowls if you want different colors, add food coloring, and pipe it into the brownies.
A fudgy brownie mix is usually the best choice because it stays soft and rich in these small molds. That said, any standard brownie mix should work as long as you prepare it according to the package directions.
Yes, for the egg shape, a silicone egg mold is the easiest way to get the look. Silicone makes removal easier than a rigid pan and helps create those cute deviled-egg-style brownies.
Yes. You can bake the brownies a day ahead, store them once cooled, and decorate them the next day. This makes party prep much easier.
Let them cool completely before removing them from the silicone mold. If your mold tends to stick, a very light coating of nonstick spray can help, but many silicone molds release baked goods well once cooled.
A large star tip makes a pretty swirl but a round tip will work as well. Honestly, even a zip-top bag with the corner snipped off can do the job.
Storage
These brownies are easy to store, which is another reason they’re such a practical party dessert.
If the brownies are unfrosted, keep them in an airtight container at room temperature for a short period or refrigerate them for longer freshness.
If they are frosted, especially with a frosting that includes butter or milk, it’s safest not to leave them out for too long. Perishable foods should not sit at room temperature for more than 2 hours, and your refrigerator should be kept at or below 40 degrees F.
For refrigeration, place the brownies in a single layer or separate layers with parchment paper so the frosting doesn’t smear. Store in an airtight container.
For freezing, place the brownies on a tray until firm, then transfer to a freezer-safe container with parchment between layers. Frozen foods stored at 0 degrees F remain safe indefinitely, though texture and flavor are best within a more reasonable time frame for quality.
To serve after chilling, let the brownies sit at room temperature for a bit so the texture softens and the frosting becomes creamier again.
These don’t really need reheating, since they’re meant to be served as decorated brownie bites. But if you’ve frozen unfrosted brownies, thaw them first, then decorate before serving for the freshest look.
Like this recipe?
Make sure to follow us on Instagram and Pinterest for more recipes like this.
Deviled Brownies
Ingredients
- 1 box Brownie mix , + ingredients on back of box
- 1 cup Unsalted Butter, softened
- 1 pound Powdered sugar
- 1 tablespoon Water or milk
- 2 teaspoons Vanilla extract
- Food coloring of choice
Instructions
- Make brownie mix according to package instructions.
- Place silicone egg mold on a baking sheet and spoon brownie mix into the mold, filling each cup approximately ¾ of the way full.
- Bake at 350 degrees F for 20-25 minutes, or until a toothpick stuck in the center comes out clean.
- When you remove the brownies from the oven, immediately press the back of a teaspoon into the brownie, creating an indent in the area where the egg yolk would be on a hard-boiled egg.
- Let the brownies cool completely in the mold before gently removing.
- While the brownies cool make your frosting. Combine softened butter, powdered sugar, and 1 tablespoon of water or milk in the bowl of your mixer. Mix together on medium-high speed for 3 minutes.
- Add the vanilla extract and continue to mix until the frosting is light and fluffy.
- Decide how many colors of frosting you want to make and divide the frosting evenly into the number of bowls needed.
- Add a drop or two of food coloring to each bowl and mix.
- Using a frosting bag and tip fill each brownie bite with frosting.
Nutrition
