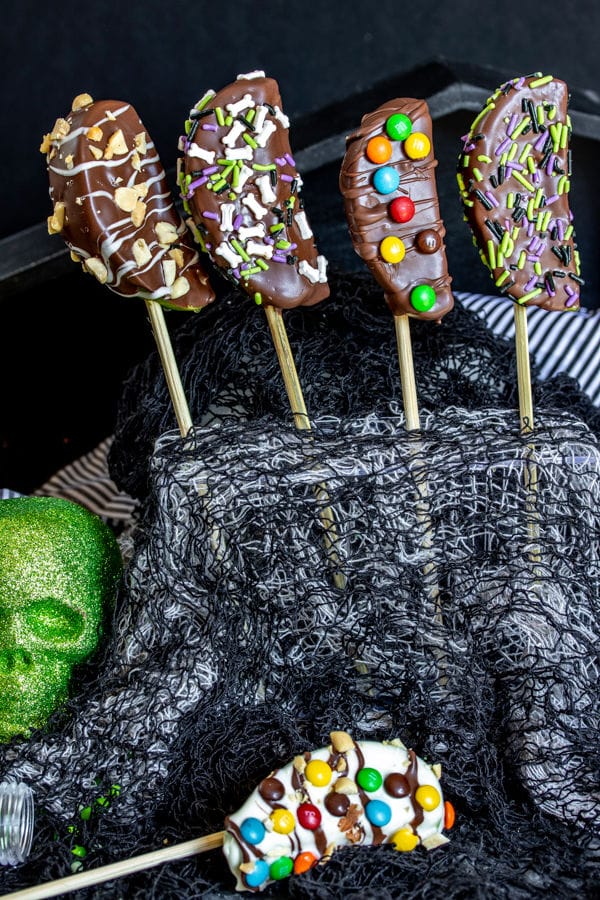
Chocolate Covered Apple Kabobs
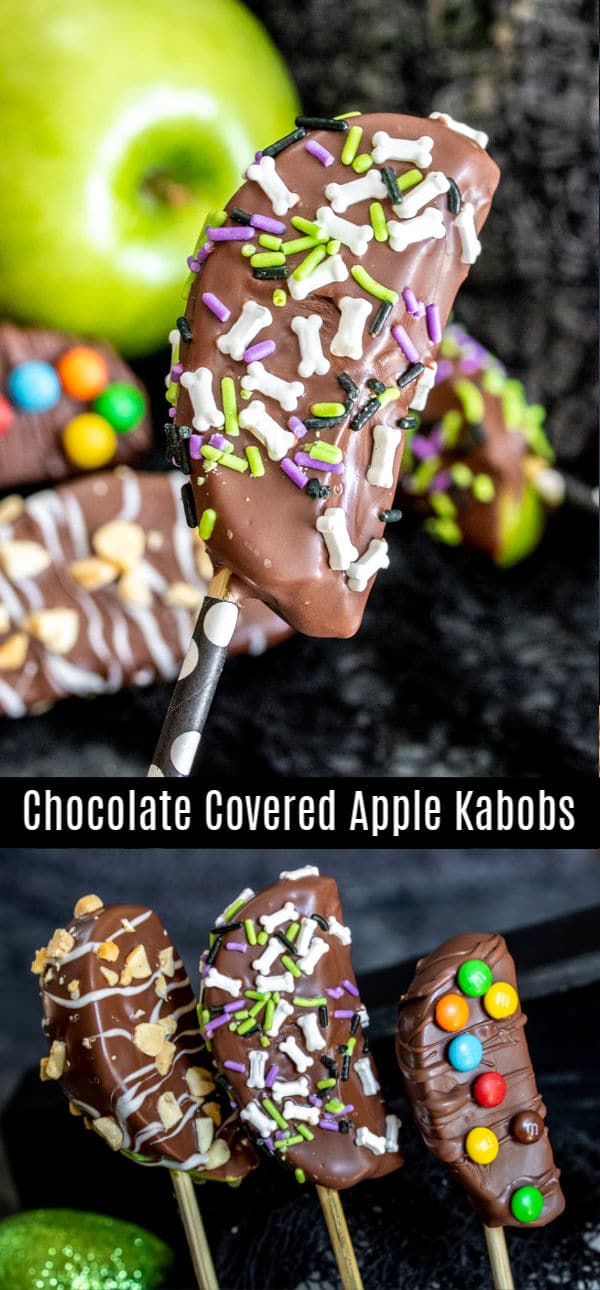
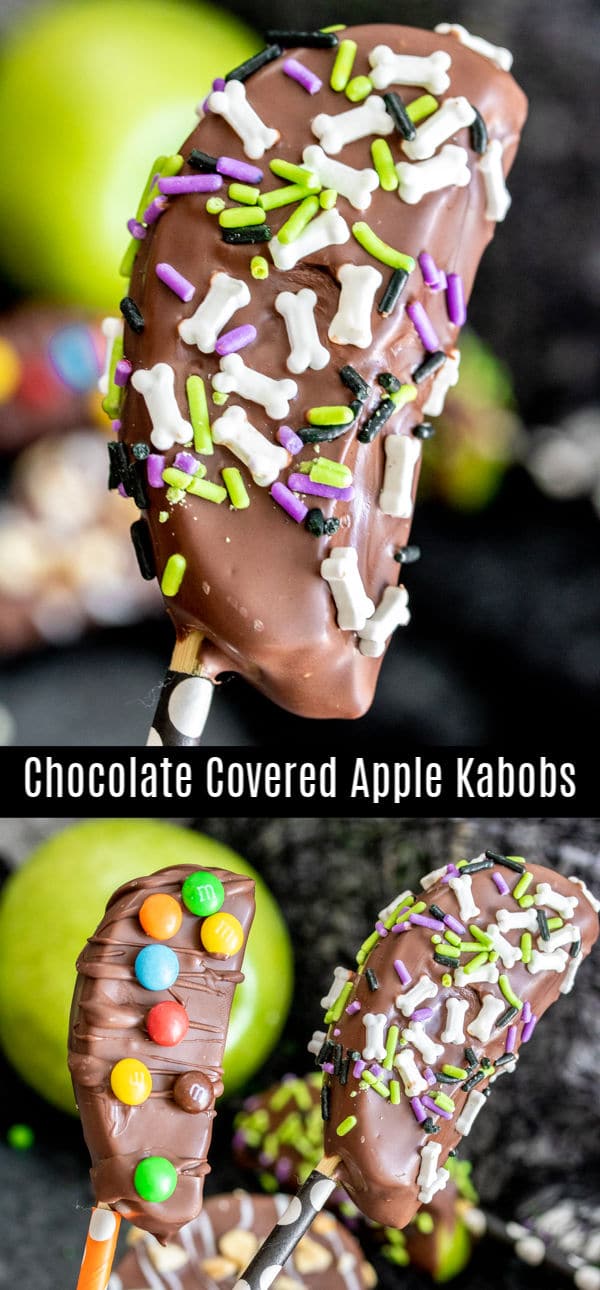
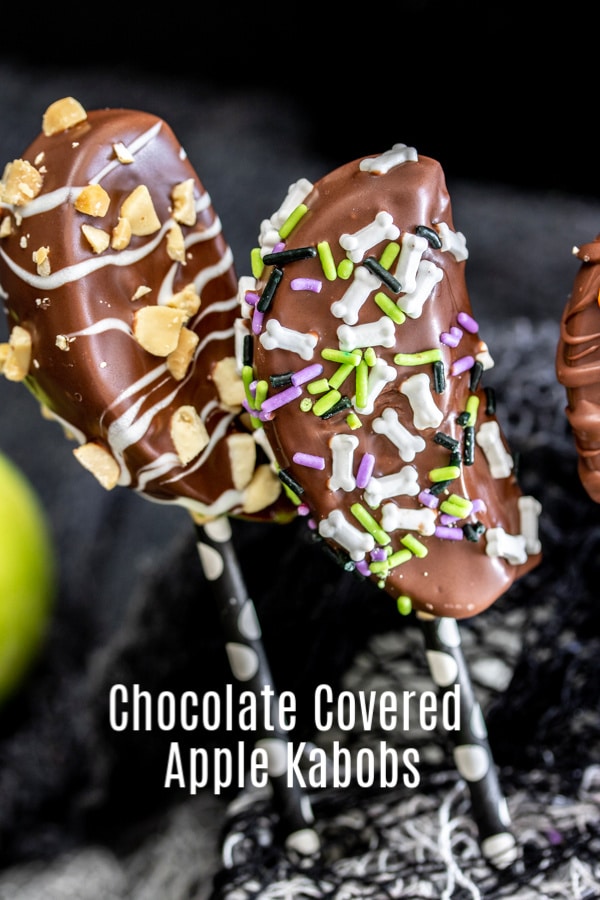
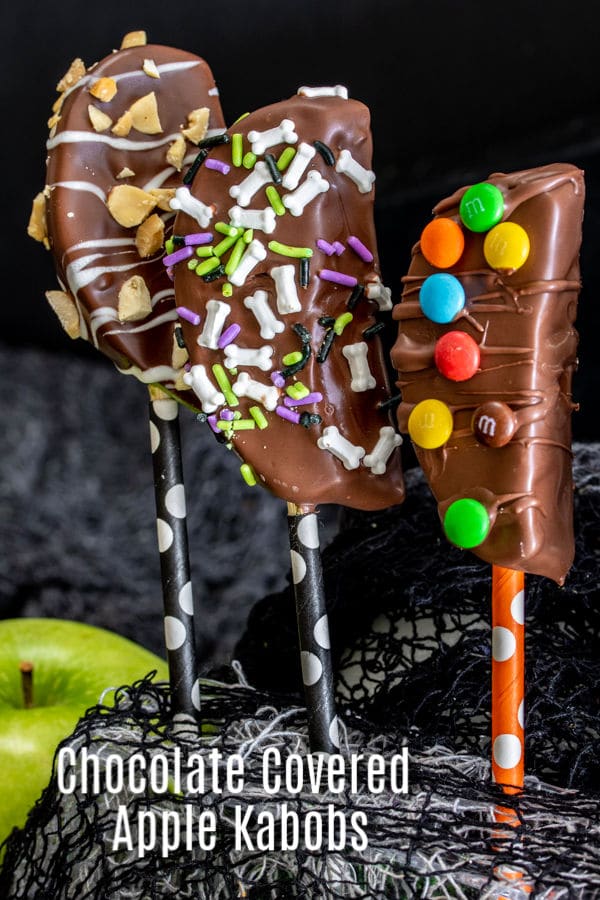

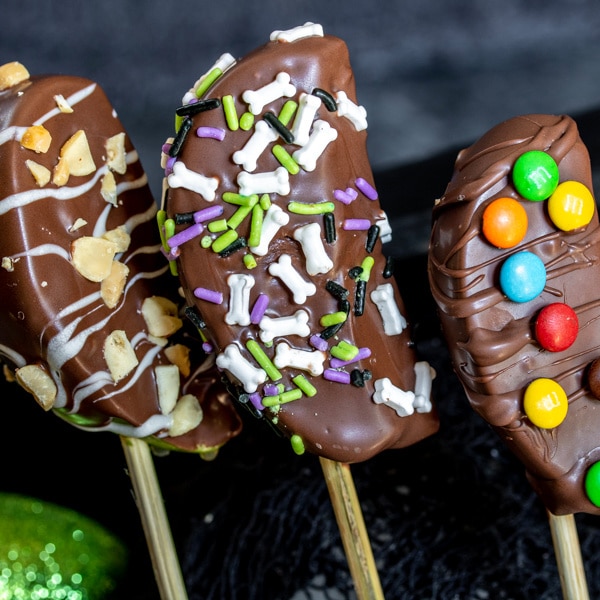
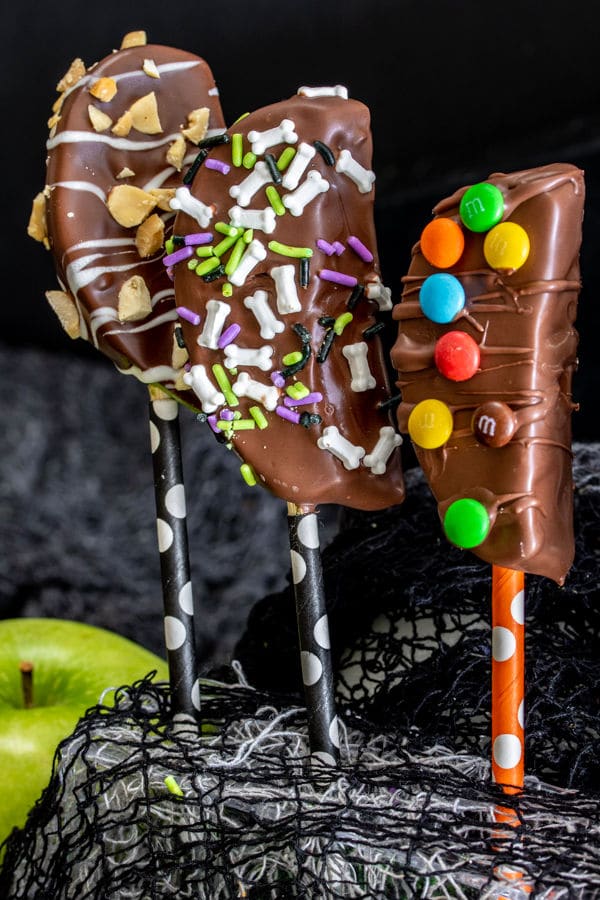
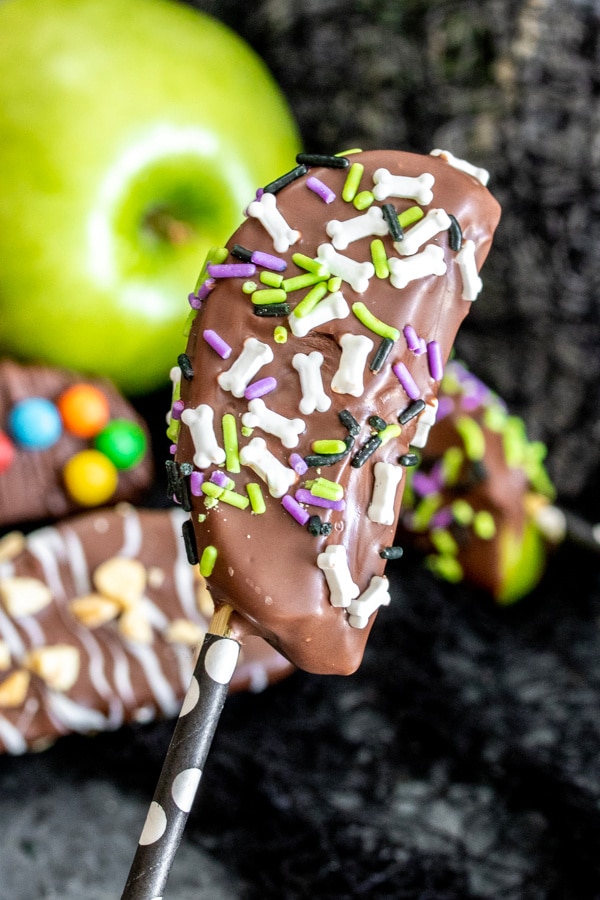
These Chocolate Covered Apple Kabobs are chocolate dipped apples coated in nuts and candy to make a fun fall treat for your next Halloween party!
Chocolate Covered Apple Kabobs
These easy Chocolate Covered Apple Kabobs are a simple way to serve candied apples at a Halloween party. I LOVE caramel apples, they’re delicious AND pretty, but who wants to stand around eating a whole apple when you’re at a party?
This simple recipe uses apple slices, skewers them on a stick, and then you dip them into melted chocolate and sprinkle them with your favorite candies. It’s the perfect way to serve candied apples at this year’s Halloween party.
Note: This post may contain affiliate links. That means if you click on a link and make a purchase we may receive a small commission. Thank you!
What You Need to Make Chocolate Covered Apples:
- 3 large Granny Smith Apples (you can use red apples if you prefer!)
- Wooden Skewers – we used these skewers and trimmed them using scissors.
- Chocolate – We used Ghiradelli Melting Wafers because they melt smoothly and firm up quickly after dipping. If you cannot find these in your grocery store you can use chocolate chips and/or almond bark.
- Toppings – Chopped peanuts, almonds, or walnuts, mini M&Ms, mini Reese’s pieces, mini marshmallows, Halloween sprinkles, etc.
How to Make Chocolate Covered Apple Slices:
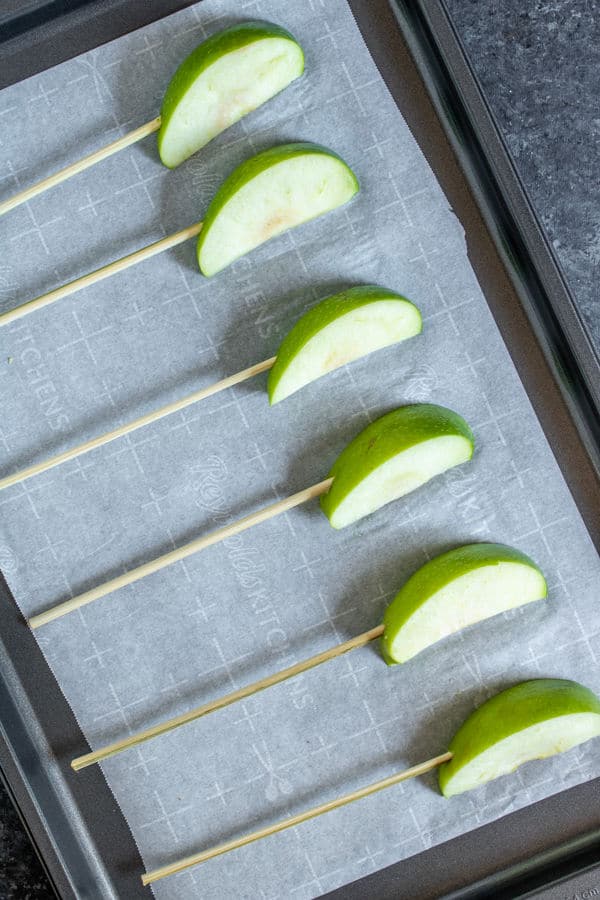
- Cut each apple into 6-8 slices. This depends on the size of the apple. You want the apple slices to be about 1 – 1/5 inches thick.
- Push a skewer into each apple slice.
- Melt your chocolate according to package instructions. I place my melting chocolate in a large coffee mug and use my microwave to melt the chocolate by heating it for 30 seconds at a time and stirring in between until it is melted and smooth.
- Dip the apple slice into the melted chocolate making sure to cover them completely. Lightly tap the skewer against the edge of your mug 3 or 4 times to remove excess chocolate.
- Sprinkles, and chopped nuts can be added right after dipping but heavier toppings like mini M&Ms will need to be added once the chocolate begins to firm up otherwise they will slide off. Let the chocolate harden for about 30 seconds, to the point that it is still wet but it is starting to firm up, and then sprinkle with your toppings.
- If you want you can use another flavor of melted chocolate to drizzle over the apple to add another layer of color. This is optional.
- Place the apple slice, skewer down, into a mug that is tall enough that it doesn’t tip over but not so tall that it touches the apple slice.
- Once the chocolate is firm these are ready to serve.
Can You Make Chocolate Covered Apples Ahead of Time?
Yes. You can dip the apples the day before and store in an airtight container in the refrigerator. Remove from the fridge at least 1 hour before serving to let the chocolate come to room temperature.
How to Serve Chocolate Covered Apple Kabobs:
You can lay your dipped apple slices on a platter to keep things simple. If you’d like to get a little more creative you can place a piece of styrofoam in a Halloween box, pumpkin, cauldron, etc. and push the skewers into the styrofoam. Just make sure your container is tall enough and heavy enough that it won’t tip over when the apple kabobs are added.
Looking for More Easy Halloween Recipes?
- Halloween S’mores Dip
- Werewolf Chow
- Frankenstein Marshmallow Pops
- Mummy Dogs
- Nutter Butter Boos
- Mummy Mallows
- Witch’s Brew Brownies
- Ghost Goo Cupcakes
- More Halloween Recipes…
Like this recipe?
Make sure to follow us on Instagram and Pinterest for more recipes like this.
Chocolate Covered Apple Kabobs

Ingredients
- 3 large Granny Smith Apples
- 10 ounces Ghiradelli Chocolate Melting Wafers
- 10 ounces Ghiradelli White Chocolate Melting Wafers
- Toppings – Chopped peanuts, almonds, or walnuts, mini M&Ms, mini Reese’s pieces, mini marshmallows, Halloween sprinkles, etc.
Instructions
- Remove core and cut each apple into 6-8 slices. This depends on the size of the apple. You want the apple slices to be about 1 – 1/5 inches thick.
- Push a skewer into each apple slice.
- Melt your chocolate according to package instructions. I place my melting chocolate in a large coffee mug and use my microwave to melt the chocolate by heating it for 30 seconds at a time and stirring in between until it is melted and smooth.
- Dip the apple slice into the melted chocolate making sure to cover them completely. Lightly tap the skewer against the edge of your mug 3 or 4 times to remove excess chocolate.
- Sprinkles, and chopped nuts can be added right after dipping but heavier toppings like mini M&Ms will need to be added once the chocolate begins to firm up otherwise they will slide off. Let the chocolate harden for about 30 seconds, to the point that it is still wet but it is starting to firm up, and then sprinkle with your toppings.
- If you want you can use another flavor of melted chocolate to drizzle over the apple to add another layer of color. This is optional.
- Place the apple slice, skewer down, into a mug that is tall enough that it doesn’t tip over but not so tall that it touches the apple slice.
- Once the chocolate is firm these are ready to serve.

This recipe was first published on 10/28/14. It was republished with updated instructions and photos on 9/25/19.
Look at all those toppings! Mm, these look scrumptious!
These sound so good! Found you on The DIY Dreamer link up =)
I LOVE this kabob idea!
As much as I am in love with coated apples, they are SO messy to eat! Problem solved!
Yippee!
🙂 Anna
Thanks so much Anna!
LOVE this idea! I’m not a huge fan of caramel apples on a stick (not enough caramel to apple ratio!), but I love the idea of slicing them first, then coating them in caramel and/or chocolate! Pinning this one!!
LOL, I agree, more caramel/chocolate, less apple 😉
What a FUN idea! Way to go on being very creative. So glad I stopped by from Thurs Fav Things Party. Carrie, A Mother’s Shadow
This is a fabulous idea. They look delicious and they are portable…great combination. Thanks for sharing at my Creative Ways Link Party.
Blessings,
Nici
I love this idea! I really love caramel (Or chocolate) apples but they can be so messy to eat and I usually don’t eat the entire thing. I’m going to do this for our Halloween party tomorrow! Another great idea from the BFF’s! 🙂
Thanks
Those look absolutely delicious!!! Found your blog via Thrifty Thursday! 🙂 Pinning! Thank you for sharing!
Brilliant. I have a ton of apples and will definitely be making these for the kiddos.
Cheers,
Stephanie
What a great idea! My son will love these. Found you at the Weekend Retreat link party!
Thanks for stopping by Erica 🙂
Kat, I love this idea! It really would be perfect for a classroom treat. Pinned and tweeted!
Thanks so much Blair 🙂
Cute idea! Pinning now!
I stopped over from Say G’Day Saturday.
~Lisa
These look so yummy! How did you get the caramel to stay on the apple? Thanks for linking up to the Creative Exchange!
Liz, I used the caramel cubes, the kind individually wrapped in plastic, and melted them in the microwave. We were worried it might not stick to a cut apple but it wasn’t a problem (thank goodness!)
Hi Kat, these Apple Kabobs look delicious and fun! What a great idea! Visiting from Marvelous Monday Link Party, have a great week!
Can’t wait to try these! It’s so much better than trying to eat an entire apple!
Thanks Leah, I can never make it through a whole candied apple but these were perfect.
Oh, these look amazing! So fun!
http://makingmemorieswithyourkids.com
Fruit does of course always taste so much nicer when covered with chocolate…lol. These look awesome and are definitely easy to munch on.
Thanks for linking up to Marvelous Monday on Smart Party Planning.
These are awesome! So glad I found them on Motivation Monday, sharing for sure!!
Thanks Michelle, we appreciate it!
These look so good, they’d be great for Thanksgiving too.
I think so too. I mean really, when is it NOT a good time for chocolate-covered anything? 😉
Those are just too cool! Sharing on my FB page. Thanks for linking them up at Monday Funday!
Thanks Katie, they were delicious too!
Stopping by from the Create Link Inspire link party. These look delicious! I love the idea of making them more bit size. I will definitely have to give them a try. Thanks so much for sharing!
Thanks for linking up to Motivation Monday!
How fun!! those are adorable and look delicious too! thanks for linking up to the Create LInk Inspire party. You are being featured today on Nap-Time Creations in some great fall food!! Check it out! Emily
I’m drooling right now! Pinned. Lou Lou Girls
how far in advance can these be made?
Thanks
Since the apples are cut I wouldn’t make them more than two days ahead of time. If you are making them ahead of time you will want to dip your apple slice in some watered down lemon juice to help keep it from turning brown.
Do the apples brown if made the night before?
To help keep them from browning we soaked them in lemon juice diluted with water before dipping them. They will still brown some if they are left overnight (wrapping in plastic wrap to keep them from being exposed to the air helps).
You can also dip them so that they are completely covered in chocolate. Then they won’t brown.
Hi, How can I get the Carmel stick to the apple slices? When I tried it the Carmel just made a big mess.
,
Hi Chrissy, we dipped our apples in chocolate for the very same reason. Unfortunately caramel just doesn’t seem to like to stick to cut apple pieces.
Does the chocolate get really hard and crumbles when you eat it, or does it stay a little soft?
We just melted the chocolates and dipped the apples so the chocolate did crack but if you wanted it to be softer you could make a ganache by melting the chocolates with some heavy cream.
I guess the chocolate really sticks to the wet apple side? I’d be worried it’d just slide off.
The chocolate sticks to the wet apple with no problems that is actually why we used it. Originally it was going to be caramel but caramel slid off.
Great idea. Thanks for sharing. How do you prevent the apples from turning brown?
Put them in a lemon water mixture.