Oreo Magic Bars
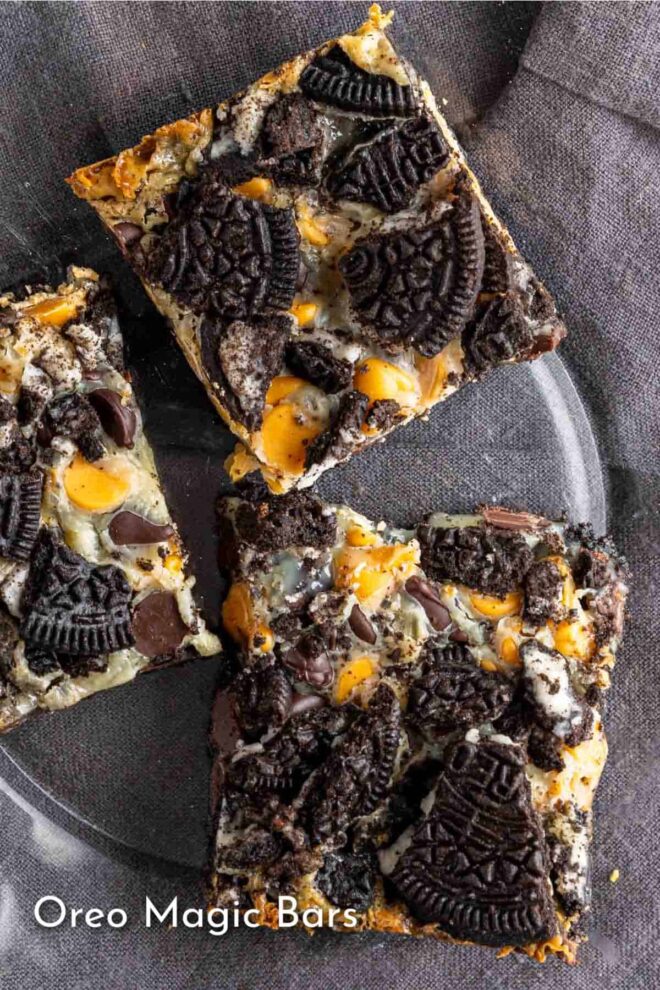
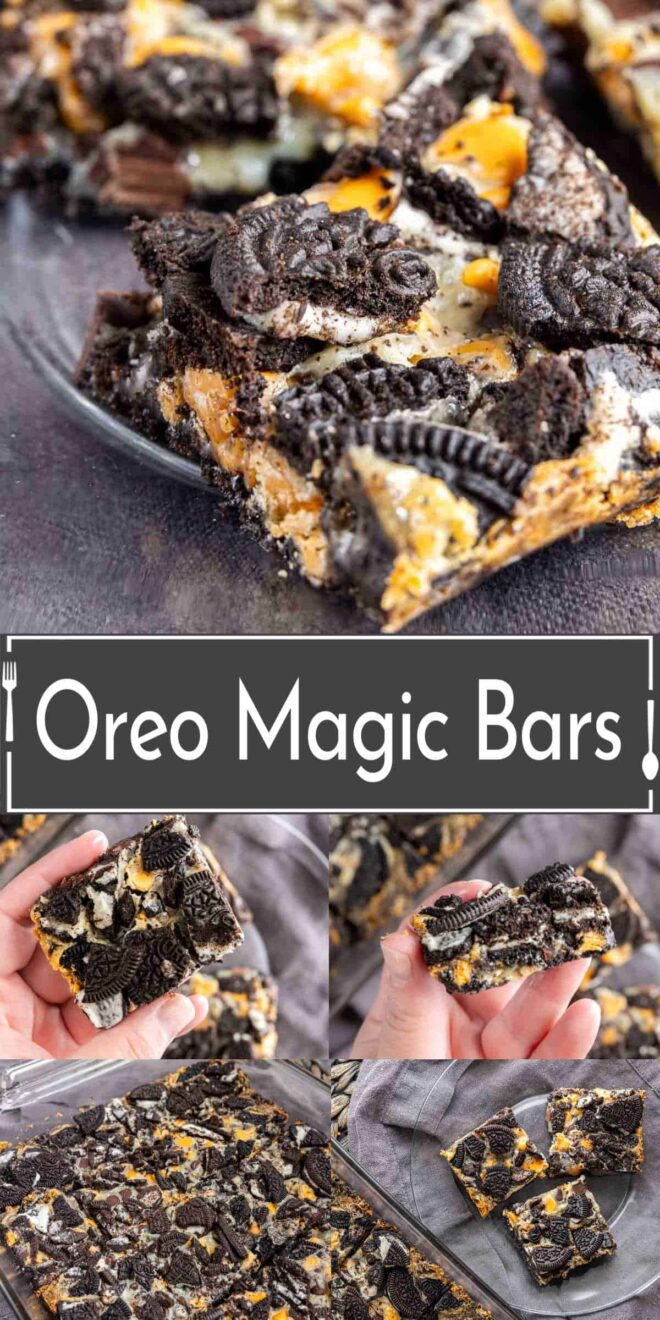
These simple Oreo Magic Bars are a fun twist on the classic 7 layer bar with layers of chocolate, butterscotch and Oreo baked together into an ooey, gooey dessert bar that you won’t be able to resist.
A friend of ours always makes these for parties and we finally convinced her that the recipe needed to be shared with the world! You can thank us later ;).
Oreo Magic Bars are the perfect way to elevate your traditional magic bars experience to a whole new level. These sweet treats are easy to make and guaranteed to impress your friends and family.
Note: This post may contain affiliate links. That means if you click on a link and make a purchase we may receive a small commission. Thank you!
Classic Magic Bars
The terms “classic magic bars,” “magic cookie bars”, “Dolly Madison bars,” and “7-layer bars” are often used interchangeably to refer to a delicious dessert that consists of several layers of sweet ingredients. While the exact names may vary regionally or among different bakers, both typically describe the same type of treat.
These bars typically consist of a graham cracker or cookie crust, followed by layers of chocolate chips, butterscotch chips, shredded coconut, chopped nuts (such as walnuts or pecans), and sweetened condensed milk. Some variations may include additional ingredients like toffee bits or white chocolate chips.
Ingredients You’ll Need
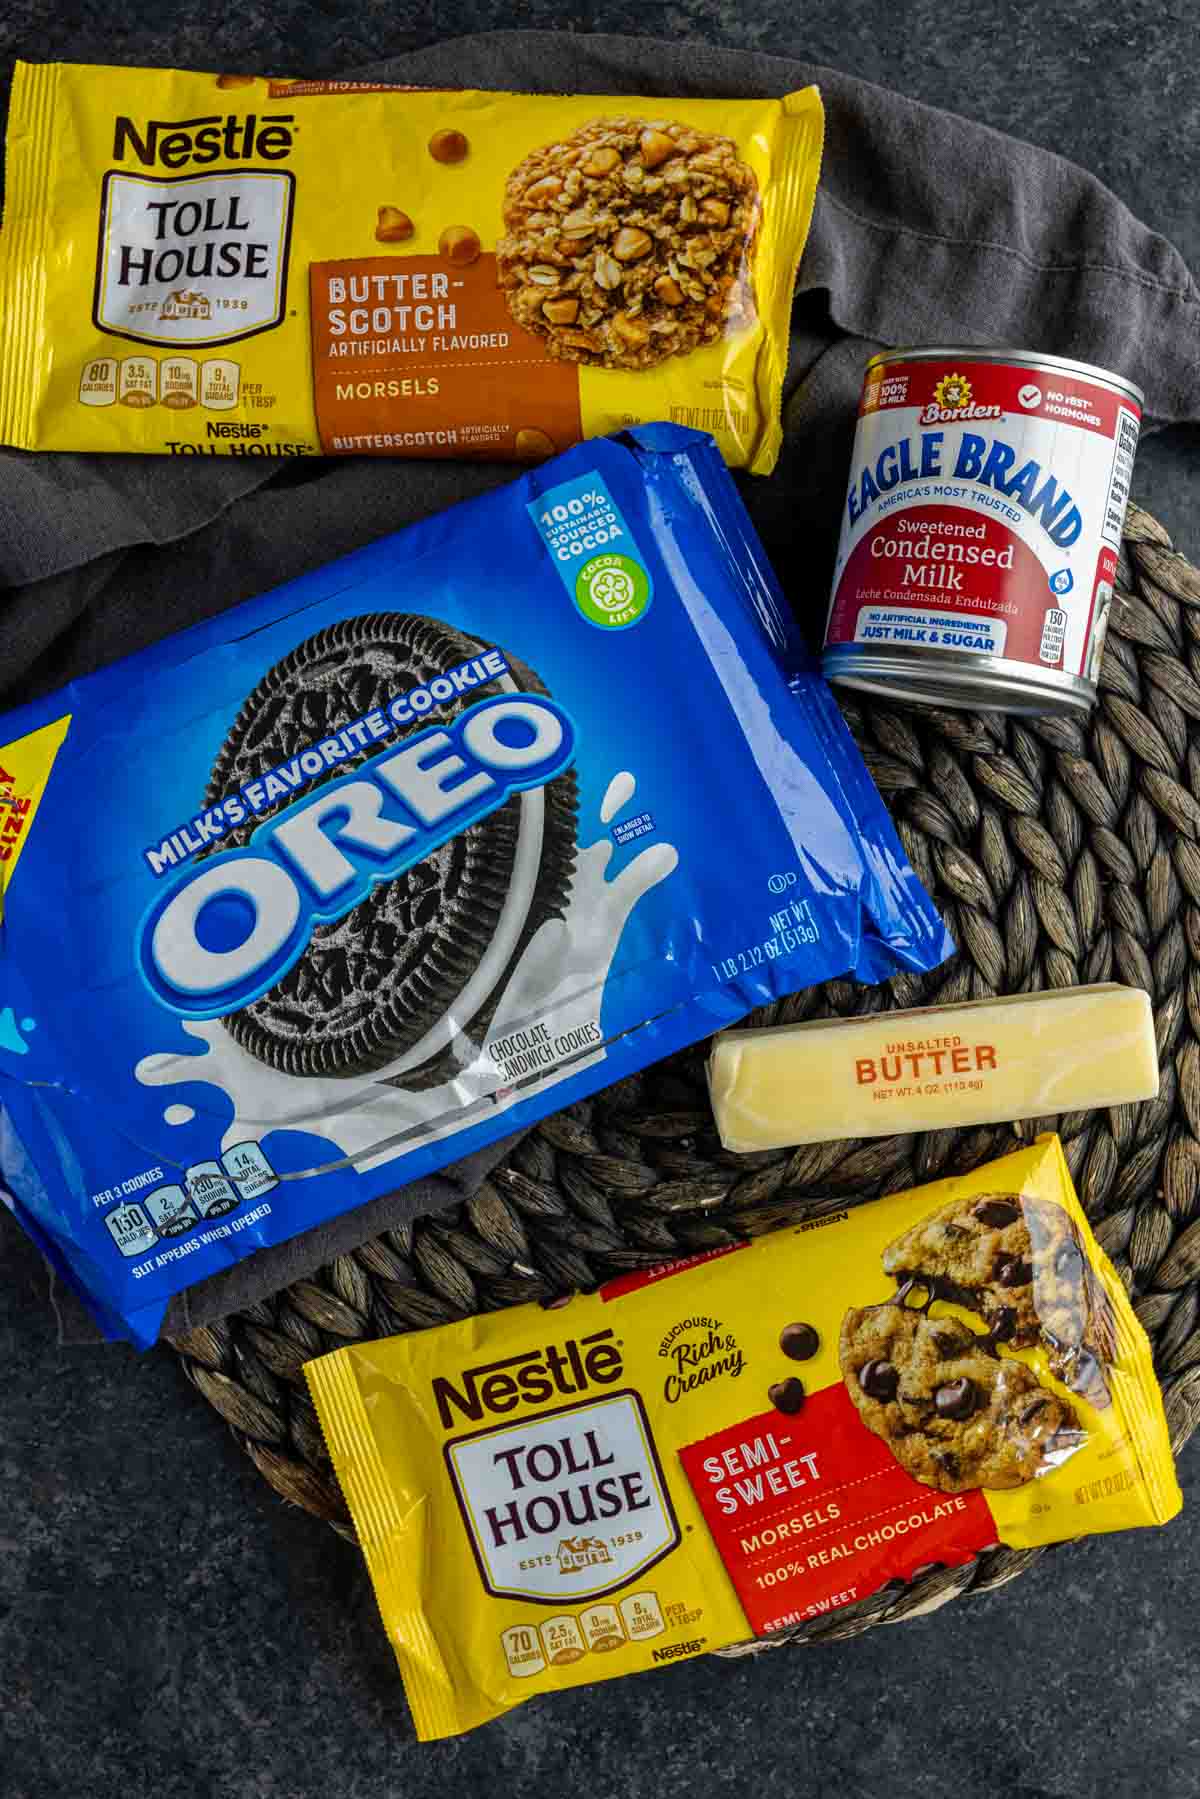
To create Oreo Magic Bars, you’ll need a handful of key ingredients:
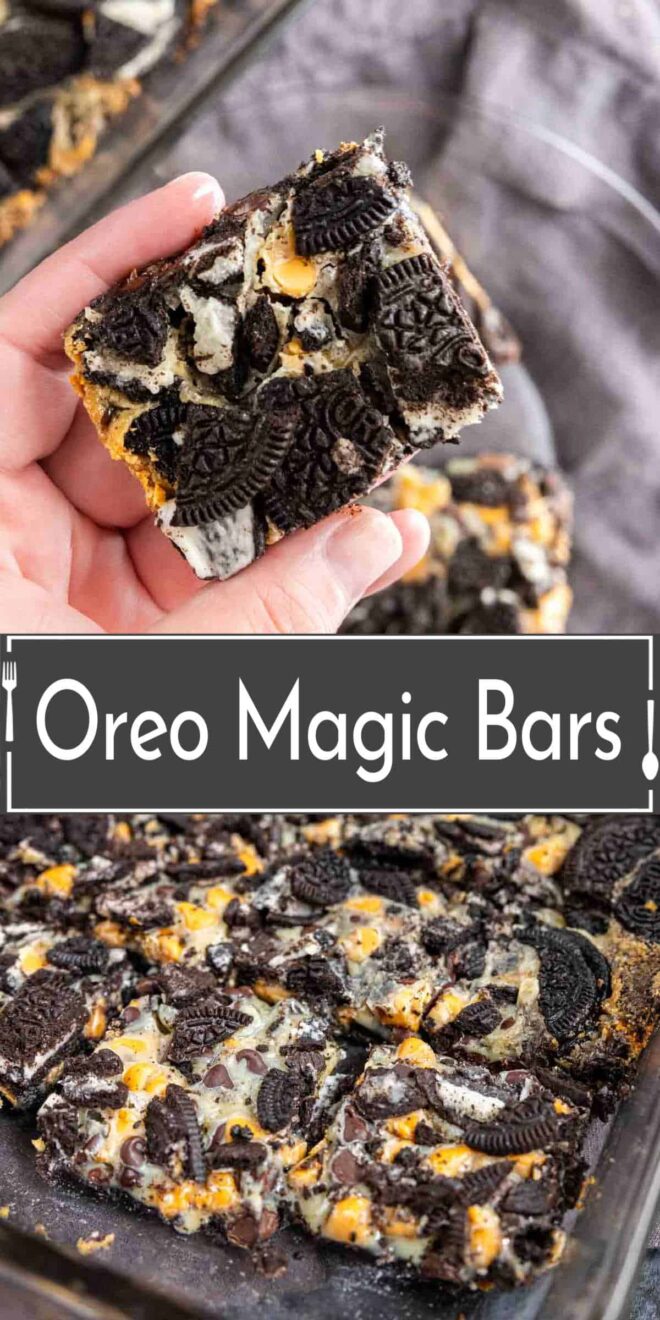
- Oreos – The star of the show! Crushed Oreo cookies provide both the base and crispy topping for these bars.
- Butter – Butter is essential for achieving that perfect cookie crust and adding richness to the dessert.
- Sweetened Condensed Milk – This sticky-sweet liquid plays a crucial role in binding the ingredients together and adding creaminess to the bars.
- Chocolate and Butterscotch Chips – Extra chocolate is always a good idea. Semi-sweet chocolate chips and butterscotch chips are sprinkled generously over the top to melt into these delicious bars.
Note: We used regular Oreos for this recipe, but you can use any Oreo flavor you like. Play around with different combinations of chocolate chips to combine with different flavors of Oreos!
Love Oreos as Much As We Do? Try These Oreo Desserts!
- Oreo Rice Krispie Treats
- Acorn Oreo Balls
- Mint Ice Cream Oreo Tart
- Funfetti Oreo Icebox Cake
- Mint Oreo Lasagna
Making Oreo Magic Bars: Step-by-Step
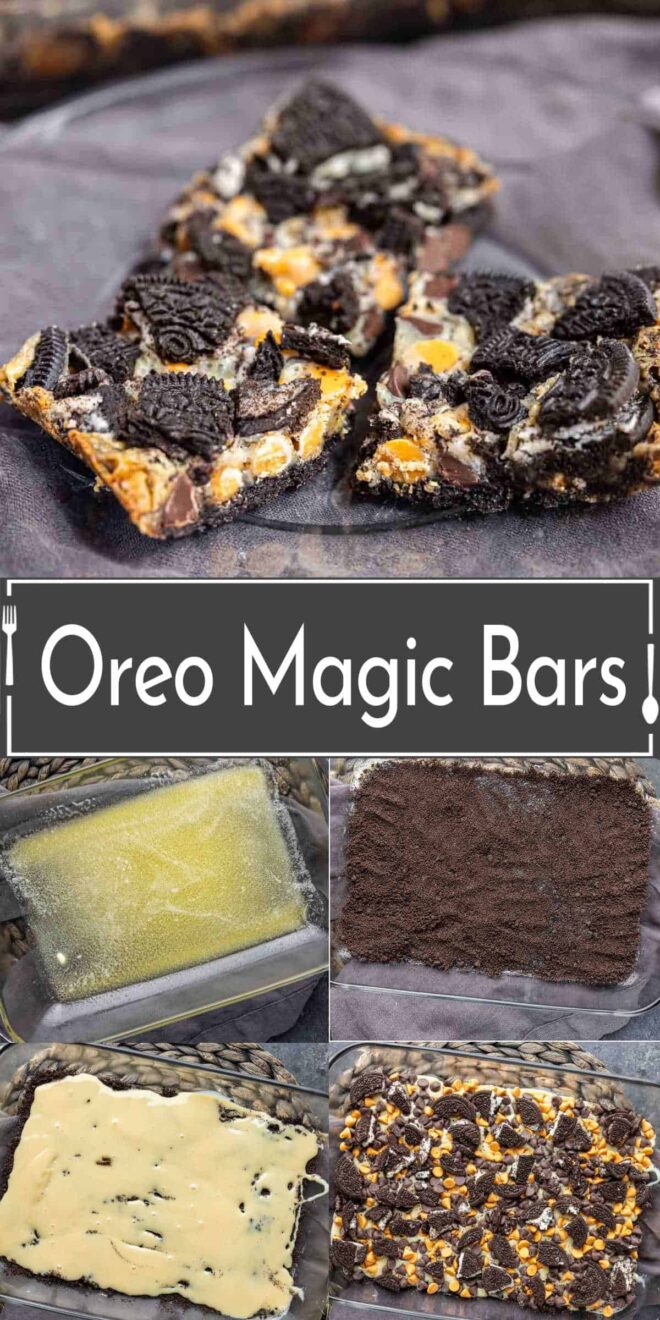
Step 1 – Prepare the oven and baking dish. Begin by preheating your oven to 350°F (175°C) and greasing a 9×13 inch baking dish.
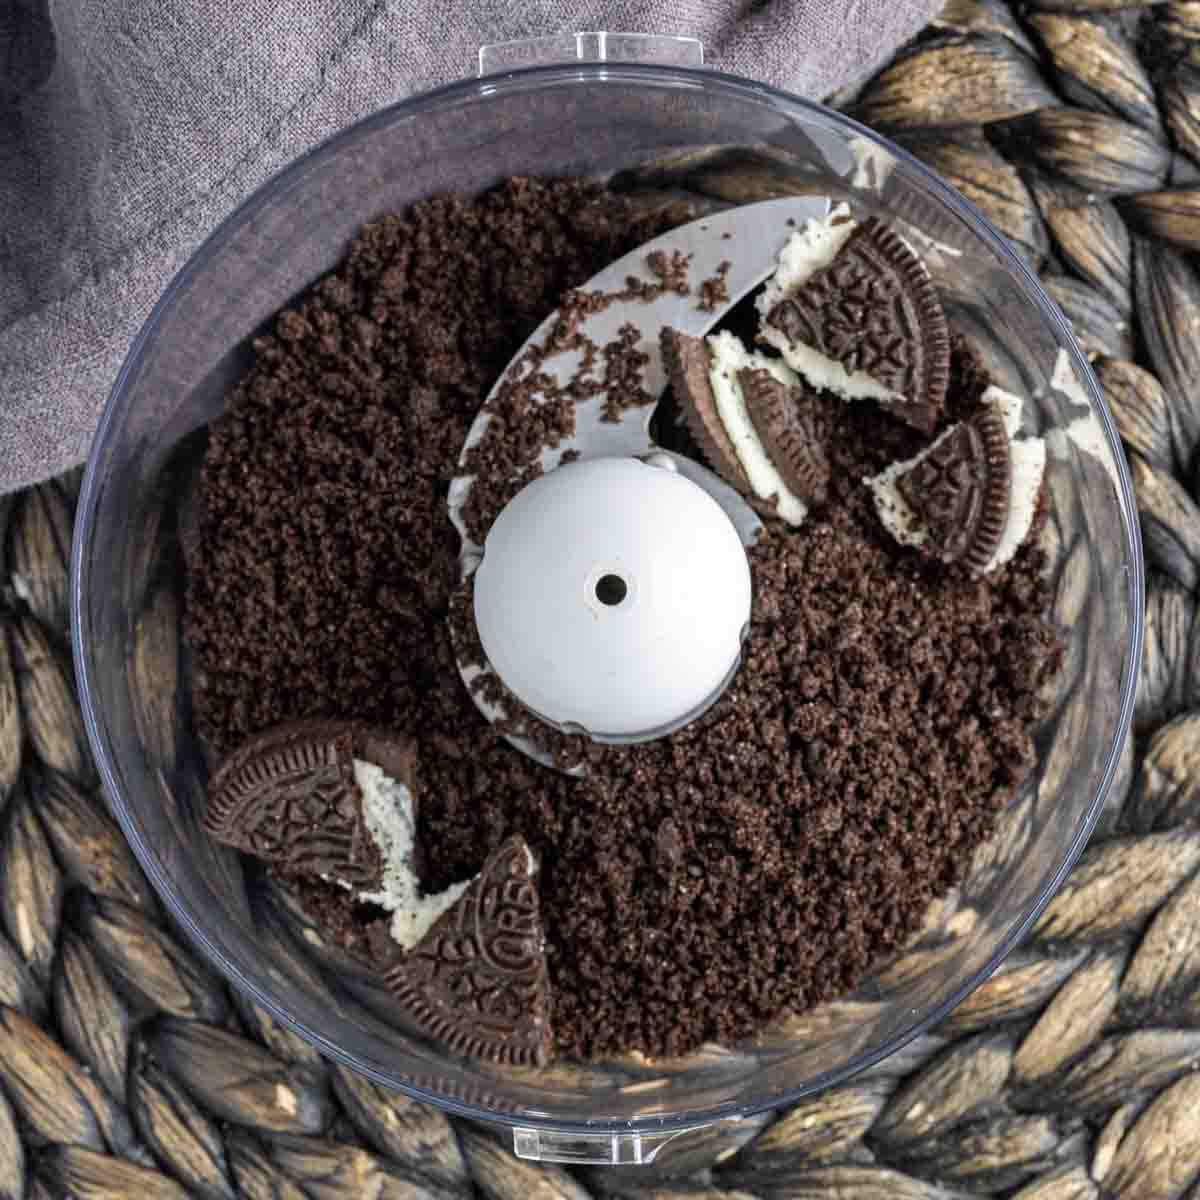
Step 2 – Prepare Oreos. Place approximately 18 Oreos in a food processor and pulse until they are crushed into fine crumbs. Place the remaining Oreos in a gallon-size plastic bag and seal it. Use a mallet or rolling pin to roughly crush the cookies, leaving lots of big chunks.
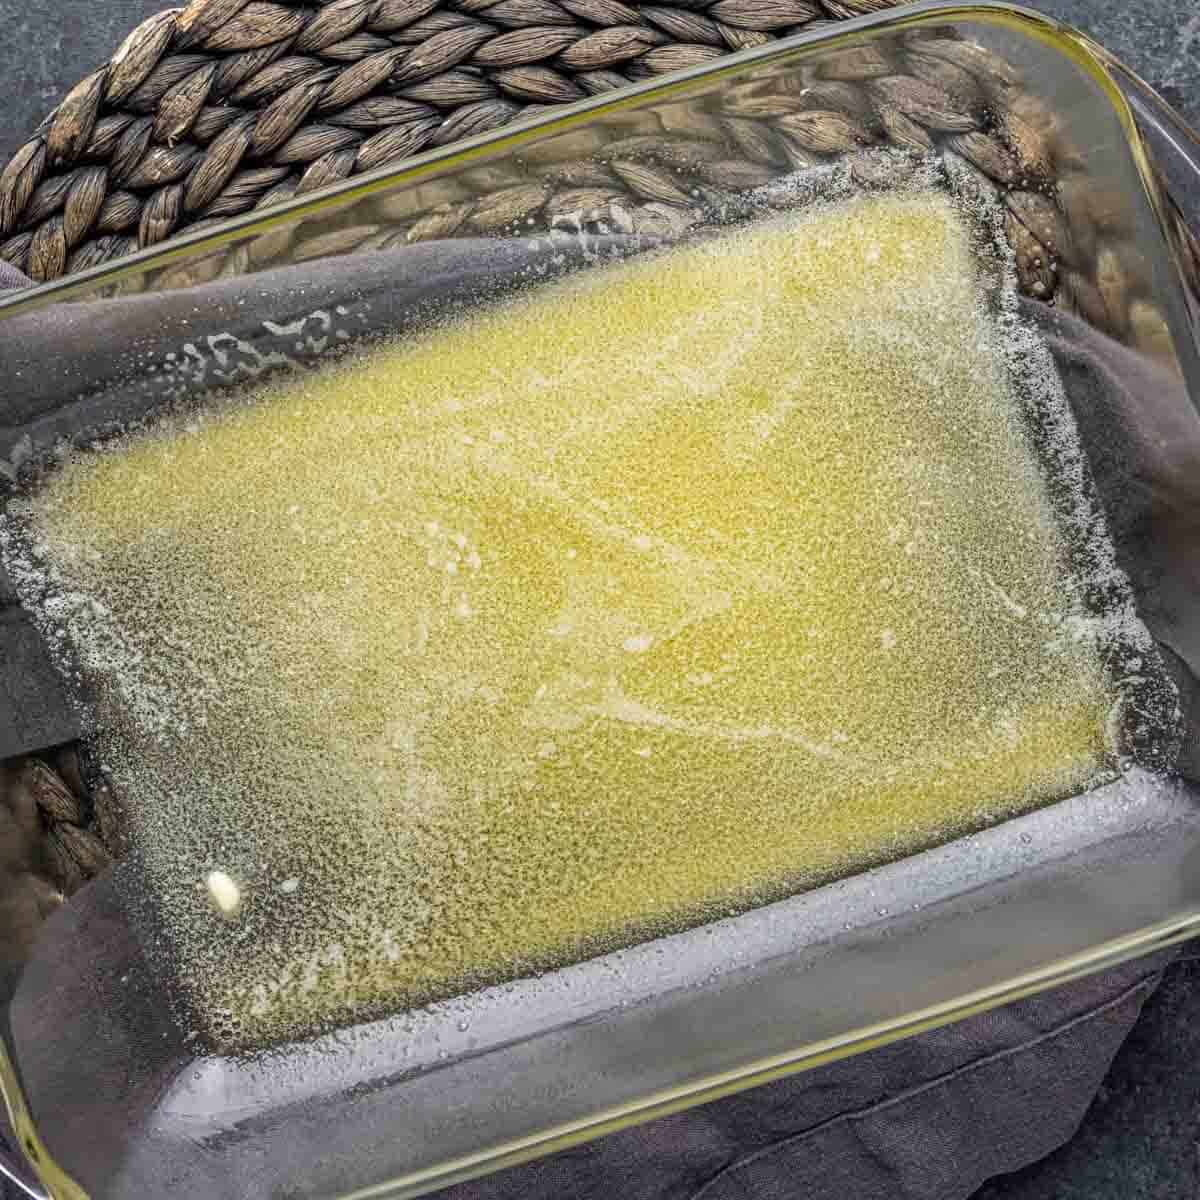
Step 3 – Melted butter. Melt the butter and pour over the bottom of the baking dish. Make sure it completely covers the bottom.
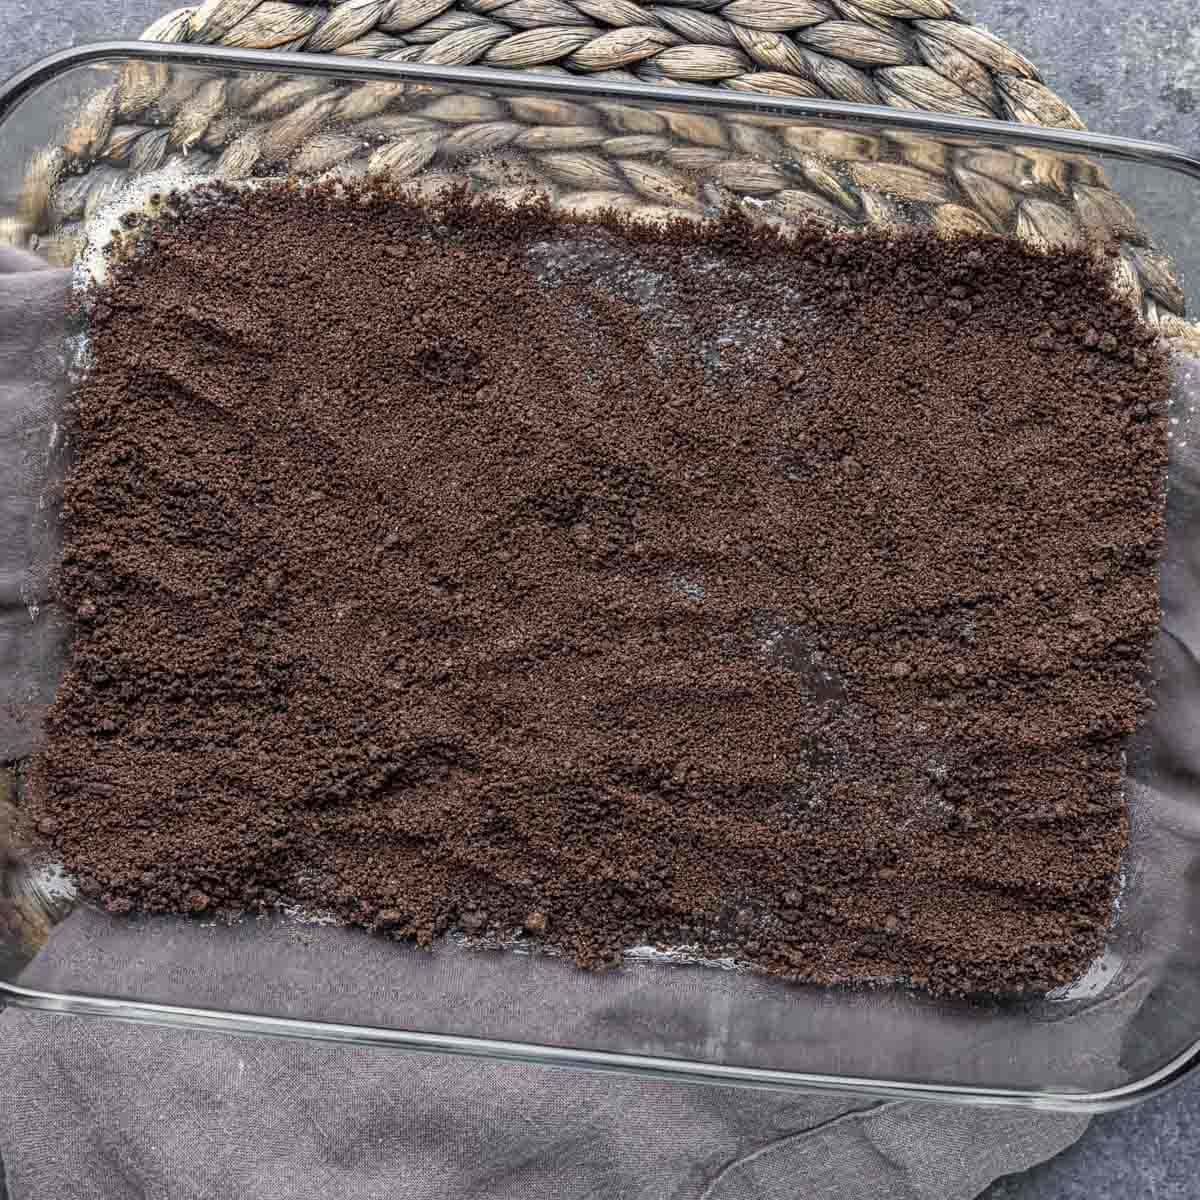
Step 4 – Make the crust. Sprinkle the Oreo crumbs over the butter, creating an even layer. Press this mixture firmly into the bottom of the baking dish to create a crust.
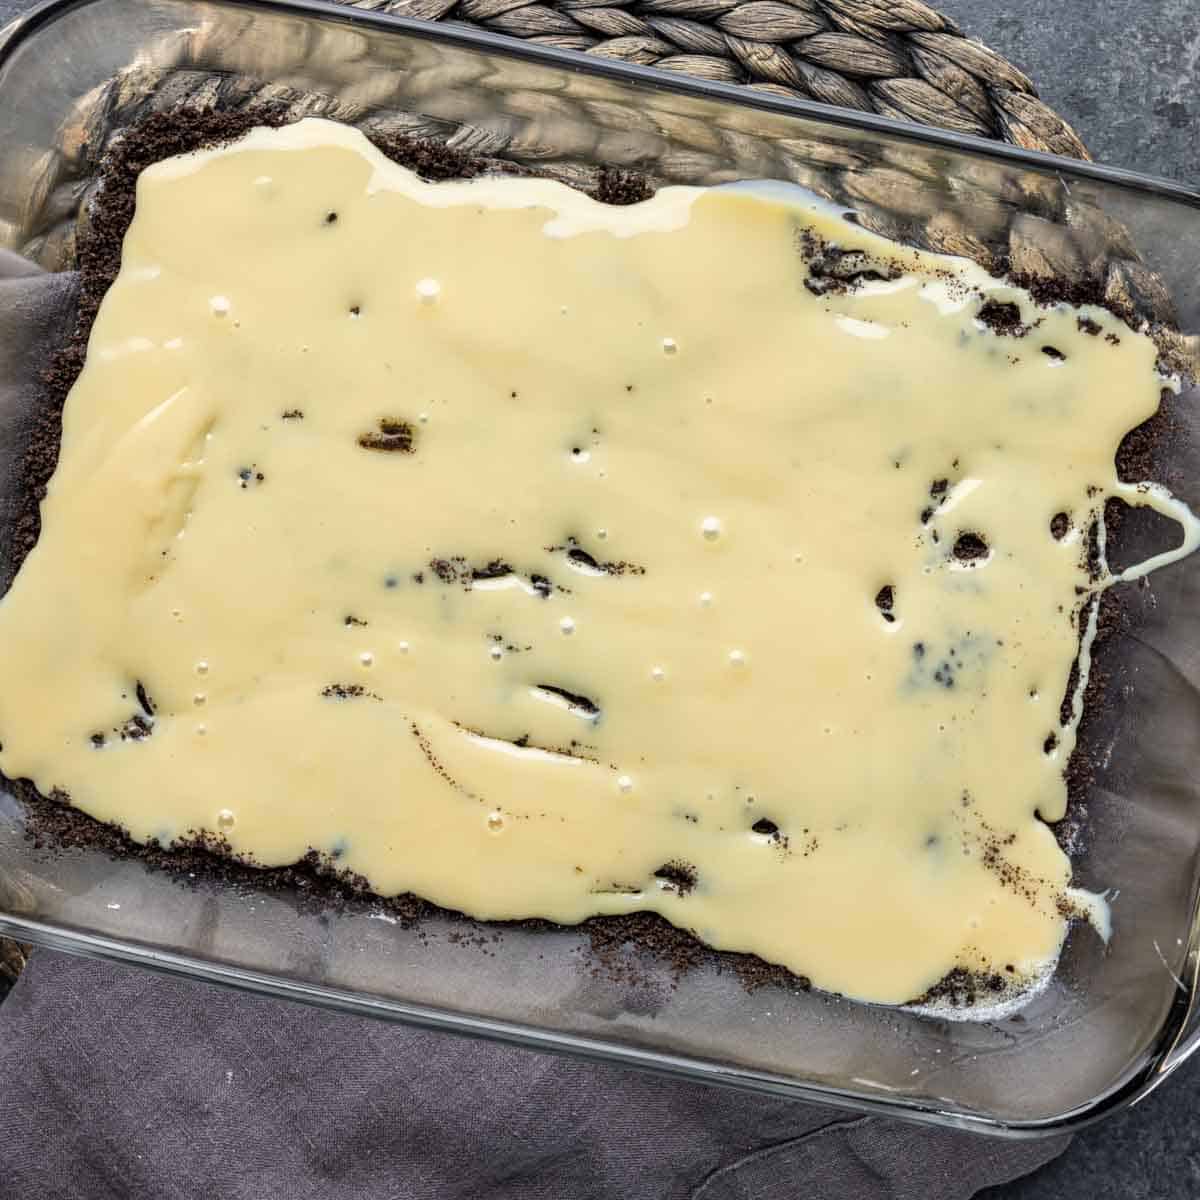
Step 5 – Sweetened condensed milk layer. Pour sweetened condensed milk evenly over the Oreo crust.
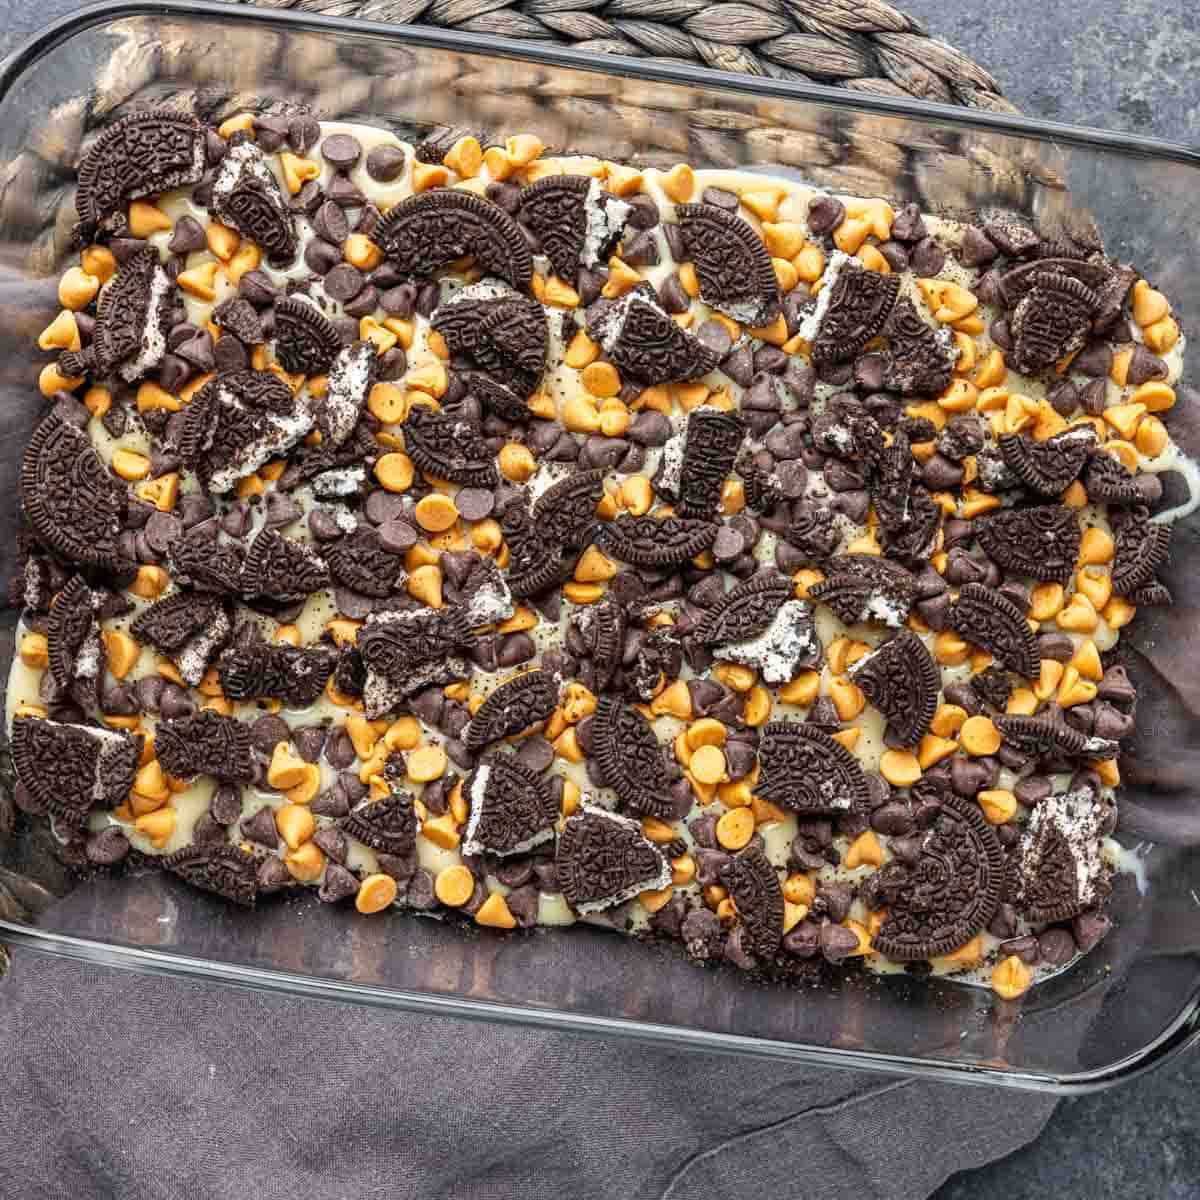
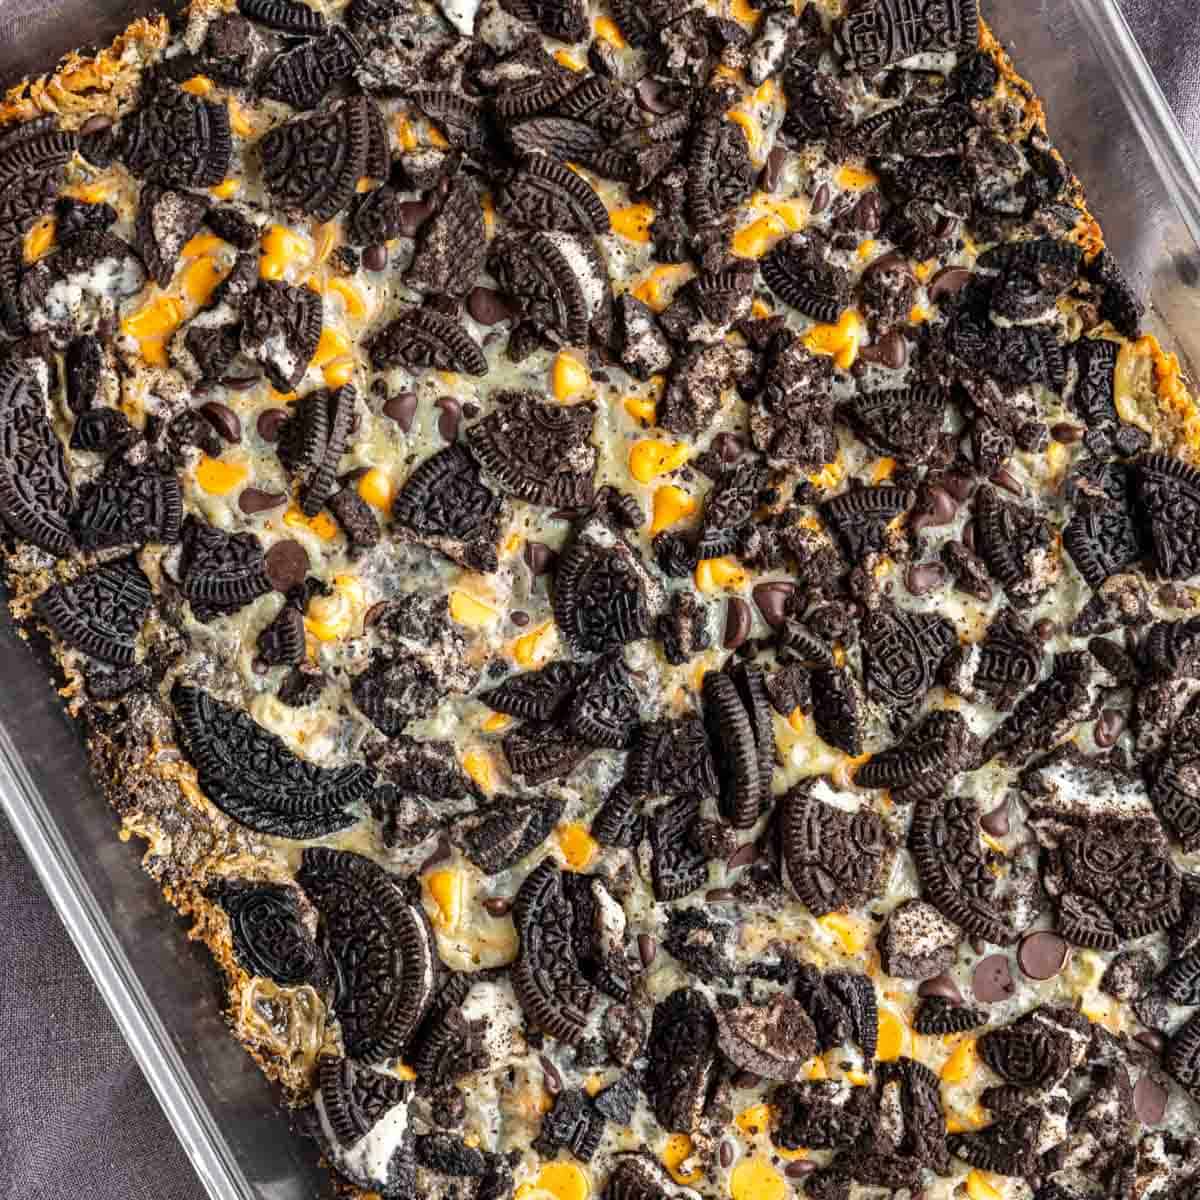
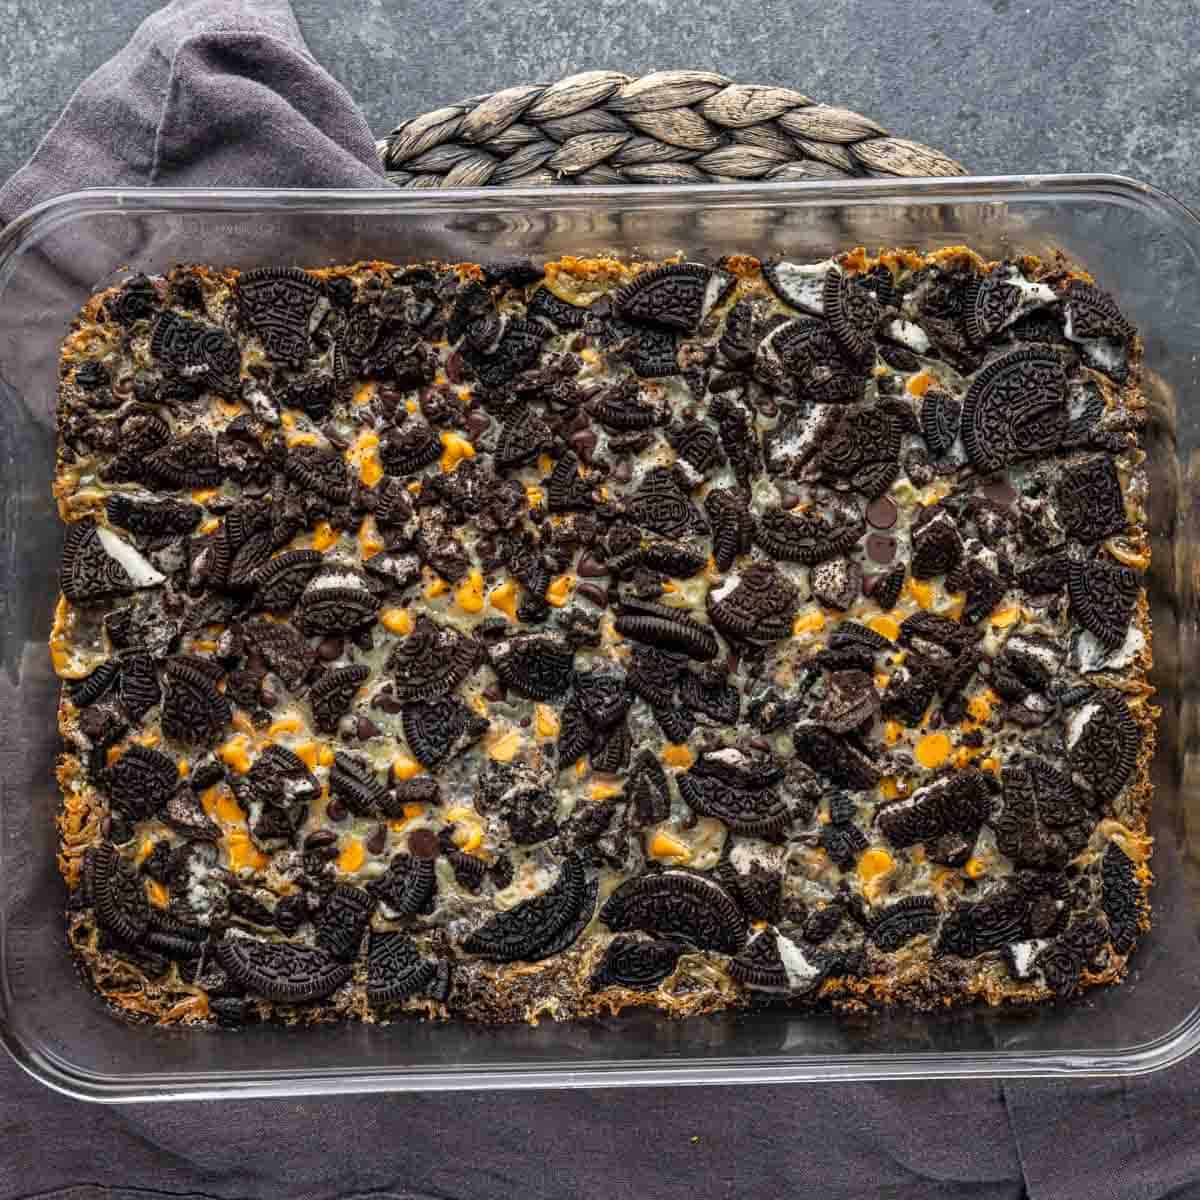
Step 6 – Oreo and chocolate layer. Then sprinkle a generous amount of chocolate chips and butterscotch chips on top.Sprinkle the crushed Oreo pieces over the chocolate and butterscotch chips.
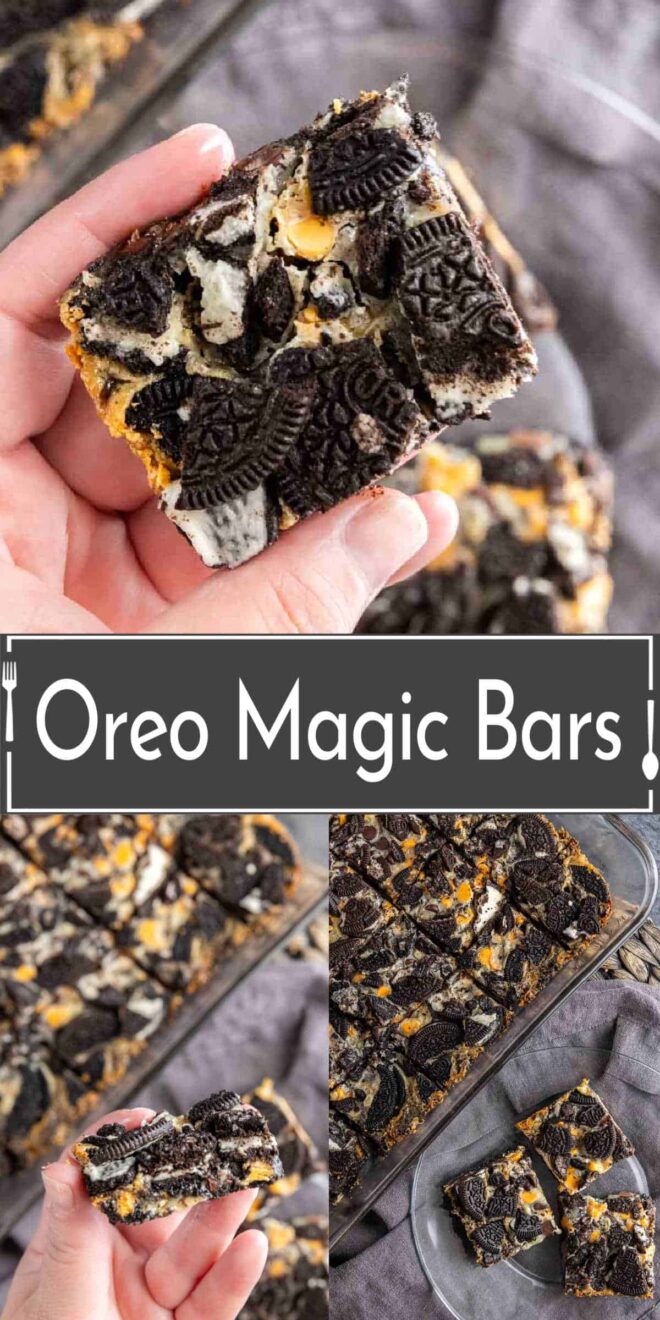
Step 7 – Bake to Perfection. Place the baking dish in the preheated oven and bake for 25-30 minutes or until the edges are golden brown.
Step 8 – Let It Cool. Once done baking, remove the Oreo Magic Bars from the oven and allow them to cool completely before placing them in the refrigerator to chill for at least 12 hours.
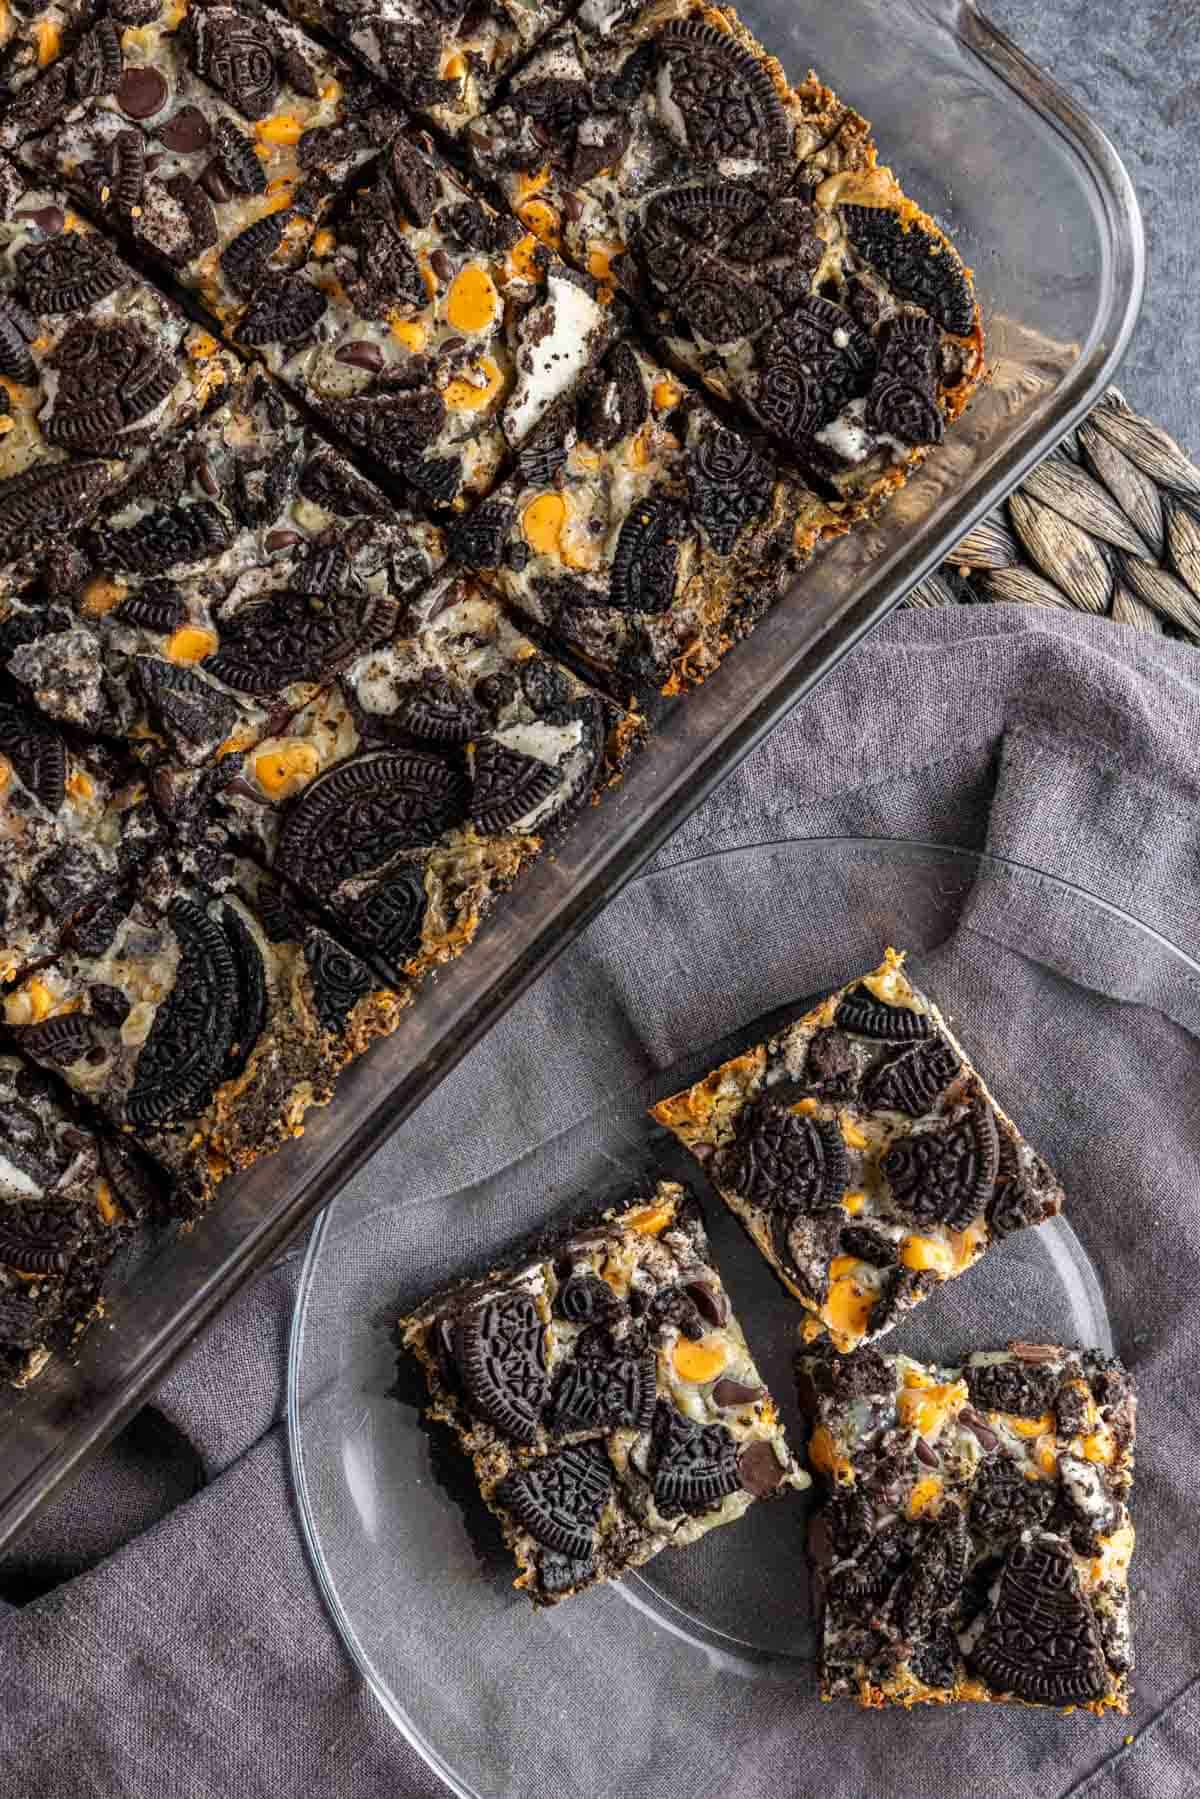
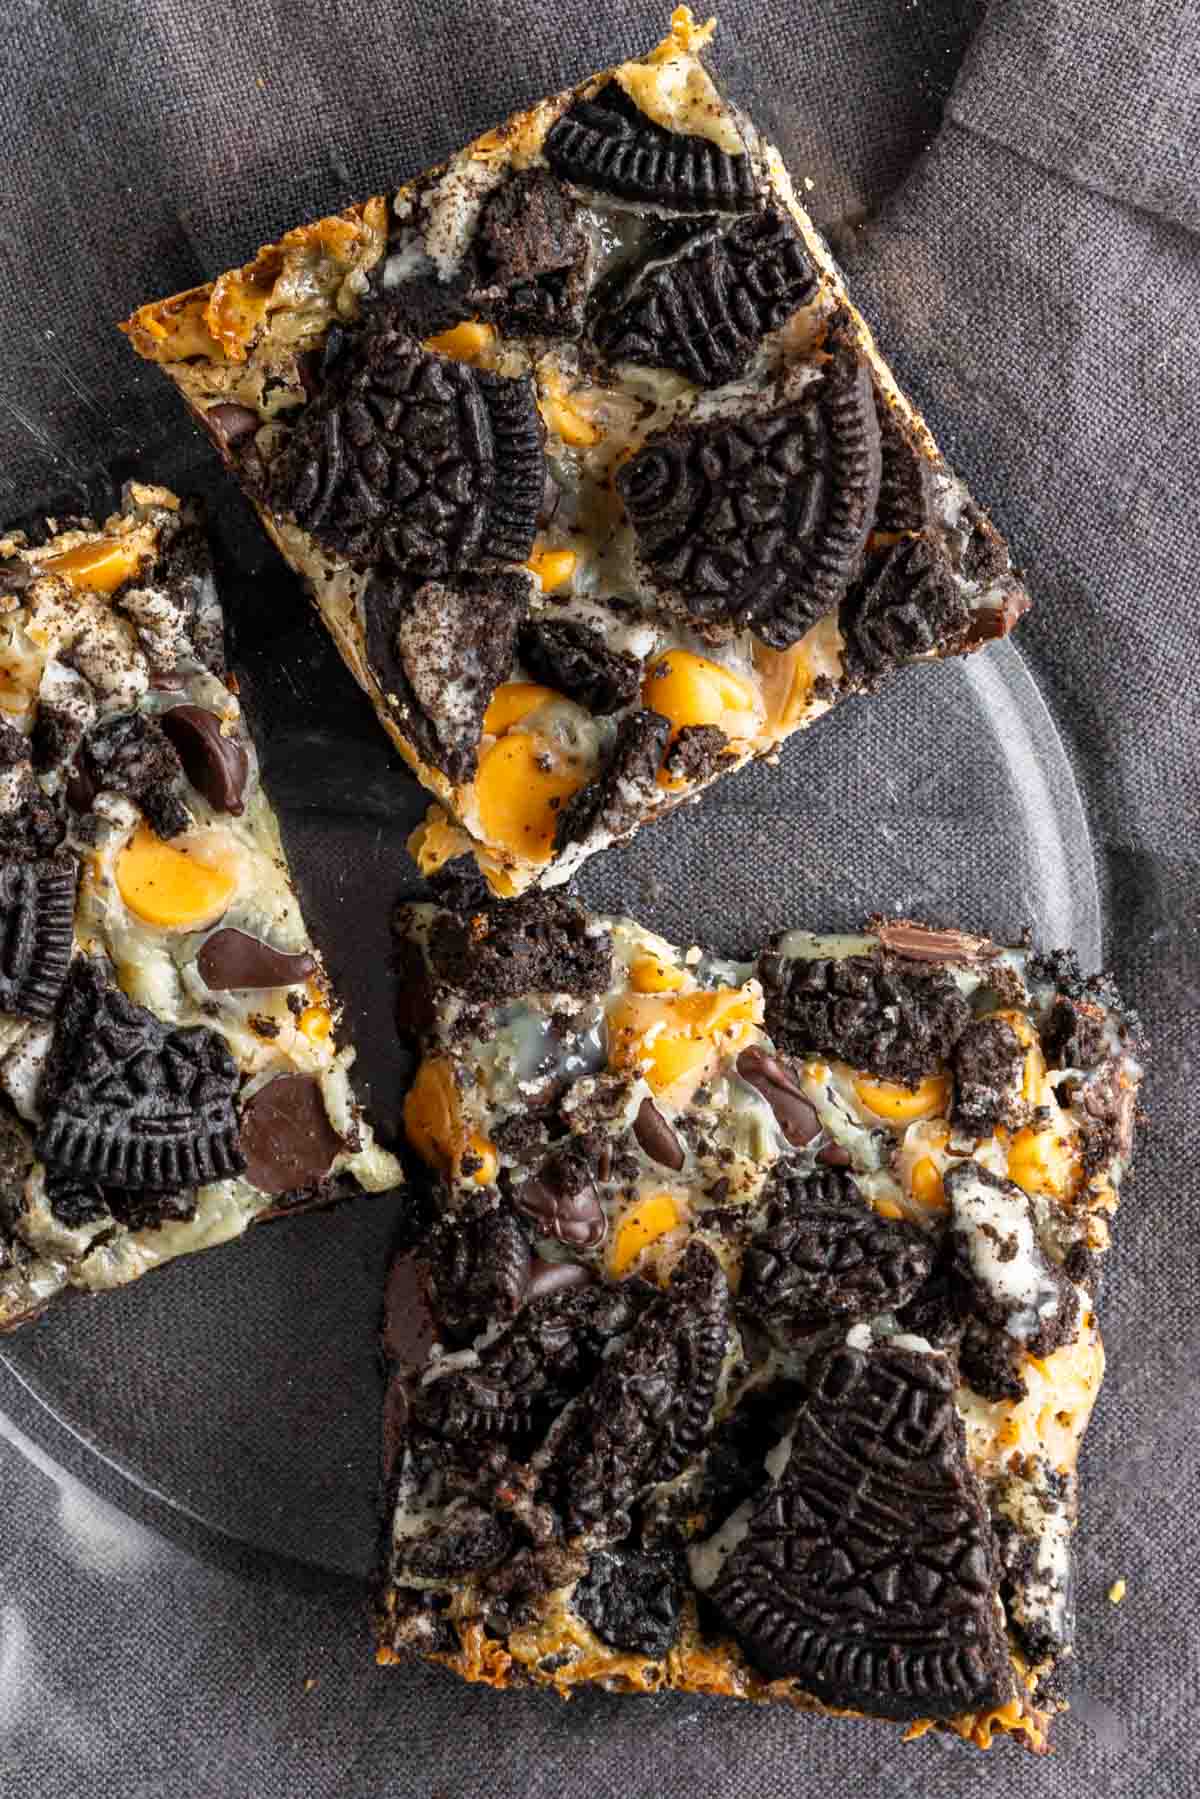
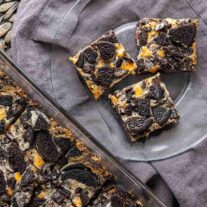
Step 9 – Serve. About an hour before you are ready to serve them, take them out of the refrigerator to let them soften slightly. When ready to serve, cut bars into 16 squares and enjoy!
Be warned that once you make these for your friends and family, it is the only thing they are going to ask for from then on. However, this does give you an excuse to make them more often….you can’t disappoint people, right?
How to Store Them
Storing Oreo Magic Bars is crucial to maintaining their freshness and deliciousness. Here’s how to store them properly:
- Cool Completely: Before storing Oreo Magic Bars, make sure they have cooled completely. Let them sit at room temperature for a while or, if you’re in a hurry, you can place them in the refrigerator to speed up the cooling process.
- Cut into Squares: If you haven’t already, cut the Oreo Magic Bars into squares or rectangles. This makes it easier to portion them out later.
- Airtight Container: Transfer the cut bars into an airtight container. This container should have a tight-fitting lid to prevent air from getting in.
- Layer Separation: If you need to stack the bars in the container, place sheets of parchment paper or wax paper between the layers. This prevents them from sticking together and maintains their shape.
- Room Temperature: If you plan to consume the bars within a few days, you can store them at room temperature. They’ll remain fresh for up to a week when stored in a cool, dry place away from direct sunlight or heat sources.
- Refrigeration: For longer-term storage or if your kitchen tends to be warm, it’s a good idea to refrigerate the bars. They can stay fresh for up to two weeks in the refrigerator. Again, use an airtight container.
- Freezing (Optional): If you want to keep Oreo Magic Bars for an extended period, you can freeze them. Wrap individual bars or layers in plastic wrap or aluminum foil, then place them in a resealable freezer bag. They can be stored in the freezer for up to three months. To thaw, transfer them to the refrigerator for a few hours or leave them at room temperature for about 30 minutes.
By following these storage instructions, you can enjoy the deliciousness of Oreo Magic Bars for an extended period without compromising their taste or texture.
Like this recipe?
Make sure to follow us on Instagram and Pinterest for more recipes like this.
Oreo Magic Bars
Ingredients
- ½ cup Melted Butter
- 36 Oreos
- 14 ounces Sweetened Condensed Milk
- 6 ounces Semi Sweet Chocolate chips
- 6 ounces Butterscotch Chips
Instructions
- Begin by preheating your oven to 350°F (175°C) and greasing a 9×13 inch baking dish.
- Place approximately 18 Oreos in a food processor and pulse until they are crushed into fine crumbs. Place the remaining Oreos in a gallon-size plastic bag and seal it. Use a mallet or rolling pin to roughly crush the cookies, leaving lots of big chunks.
- Melt the butter and pour over the bottom of the baking dish. Make sure it completely covers the bottom.
- Sprinkle the Oreo crumbs over the butter, creating an even layer. Press this mixture firmly into the bottom of the baking dish to create a crust.
- Pour sweetened condensed milk evenly over the Oreo crust.
- Sprinkle a generous amount of chocolate chips and butterscotch chips on top. Then sprinkle the crushed Oreo pieces over the chocolate and butterscotch chips.
- Place the baking dish in the preheated oven and bake for 25-30 minutes or until the edges are golden brown.
- Once done baking, remove the Oreo Magic Bars from the oven and allow them to cool completely before placing them in the refrigerator to chill for at least 12 hours.
- About an hour before you are ready to serve them, take them out of the refrigerator to let them soften slightly. When ready to serve, cut bars into 16 squares and enjoy!
Nutrition


Oh boy, I am in trouble! I am still going to make these and try to share them! I think they are pretty!
I hope you like them!
These sound amazing. I’m certain that I would eat far too many if I made them, though.
Oh my goodness, these look dangerously delicious!! Just how I like my deserts…;) Pinned!
This looks absolutely amazing! Pinned and tweeted. You always bring the most amazing creations to our party. Thank you! I hope to see you again, this Monday at 7 pm. It wouldn’t be a party without you! Lou Lou Girls
How far in advance can you make them and can you freeze them???
They are best made a day ahead, but no more than a few days ahead. I would not suggest freezing them.
Hello, going to make these for my sister birthday! Wondering do I use whole Oreos or just the chocolate part? Thanks!
Hi Holly, you use the whole Oreo. Your sister is going to love them!!
When you say crumbled Oreos, I put them in my food processor and they are the crumb consistency. Is that too fine? The recipe calls for crumbled, does that mean I should’ve broken them into larger pieces?
It’s not necessary to put them in a food processor but it is totally fine if you did. If you want to save yourself the trouble next time I usually just put mine in a gallon ziploc bag and hit them with a mallet until they are crushed up 🙂
Made them the original way only with peanut butter chips instead of butterscotch…amazing. Making a batch tonight with peanut butter sandwich cookies instead of Oreos and a few extra chocolate chips . We’ll see.
Yum! Sounds amazing! You can never go wrong with adding peanut butter.
These are so delicious, easy and versatile!! I’ve made them the original way and also subbed dark chocolate oreos, dark chocolate chips and peanut butter chips. Both ways are amazing! The only suggestion I have is to use parchment paper in the pan bc it is so hard to get them out if not!! They are super sticky!
Good but wouldn’t make again. Nothing super special, but super easy if you need a quick and easy dessert you can make in one baking dish.